Modern drumming requires a versatile approach to practice, one that balances the need for quiet repetition with the desire for powerful, detailed auditory feedback.
The electronic drum practice pad sits at the heart of this evolution, but its true power is only unleashed through a deep understanding of its headphone and speaker connectivity.
This single aspect of your gear dictates whether you can practice silently in an apartment at 2 AM, critically analyze your own dynamics, seamlessly play along with your favorite songs, or connect to a computer to record your next masterpiece.
Mastering this connectivity is no longer a luxury for the technically-minded; it is a fundamental skill for any drummer looking to maximize their potential in the digital age.
This comprehensive guide will serve as your definitive resource for navigating the world of drum pad audio connections.
We will begin by exploring precisely why connectivity is so crucial for developing your skills, moving beyond the obvious benefit of silent practice.
From there, we will embark on a detailed exploration of every connection type you’ll encounter, from the humble 3.5mm headphone jack to the complexities of low-latency Bluetooth.
To ensure you make informed purchasing decisions, we will then detail what to look for in pads, headphones, and speakers, complete with comparative tables and checklists.
Finally, we will provide straightforward, step-by-step guides for common setups and answer the most frequently asked questions on the topic, empowering you with the knowledge to build a practice rig that perfectly suits your goals.
Why Connectivity Matters for Drummers
Effective headphone and speaker connectivity fundamentally transforms a simple practice pad into a sophisticated tool for musical development.
It allows a drummer to control their sonic environment completely, creating a direct and intimate link between their physical actions and the sounds they perceive.
This control is the key to unlocking nuanced practice sessions that translate directly into improved performance, whether on an acoustic kit or a full electronic setup.
Achieve Truly Silent Practice Without Compromise
The most immediate benefit of connecting headphones to an electronic practice pad is the ability to engage in virtually silent practice.
This capability is a game-changer for drummers living in shared spaces like apartments, dormitories, or family homes, effectively removing the time and place restrictions traditionally associated with practicing an inherently loud instrument.
Drummers can work on rudiments, timing, and muscle memory late at night or early in the morning without causing any disturbance.
This liberation from noise constraints leads to more consistent and frequent practice, which is the cornerstone of all musical progress.
It ensures that the only barrier to improvement is your own discipline, not the tolerance of your neighbors or family members.
Gain Crystal-Clear Auditory Feedback for Technical Improvement
Hearing every detail of your playing is essential for technical refinement, and a direct headphone or monitor connection provides this with unparalleled clarity.
Through a high-quality audio feed, you can discern the subtle variations in your stick velocity, the consistency of your accents, and the precision of your ghost notes.
This detailed feedback loop is incredibly difficult to achieve with a traditional, non-electronic practice pad, where the sound is purely acoustic and often lacks definition.
By amplifying your practice, you begin to train your ears to the same level as your hands, fostering a deeper understanding of dynamics and control that is directly applicable to playing a full drum kit.
Integrate Backing Tracks and Metronomes Seamlessly
Modern electronic practice pads with auxiliary inputs or Bluetooth audio-in capabilities allow you to blend external audio with your drum sound, a function that is vital for contemporary practice routines.
This means you can play along directly with backing tracks, songs from your music library, or online drum lessons, hearing both the track and your own playing mixed perfectly in your headphones or speakers.
This integrated approach is far superior to playing a pad while music comes from a separate speaker across the room.
It helps develop a stronger sense of time, improves your ability to lock in with other musicians, and makes practice sessions more engaging and musically satisfying.
Prepare for Live Performance and Studio Recording
Using speakers or connecting your pad to an audio interface prepares you for the realities of modern performance and recording environments.
Practicing with a drum amplifier or studio monitors accustoms your ears to the feel of an amplified instrument, helping you manage your dynamics when you’re no longer relying solely on the acoustic sound of a kit.
Furthermore, understanding how to use Line Out and USB/MIDI connections is the first step into the world of music production.
It allows you to record your ideas, program drum parts in a Digital Audio Workstation (DAW), and experiment with the vast universe of virtual drum sounds (VSTs), turning your practice rig into a creative workstation.
Types of Connections for Drum Practice Pads
The array of ports on the back of an electronic practice pad can seem intimidating, but they can be logically categorized into two primary groups: wired and wireless.
Each connection type serves a distinct purpose, offering different balances of audio fidelity, latency, and convenience.
Understanding the function of each port is the most critical step in building a versatile and effective practice setup.
The Foundation: Wired Connections
Wired connections form the bedrock of audio technology, prized for their reliability, stability, and near-zero latency.
For any rhythmic application, from practice to performance, a wired connection guarantees that you hear the sound the instant you strike the pad, providing the immediate feedback necessary for developing precise timing.
- 3.5mm (1/8-inch) Headphone Jack:
- This is the most ubiquitous audio port in the world, the same one found on smartphones, laptops, and countless other consumer electronic devices.
- On a drum practice pad, this output is specifically designed to power consumer-grade headphones.
- It sends a stereo signal that is amplified to a level suitable for driving the small speakers inside a headphone set.
- Its primary advantage is convenience; nearly everyone owns a pair of headphones with a 3.5mm plug, making it incredibly easy to get started with silent practice right out of the box.
- 6.35mm (1/4-inch) Headphone Jack:
- Often found on more professional or robustly built practice pads and audio equipment, the 6.35mm jack is the larger, more durable sibling of the 3.5mm jack.
- While the electrical signal is identical, the larger physical connector is less prone to damage and provides a more secure connection, which is important in a studio or stage environment.
- If your pad has a 1/4-inch output but your headphones have a 3.5mm plug, you will need a simple and inexpensive 3.5mm-to-6.35mm adapter to make them compatible.
- Line Out (L/MONO and R):
- Line Out jacks are fundamentally different from headphone jacks and are crucial for connecting to external amplification.
- A Line Out port sends an unamplified, line-level signal, which is the standard signal level for connecting different pieces of audio gear like mixing consoles, audio interfaces, and powered speakers or amplifiers.
- Using a headphone jack to connect to a line-level input can result in a distorted, overly loud signal.
- Many pads feature two Line Out jacks: Left (often marked L/MONO) and Right (R).
- For a full stereo image, you connect both to two separate speakers or two channels on a mixer.
- If you are using a single speaker or a mono setup, you simply connect a cable from the L/MONO jack.
- USB/MIDI:
- The USB port on a practice pad is arguably its most powerful and versatile connection.
- It typically serves two functions.
- First, it can transmit MIDI (Musical Instrument Digital Interface) data to a computer.
- MIDI is not audio; it’s information about your performance—which note you hit, how hard you hit it, and when you hit it.
- This data can be used to trigger sounds in a Digital Audio Workstation (DAW) like Ableton Live, Logic Pro, or GarageBand, giving you access to limitless high-quality drum kits and sounds.
- Second, some pads also support “USB Audio,” which allows the pad to send its own internal audio directly to the computer over the USB cable, acting as its own audio interface for simple recording without extra hardware.
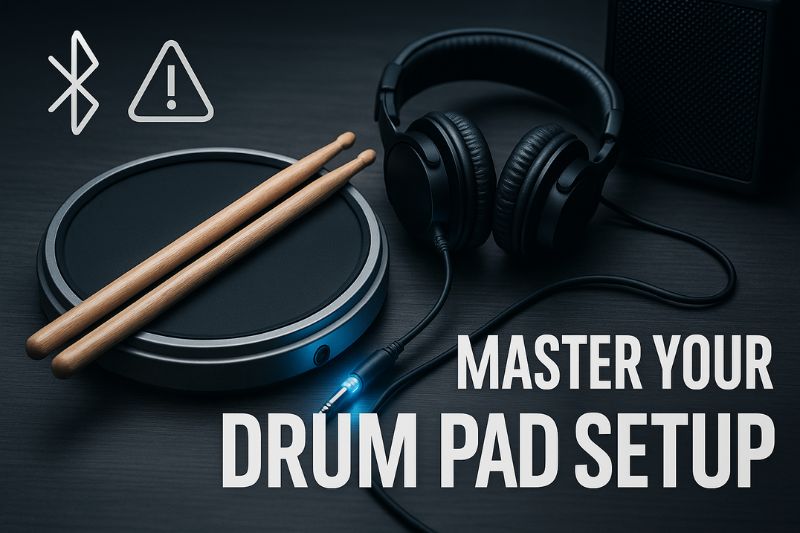
The Future: Wireless Connections
Wireless technology, specifically Bluetooth, offers unparalleled convenience, eliminating the tangle of cables and allowing for greater freedom of movement.
However, for drummers, this convenience comes with a significant technical challenge that must be understood and addressed: latency.
- Bluetooth:
- The primary wireless technology used in drum practice pads is Bluetooth.
- It allows you to connect wirelessly to Bluetooth-enabled headphones and speakers.
- Many pads also feature Bluetooth Audio In, which lets you stream music from your phone or tablet to the pad, so you can play along with it.
- The benefit is obvious: a clean, cable-free practice space.
- You can set up your pad anywhere without being tethered to your speakers or fumbling with wires for your headphones.
- The Latency Issue:
- The most critical concept to understand with wireless audio for drumming is latency. Latency is the delay between the moment an event happens and the moment you perceive it.
- In this context, it’s the time between your stick hitting the pad and the corresponding sound being produced in your wireless headphones.
- Standard Bluetooth connections (using the default SBC codec) can have latency anywhere from 100 to over 200 milliseconds.
- For reference, a delay of even 20-30ms is perceptible and can completely throw off a musician’s sense of rhythm.
- Attempting to practice drums with high-latency Bluetooth is a frustrating and counterproductive experience, as you will constantly be fighting against the noticeable delay.
- Low-Latency Bluetooth (aptX LL):
- The solution to this problem is a specific Bluetooth codec called aptX Low Latency (aptX LL). A “codec” is a program that compresses and decompresses digital audio data for transmission.
- While most devices use the standard SBC codec, aptX LL is specially designed for applications like gaming and music creation, reducing latency to an imperceptible 30-40ms.
- This is the gold standard for wireless drumming.
- Crucially, for aptX LL to work, both the transmitting device (the drum pad) and the receiving device (your headphones or speaker) must support the aptX Low Latency codec.
- If even one of the devices does not, the connection will revert to a higher-latency codec like SBC or standard aptX, and the delay will return.
Table 1: Connectivity Options at a Glance
| Connection Type | Best For | Latency | Common Gear | Key Consideration |
|---|---|---|---|---|
| 3.5mm (1/8″) | Quick, easy silent practice | Near-Zero | Consumer headphones, earbuds | Most convenient option for beginners. |
| 6.35mm (1/4″) | Secure silent practice | Near-Zero | Studio headphones, pro gear | More durable connection; may require an adapter. |
| Line Out (L/R) | Connecting to external amplification | Near-Zero | Powered speakers, mixers, audio interfaces | Essential for playing out loud or recording analog audio. |
| USB/MIDI | Recording, using virtual instruments | Near-Zero | Computers, laptops, DAWs | Unlocks immense sonic and creative potential. |
| Standard Bluetooth | Streaming music to the pad | High (>100ms) | Phones, tablets, standard BT speakers | Unsuitable for playing pad sounds due to high latency. |
| aptX Low Latency | Wireless silent practice | Very Low (<40ms) | aptX LL-compatible headphones/transmitters | The ONLY viable option for wireless drumming. |
What to Look For When Buying: A Buyer’s Guide
Choosing the right gear is paramount to creating a practice environment that is both functional and inspiring.
Your decision should be guided by your primary goals: Are you focused exclusively on silent practice? Do you plan to record your ideas? Is wireless convenience a top priority? Answering these questions will help you navigate the features of practice pads, headphones, and speakers to find the perfect match for your needs.
Choosing the Right Electronic Practice Pad
The practice pad itself is the brain of your entire setup, and its built-in connectivity options will define the limits of what you can achieve.
- Essential Inputs/Outputs (I/O):
- Before looking at any other feature, you must inspect the pad’s I/O panel.
- A well-equipped pad will provide you with the flexibility to grow as a drummer.
- Use the following checklist to evaluate a potential purchase.
- List 1: Essential Practice Pad I/O Checklist
- [ ] Headphone Out (3.5mm or 6.35mm):
- Non-negotiable. At least one headphone jack is mandatory for silent practice.
- [ ] Line Out (L/MONO, R):
- Highly recommended.
- This is essential for connecting to speakers, amplifiers, or an audio interface without causing distortion.
- [ ] USB/MIDI Port:
- Essential for any drummer with an interest in recording, music production, or using superior-sounding virtual drum libraries.
- [ ] Aux In (3.5mm):
- A very useful feature that provides a wired, zero-latency way to play along with music from a phone or MP3 player.
- [ ] Bluetooth (Audio In & Out):
- A premium feature.
- Audio In lets you stream tracks wirelessly to the pad.
- Audio Out provides a wireless connection to headphones/speakers, but you must verify its specifications.
- [ ] Headphone Out (3.5mm or 6.35mm):
- Bluetooth Version and Codecs:
- If you desire a wireless setup, do not simply look for a “Bluetooth” logo.
- You must investigate the specifications to confirm which codecs are supported.
- As established, for playing the pad’s sounds wirelessly, aptX Low Latency (aptX LL) support is mandatory.
- If the pad only offers standard Bluetooth (SBC/AAC codecs), its wireless capability is only useful for streaming music to the pad for play-along, not for transmitting your drum sounds from the pad to headphones.
- Onboard Sounds and Metronome:
- The quality and variety of the built-in sounds significantly impact how enjoyable the practice experience is.
- A pad with a few high-quality, dynamic drum sounds is often better than a pad with hundreds of mediocre ones.
- Likewise, a good built-in metronome is a vital practice tool.
- Check for features like customizable time signatures, subdivisions (quarter notes, eighths, sixteenths), and the ability to change the metronome’s sound.
Selecting the Perfect Headphones
Your headphones are your most intimate connection to the sound.
The right pair will provide detail and isolation, while the wrong pair can be uncomfortable and sonically misleading.
- Wired Headphones:
- For the highest fidelity and zero-latency connection, wired headphones are the undisputed champion.
- The ideal choice for drumming is a pair of over-ear, closed-back studio headphones. The “over-ear” design creates a seal around your entire ear, which is more comfortable for long sessions.
- The “closed-back” construction prevents sound from leaking out and, more importantly, provides excellent passive noise isolation, blocking out external distractions and allowing you to focus completely on your playing and the audio feed.
- Wireless Headphones:
- If you opt for a wireless experience, your single most important purchasing criterion is aptX Low Latency compatibility. Do not compromise on this.
- Many headphones advertise “aptX” or “aptX HD,” which are great for listening to music but do not provide the ultra-low latency required for drumming.
- You must specifically look for the “aptX LL” logo on the product’s packaging or specifications sheet.
Picking the Best Speakers or Amplifier
When you want to move beyond headphones and hear your playing in the room, you need an amplification solution.
The type of speaker you choose will drastically color the sound and feel of your practice pad.
- Studio Monitors:
- For the most accurate and uncolored sound reproduction, a pair of powered studio monitors is the best choice.
- These speakers are designed to have a “flat” frequency response, meaning they don’t artificially boost the bass or treble.
- This gives you a true representation of the pad’s onboard sounds, which is ideal for critical listening, sound design, and mixing if you are recording.
- Drum Amplifiers:
- A dedicated electronic drum amplifier is specifically voiced to handle the sharp, percussive transients of drum sounds.
- They often have a punchier, more aggressive sound than studio monitors, which can make playing feel more powerful and akin to an acoustic kit.
- They are built to be durable and are a great all-in-one solution for both practice and small performances.
- Portable Bluetooth Speakers:
- While convenient for casual use, standard portable Bluetooth speakers are generally a poor choice for connecting to a practice pad for real-time playing.
- They almost never support low-latency codecs, meaning you will experience a significant, unplayable delay.
- Their use should be limited to streaming backing tracks to your pad via its Bluetooth Audio In function.
Table 2: Gear Comparison for Drummers
| Gear Category | Pro | Con | Ideal Use Case |
|---|---|---|---|
| Studio Monitors | Extremely accurate, detailed sound. | Less “punchy,” can sound sterile. | Critical listening, recording, mixing. |
| Drum Amplifier | Punchy, powerful sound; built for drums. | Colors the sound; not ideal for mixing. | Replicating a “live” feel, band practice. |
| Closed-Back Headphones | Excellent isolation, zero latency, detailed. | Can be fatiguing; tethered by a cable. | All silent practice, critical listening. |
| aptX LL Headphones | Wireless freedom, no cable clutter. | Requires compatible pad; potential for interference. | Convenient, cable-free silent practice. |
Step-by-Step Connectivity Guides
Connecting your gear should be a straightforward process.
These simple guides will walk you through the most common setups, ensuring you get sound from your pad to your ears with minimal fuss.
How to Connect Headphones for Silent Practice
This is the most common use case for an electronic practice pad.
The goal is to get the pad’s sound directly and cleanly into your headphones.
List 2: Simple Headphone Connection Steps
- Identify the Headphone Jack:
- Locate the headphone output on your practice pad.
- It will be labeled “Headphones” or have a small headphone icon.
- It will be either a 3.5mm or 6.35mm port.
- Check Your Headphone Plug:
- Look at the plug on the end of your headphone cable.
- Use an Adapter if Necessary:
- If the pad has a 6.35mm jack and your headphones have a 3.5mm plug, you will need a 3.5mm-to-6.35mm adapter. Screw or plug the adapter securely onto your headphone plug.
- If the sizes match, no adapter is needed.
- Plug In Securely:
- Insert the headphone plug (or the adapted plug) firmly into the pad’s headphone jack.
- Power On and Set Volume:
- Turn on your practice pad.
- Start with the volume at its lowest setting, then put on your headphones.
- Slowly increase the volume to a comfortable and safe listening level.
How to Connect Speakers for Amplified Sound
This setup is for when you want to hear your drumming out loud, either for your own enjoyment or for playing with others.
- Locate the Line Out Jacks:
- Find the Line Out jacks on your pad.
- You will likely see two: “L/MONO” and “R”.
- Acquire the Correct Cables:
- You will need one or two TS (Tip-Sleeve) or TRS (Tip-Ring-Sleeve) 1/4-inch cables.
- Connect to Your Speaker(s):
- For a Mono Setup (One Speaker):
- Plug one end of a cable into the “L/MONO” jack on your pad.
- Plug the other end into the input of your powered speaker or drum amplifier.
- For a Stereo Setup (Two Speakers):
- Use two cables.
- Plug one from the “L/MONO” jack to the input of your left speaker.
- Plug the second cable from the “R” jack to the input of your right speaker.
- For a Mono Setup (One Speaker):
- Power On and Set Volume:
- Turn on the practice pad first, then turn on your speaker(s).
- Set the pad’s output volume to about 75% and start with the speaker volume at zero.
- Slowly increase the speaker volume to the desired level.
How to Connect to a Computer for Recording (USB/MIDI)
This is your gateway to music production, allowing you to use your pad as a MIDI controller.
- Get a USB Cable:
- You will need a standard USB cable (usually Type-A to Type-B, but check your pad’s manual).
- Install Drivers if Necessary:
- Most modern pads are “class-compliant,” meaning they don’t require special drivers.
- However, some may require you to download and install a driver from the manufacturer’s website.
- Connect to the Computer:
- Plug the USB cable from the pad’s USB port to an available USB port on your computer.
- Configure Your DAW:
- Open your Digital Audio Workstation (DAW).
- Go to the Preferences or Settings menu, usually under “Audio/MIDI.” In the MIDI input section, you should see your practice pad listed as an available device.
- Select it.
- Start Playing:
- Create a new instrument track and load a drum VST or your DAW’s built-in drum machine.
- When you strike the pad, you should now see the MIDI data being registered in the DAW and hear the computer-generated drum sounds.
Frequently Asked Questions (FAQ)
Can I use my regular AirPods/Bluetooth headphones with my drum pad?
You can, but almost certainly only for streaming music to the pad to play along with.
For hearing the sounds you are playing on the pad itself, regular Bluetooth headphones (like standard AirPods) will have too much latency, creating a frustrating delay between your hit and the sound.
You need a pad and headphones that both specifically support the aptX Low Latency codec for a viable wireless drumming experience.
What’s the real difference between a headphone out and a line out?
The key difference is the signal level. A “Headphone Out” provides an amplified signal, powerful enough to drive the small speakers in headphones.
A “Line Out” provides a weaker, unamplified “line-level” signal, which is the industry standard for connecting different pieces of audio equipment together.
Plugging a headphone output into a line-level input will result in a loud, distorted signal, while plugging a line output into headphones will result in a very quiet, barely audible signal.
Do I absolutely need a special drum amplifier for my practice pad?
No, you don’t absolutely need one.
A pair of quality studio monitors will give you a more accurate and true-to-the-source sound, which is often better for practice.
However, many drummers prefer the punchy, tailored sound of a dedicated drum amplifier because it feels more like playing a real kit in a live room.
The choice depends on your goal: accuracy (studio monitors) vs. feel (drum amp).
How can I guarantee I have the lowest possible latency for my wireless setup?
The only way to guarantee the lowest latency is to ensure your entire signal chain is aptX Low Latency compatible.
This means you must purchase an electronic practice pad that explicitly states it supports aptX LL transmission, and you must purchase a pair of headphones or a Bluetooth receiver that also explicitly states it supports aptX LL.
If both devices are compatible, they will automatically connect using the low-latency codec.
Conclusion
Mastering the headphone and speaker connectivity of your electronic drum practice pad is the single most impactful step you can take to elevate your practice sessions from mundane repetition to focused, productive, and enjoyable musical training.
The journey from a simple 3.5mm headphone jack for silent practice to a multi-faceted USB/MIDI connection for studio recording represents the full spectrum of possibilities available to the modern drummer.
By understanding the critical roles of wired stability, the nuances of wireless latency, and the specific functions of each port and cable, you empower yourself to build a setup that is perfectly tailored to your ambitions.
We encourage you to assess your primary drumming goals.
If your focus is on quiet, disciplined technical work, a quality pair of wired, closed-back headphones is your most reliable tool.
If you dream of recording your own music, prioritize a pad with a robust USB/MIDI implementation.
And if the convenience of a cable-free environment is your priority, invest wisely in a system where both the pad and headphones are verified to support aptX Low Latency.
The right connection is the bridge between the drummer you are today and the musician you aspire to become.
Now we want to hear from you! What does your practice setup look like? Leave a comment below with your favorite combination of pads, headphones, or speakers!