In the dynamic world of electronic drumming, footswitches represent a pivotal yet often overlooked accessory that unlocks a new dimension of control and creativity for performers.
These unassuming pedals provide drummers with the ability to manage a vast array of functions hands-free, transforming a standard electronic drum pad from a simple percussive instrument into a comprehensive command center for live performance, studio recording, and practice.
By integrating a footswitch, a musician can trigger samples, switch between complex kit configurations, control effects, and manage backing tracks, all without interrupting their rhythm.
The most vital information to grasp is that footswitches are not merely on/off buttons for your feet; they are sophisticated tools that can be momentary, latching, or offer continuous control, each type serving distinct purposes that can fundamentally enhance a drummer’s workflow and expand their sonic palette.
This article will provide a comprehensive exploration of footswitches for electronic drum pads, beginning with a foundational explanation of what they are and the different types available to a modern drummer.
Subsequently, we will delve into their key applications, offering practical examples of how they are used in various musical contexts.
Furthermore, this guide will provide a step-by-step process for setting up and configuring your footswitch, recommend suitable models for different needs, and offer solutions for troubleshooting common issues, ensuring you have all the necessary knowledge to seamlessly integrate this powerful tool into your electronic drumming setup.
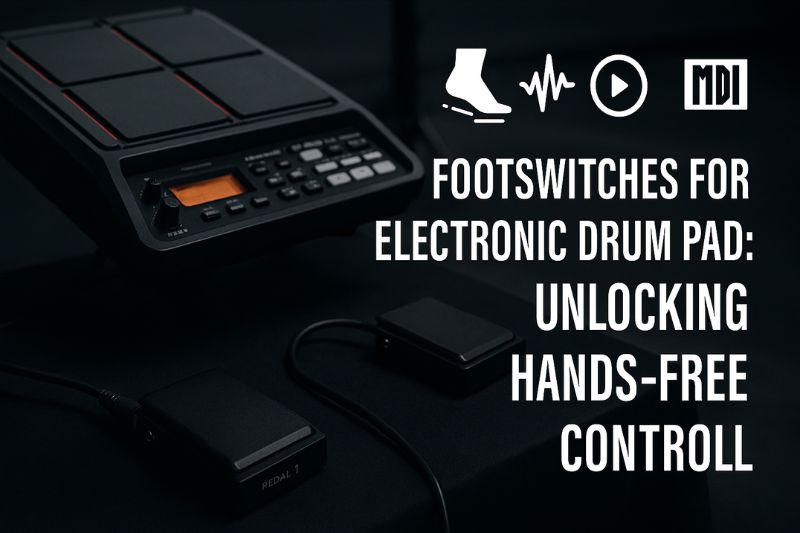
What Are Footswitches in the Context of Electronic Drumming?
A footswitch, in the context of electronic drumming, is a pedal-operated electronic switch used to send a control signal to a drum module or electronic drum pad, enabling hands-free operation of various programmable functions.
Unlike the pads themselves, which are designed to be struck with sticks or hands, footswitches are engineered for foot activation, allowing the drummer to maintain their groove while simultaneously managing other aspects of their sound.
This functionality is crucial in modern music where drummers are often tasked with more than just keeping time; they may be responsible for launching loops, changing instrumental patches, or adding real-time effects.
The footswitch acts as a remote control, a third and fourth limb that can be assigned to nearly any digital parameter within the drum module’s operating system, thereby liberating the drummer’s hands to focus solely on the percussive performance.
This remote capability transforms the electronic drum setup into a more powerful and versatile instrument, bridging the gap between rhythmic performance and sound management.
It is essential to distinguish footswitches from other types of electronic drum pedals, as their underlying mechanisms and intended applications differ significantly.
Standard electronic kick drum pedals, such as the Roland KD-10 or Yamaha KP65, are velocity-sensitive trigger pads designed to replicate the feel and response of an acoustic bass drum; they contain a piezo transducer that measures the force of the beater’s impact to produce a dynamic bass drum sound.
Similarly, continuous hi-hat controller pedals like the Roland FD-9 or VH-11 are sophisticated devices that detect the precise vertical position of the pedal to generate a wide spectrum of hi-hat articulations, from tightly closed to fully open.
Footswitches, in contrast, are typically simpler signal-sending devices.
While some can be used to trigger a basic, non-dynamic kick or hi-hat sound, their primary role is not sound generation but function control—acting as toggles, momentary triggers, or continuous controllers for parameters like kit selection, effects modulation, or looper functions, which standard drum pedals are not designed to manage.
Types of Footswitches for Electronic Drum Pads
The most common type of footswitch, a momentary footswitch, activates a function only for the duration that it is physically depressed by the user’s foot.
This “push-to-make” or “push-to-break” mechanism is ideal for actions that require temporary or instantaneous engagement, mirroring the natural, fleeting motions of drumming.
When the foot is removed, the switch immediately disengages, and the function ceases.
This behavior is perfect for emulating percussive events or executing quick, in-the-moment commands without altering the overall state of the drum kit setup.
The intuitive and direct nature of momentary switches makes them indispensable for a variety of performance and production tasks.
- Common Uses for Momentary Footswitches:
- Triggering one-shot samples, such as a cymbal crash, a specific sound effect, or a vocal cue, without dedicating a hand-played pad to the task.
- Activating a cymbal choke to silence a sustained cymbal sound, mimicking the action of grabbing a brass cymbal.
- Controlling punch-in and punch-out functions for recording or overdubbing within a drum module or connected Digital Audio Workstation (DAW).
- Setting the tempo for delay, arpeggiators, or sequencers via a “tap tempo” function, allowing the drummer to sync effects to the live feel of the music.
- Briefly engaging an effect, like a stutter or filter sweep, for momentary emphasis.
Conversely, a latching footswitch is designed to toggle a function on or off with a single press, where the state remains active until the switch is pressed a second time.
This “push-on, push-off” functionality is perfectly suited for parameters that need to remain engaged for extended periods, such as throughout an entire song or a specific section, without requiring the drummer to keep their foot constantly on the pedal.
This frees the musician to focus on other performance aspects, knowing the selected function is securely “latched” in its on or off state.
This type of control is fundamental for managing broader changes in the sonic environment or performance structure.
- Common Uses for Latching Footswitches:
- Switching between different pre-programmed drum kits or sound patches, for instance, moving from a dry acoustic kit in the verse to a heavily processed electronic kit in the chorus.
- Activating or deactivating an effects processor or a specific effect module for an entire song section.
- Starting and stopping pre-recorded backing tracks, click tracks, or rhythmic loops, providing a seamless way to manage accompaniment.
- Engaging or disengaging a “master” function, such as muting a group of pads or sending the drum mix to an alternate output.
A more advanced category, the expression pedal, provides continuous control over a range of values rather than a simple on/off signal, allowing for nuanced and dynamic manipulation of sound parameters.
By pivoting the pedal forward or backward, the drummer can smoothly sweep through the entire range of an assigned parameter, much like the accelerator in a car.
This opens up a world of expressive possibilities that go far beyond what binary switches can offer, enabling real-time, fluid modulation of effects and other sound characteristics.
These pedals often need to be calibrated within the drum module to ensure the full physical sweep of the pedal corresponds accurately to the full digital range of the parameter it is controlling.
- Common Uses for Expression Pedals:
- Controlling the master volume of the entire kit or the specific volume of an individual pad or a group of pads, enabling dynamic swells and fades.
- Modulating effects parameters in real-time, such as the rate of a tremolo, the feedback of a delay, the frequency cutoff of a filter, or the mix of a reverb.
- Functioning as a MIDI-mappable continuous controller (CC) to manipulate parameters in external software instruments or DAWs.
- Serving as a hi-hat controller on modules that support this function, providing a continuous spectrum of sounds from closed to open.
- Pitch bending a sample or an entire kit for unique sound design effects.
| Footswitch Type | Mechanism of Action | Ideal Application | Common Examples |
|---|---|---|---|
| Momentary | Function is active only while the pedal is held down. | Short, instantaneous actions like triggering one-shot samples, tap tempo, or cymbal chokes. | Boss FS-5U, Hosa FSC-502 |
| Latching | Press once to turn on, press again to turn off. | Sustained actions like switching kits, activating/deactivating effects, or starting/stopping backing tracks. | Boss FS-5L, Hosa FSC-385 |
| Expression | Continuous sweep controls a range of values. | Dynamic modulation of parameters like volume, effects mix, or filter cutoff. | Roland EV-5, Moog EP-3, Nektar NX-P |
Key Applications: How Drummers Use Footswitches with Electronic Drum Pads
One of the most immediate and practical applications of footswitches is to significantly expand the percussive capabilities of a compact electronic drum pad setup.
For drummers using a multipad like an Alesis SamplePad Pro or Roland SPD-SX as a standalone instrument, floor space for additional pads is often limited, yet the need for core kit components like a bass drum and hi-hat remains.
A simple, beaterless footswitch can be assigned to a kick drum sample, instantly providing a hands-free way to lay down a beat, transforming the multipad into a minimalist yet fully functional drum kit.
Furthermore, a second footswitch can be configured for hi-hat control, with one switch toggling between open and closed hi-hat sounds assigned to a pad, allowing for more dynamic and realistic rhythmic patterns without occupying an extra trigger input that could be used for a tom or cymbal pad.
In a live performance setting, footswitches are indispensable tools for managing the complex sonic and structural demands of a show with professionalism and ease.
The ability to change entire drum kits with a single foot stomp is perhaps the most powerful application; a drummer can transition seamlessly from the tight, acoustic sound needed for a ballad’s verse to a massive, reverb-drenched electronic kit for the chorus without missing a beat.
This is crucial for cover bands or artists with a diverse catalog.
Beyond kit switching, footswitches are the lifeline for drummers who trigger backing tracks, loops, or click tracks.
A latching footswitch can initiate and conclude a song’s backing track, while a momentary switch can be used to trigger accent samples or sound effects at precise moments, adding a layer of production value to the live sound that would be impossible to execute manually while playing.
Within the controlled environment of a recording studio or a dedicated practice space, footswitches streamline the creative and learning processes by delegating transport and metronome controls to the feet.
When recording ideas or laying down tracks in a DAW, a footswitch can be mapped to the record, play, and stop functions, allowing the drummer to capture a performance without having to put down their sticks and reach for a keyboard or mouse, thereby maintaining creative flow.
For practice, this same control is invaluable.
A footswitch can be used to start and stop a metronome or a practice loop, allowing for quick repetition of challenging passages.
It can also be used to turn pages on a digital sheet music display or to switch between different practice exercises loaded into the drum module, making practice sessions more efficient and less interrupted.
Setting Up Your Footswitch: A Step-by-Step Guide
The first step in integrating a footswitch is establishing a physical connection, which almost universally requires a standard 1/4-inch instrument cable.
Most footswitches use a mono (TS) connector, while some dual-footswitches or expression pedals require a stereo (TRS) cable to transmit their signals correctly; it’s crucial to use the cable type specified in your equipment manuals.
You will then plug one end of the cable into the footswitch’s output jack and the other end into the appropriate input jack on the back of your electronic drum pad or module.
These inputs are typically labeled “Footswitch,” “FS,” or sometimes with a specific function like “Hi-Hat Control” or “Kick.” If you have multiple footswitch inputs (e.g., FS1, FS2), you can connect multiple pedals to control different functions simultaneously.
Always ensure the plugs are seated firmly to guarantee a reliable connection.
Once the footswitch is physically connected, you must configure its function within the drum pad’s software menu, as the pedal itself has no inherent function until one is assigned to it.
This process involves navigating to a global settings, control, or system menu within your drum module’s interface.
From there, you will select the specific footswitch input you are using (e.g., FS1) and browse through a list of available functions to assign to it.
This list can be extensive, offering a wide range of possibilities.
- Enter the Main Menu/Settings: Press the “Menu,” “Setup,” or “Utility” button on your drum module to access the main settings page.
- Navigate to Control/Footswitch Settings: Use the arrow keys or dial to find the submenu dedicated to external controllers, often labeled “Control,” “Assign,” “Trigger,” or “Footswitch.”
- Select the Footswitch Input: Choose the specific input jack your footswitch is connected to (e.g., FS1, FS2, Kick, HH CTRL).
- Assign the Desired Function: Scroll through the list of assignable functions.This could include options like
Kit Inc/Dec(Increase/Decrease),Tap Tempo,FX On/Off,Loop Rec/Play, or assigning a specific instrument sound (Note#). - Set Polarity (If Necessary): Some modules require you to set the footswitch’s polarity.If your switch works in reverse (e.g., the function is active when the pedal is up), look for a “Polarity” setting and change it from “Standard” to “Reverse” (or from “Normally Open” to “Normally Closed”).Many footswitches also have a physical polarity switch on the unit itself.
- Save Your Settings: Exit the menu, making sure to save or write the changes to the system settings or the current kit, depending on how your module operates.
For users of expression pedals, an additional calibration step is often necessary to ensure the drum module accurately interprets the full range of the pedal’s physical movement.
Calibration syncs the minimum and maximum positions of the expression pedal with the 0-127 MIDI value range used by the module.
Without proper calibration, you might find that you only get a partial sweep of a filter, or that the volume doesn’t go completely silent at the heel-down position.
The calibration routine is usually found within the same control or system menu as the footswitch assignment.
It will typically prompt you to press the pedal all the way to the heel-down position, then all the way to the toe-down position, and sometimes press a button to save this range.
Performing this simple one-time setup ensures smooth, predictable, and complete control over any parameter you assign to the expression pedal.
Choosing the Right Footswitch for Your Needs
The most critical factor in choosing a footswitch is ensuring its compatibility with your specific electronic drum pad or module, as a mismatch can lead to non-functionality or erratic behavior.
You must first consult your drum pad’s user manual to determine what types of footswitches it supports—momentary, latching, or expression—and whether it has specific polarity requirements (e.g., normally open or normally closed).
While many modules are flexible, some are designed to work exclusively with a certain type.
A great starting point is to consider footswitches made by the same manufacturer as your drum pad (e.g., a Roland footswitch for a Roland SPD-SX).
This brand synergy often guarantees seamless plug-and-play functionality and eliminates guesswork regarding polarity and connectivity, although many third-party options from reputable brands like Boss, Yamaha, Nektar, and Hosa will work perfectly well, provided they meet the required specifications.
The build quality and durability of a footswitch are paramount considerations, especially for drummers who plan to use it for live performances or frequent transport.
A footswitch used on stage will be subjected to repeated, forceful stomping and the general rigors of the road, so a rugged and reliable construction is essential.
Pedals with a metal chassis, such as many models from Boss, are generally more robust and can withstand more abuse than those with a plastic housing.
You should also examine the quality of the pedal’s hinge mechanism, the non-slip rubber on its base, and the strain relief on its cable jack, as these are common points of failure.
While a heavy-duty footswitch may have a higher initial cost, its longevity and reliability during a critical performance can make it a far better investment than a cheaper, less durable alternative.
To aid in your selection, it is helpful to review some of the most popular and well-regarded footswitch models currently on the market, each suited for different applications and budgets.
The Boss FS-5U is an industry-standard momentary footswitch known for its compact size and durable metal construction, making it a reliable choice for triggering samples or tap tempo.
Its counterpart, the Boss FS-5L, offers the same robust build in a latching format, ideal for kit switching.
For drummers needing both types, the Boss FS-6 and FS-7 provide two switches in a single unit, with each switch being individually assignable to either momentary or latching operation.
When it comes to expression pedals, the Roland EV-5 is a popular and affordable choice that is compatible with a wide range of gear, while the Moog EP-3 offers a sturdier build and a smoother feel for those requiring more precision.
| Model | Type(s) | Key Features | Ideal User |
|---|---|---|---|
| Boss FS-5U | Momentary | Compact, durable metal body, connectable with other FS-series pedals, selectable polarity switch. | Drummers needing a reliable, road-worthy momentary switch for triggering or tap tempo. |
| Boss FS-5L | Latching | Compact, durable metal body, connectable with other FS-series pedals, clear LED status indicator. | Performers who need a sturdy latching switch for kit changes or effects toggling. |
| Boss FS-7 | Dual (Momentary/Latching) | Space-saving dual pedal design, each switch individually assignable, no battery required for momentary operation. | Musicians with limited floor space needing versatile control over multiple functions. |
| Roland EV-5 | Expression | Compact and lightweight design, adjustable minimum volume knob, compatible with a wide range of keyboards and modules. | Drummers and keyboardists looking for an affordable, standard expression pedal. |
| Nektar NX-P | Expression | Universal compatibility with a polarity switch, robust solid body, non-slip rubber base. | Producers and performers needing a universal and sturdy expression pedal for studio or stage. |
| Yamaha FC4A / FC5 | Momentary (Sustain-style) | Realistic acoustic piano pedal feel (FC4A), simple and compact square design (FC5), durable construction. | Drummers who prefer the feel of a piano sustain pedal for momentary actions. |
Troubleshooting Common Issues
If you find your newly connected footswitch is completely unresponsive, the issue is often a simple matter of connection or configuration.
First, meticulously check the physical connections by ensuring the 1/4″ cable is plugged securely into both the footswitch and the correct input jack on your drum module; it’s surprisingly easy to accidentally plug it into an output or a different trigger input.
If the connection is solid, verify that you have assigned a function to that specific footswitch input within the drum module’s settings menu.
An unassigned footswitch will do nothing.
Lastly, if you are using a dual footswitch or a model that requires power for an LED indicator, confirm that any necessary batteries are fresh or that the correct type of cable (TRS) is being used if required.
One of the most frequent problems encountered is a footswitch that operates in reverse—for example, a sustain effect that is active when the pedal is not pressed and cuts off when it is pressed.
This is almost always a polarity mismatch between the footswitch and the drum module.
The solution is typically straightforward and can be approached in two ways.
- Check for a Physical Polarity Switch: Many footswitches, like the Boss FS-5U or Nektar NX-P, have a small switch on the side of the unit that reverses its polarity.Simply flipping this switch will often resolve the issue instantly.
- Check the Module’s Software Settings: If your footswitch lacks a physical switch, navigate to the footswitch or control settings menu within your drum pad.Look for a “Polarity” parameter associated with the footswitch input and change its setting from “Standard” to “Reverse,” or from “Normally Open (NO)” to “Normally Closed (NC).”
If your footswitch triggers inconsistently or seems to miss some of your foot presses, the problem may lie with the sensitivity settings within the drum module or the physical stability of the pedal.
Navigate to the trigger or control settings for the footswitch input and look for a sensitivity parameter.
If the setting is too low, the module may not register softer or quicker taps, so try increasing the sensitivity level incrementally until it responds reliably.
Additionally, ensure the footswitch is placed on a stable, flat surface.
If the pedal is on a thick rug or an uneven floor, it may rock or slide when pressed, preventing the internal switch from making a clean and complete connection.
Using a non-slip mat or securing the pedal to a pedalboard can provide the stability needed for consistent performance.
Conclusion: Step Up Your Drumming Game
In summary, integrating footswitches into an electronic drum pad setup is a transformative step that dramatically increases an instrument’s functional scope and a drummer’s expressive capabilities.
By delegating tasks such as kit switching, sample triggering, effects control, and loop management to the feet, musicians can unlock a more fluid, powerful, and uninterrupted performance workflow.
Whether you choose a simple momentary switch for firing off samples, a latching pedal for managing backing tracks, or an expression pedal for nuanced effects modulation, you are fundamentally expanding your ability to interact with your sound in real-time.
This hands-free control is no mere convenience; it is a gateway to more complex arrangements and a more polished, professional execution on stage and in the studio.
We encourage you to view footswitches not as a mere technical add-on but as an integral extension of your instrument and your musical voice.
The true potential of these devices is realized through experimentation.
Connect a pedal, dive into your drum module’s assignment menu, and start exploring the vast array of functions at your disposal.
Assign a filter sweep to an expression pedal, set up a tap tempo for your delay, or create a “panic button” that mutes everything with a single stomp.
The possibilities are limited only by the features of your module and your own creativity.
As you become more comfortable with this expanded control, you will likely discover new ways of playing and new sonic textures that will enrich your unique drumming style.
We invite you to join the conversation and share your own creative uses for footswitches with electronic drum pads.
What functions have you found indispensable for your live shows? Do you have a favorite footswitch model or a unique troubleshooting tip to share? Please leave your questions, experiences, and insights in the comments section below.