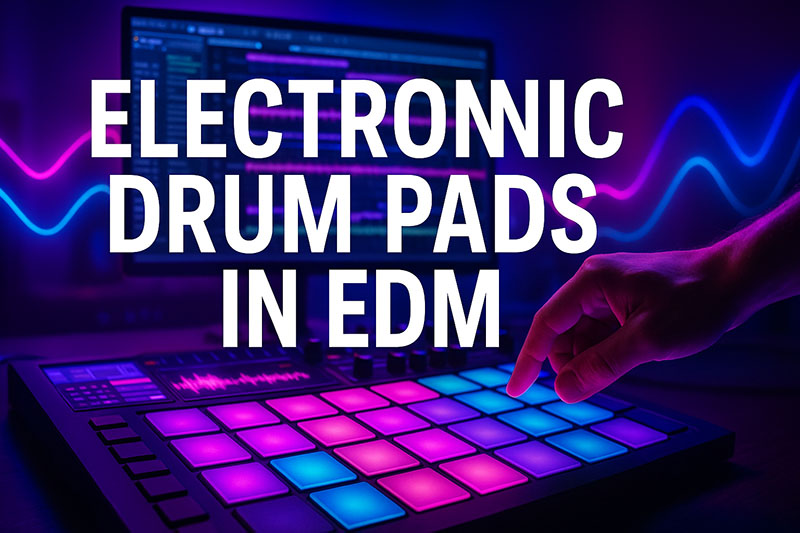
The evolution of modern music production, particularly within the Electronic Dance Music (EDM) genre, has increasingly emphasized the importance of tactile control and expressive interaction.
Electronic drum pads serve as a pivotal interface in this landscape, providing producers with a highly intuitive and physically engaging method to construct, manipulate, and perform their rhythmic ideas.
This hardware offers a direct conduit between a producer’s intent and the digital realm of sound, facilitating dynamic finger drumming, precise sample triggering, and real-time parameter control within any Digital Audio Workstation (DAW).
This approach fosters a more organic and spontaneous creative process, allowing for nuanced performances that software-based programming often struggles to replicate.
This comprehensive article will meticulously explore the profound impact and practical applications of electronic drum pads in EDM production.
We will systematically examine the compelling reasons why these devices have become indispensable tools for modern producers, from augmenting workflow efficiency to unlocking new avenues of creative inspiration and enhancing live performance capabilities.
Subsequently, we will guide you through the intricate process of selecting the most suitable drum pad, scrutinizing critical features and connectivity options.
The article will then detail practical integration strategies, outlining setup procedures, diverse drum programming methodologies, sophisticated sample triggering techniques, and the art of effect control.
Finally, we will unveil advanced strategies and practical tips, empowering both novice and seasoned producers to fully harness the expressive power and versatility of electronic drum pads, ultimately elevating their EDM tracks and live sets.
Why Electronic Drum Pads for EDM?
Electronic drum pads offer a distinct set of advantages over conventional input methods, making them highly beneficial for EDM production.
Producers gain significant benefits in terms of creative expression, workflow acceleration, and dynamic performance capabilities.
The physical interaction provided by these pads inherently promotes a more musical and spontaneous approach to beat creation, which is crucial for the energetic and rhythmic nature of EDM.
Tactile Control and Expressiveness
Electronic drum pads provide a profound level of tactile control that software interfaces simply cannot replicate, transforming the interaction from abstract clicks to physical strikes.
This physical engagement allows producers to imbue their drum patterns with a unique human feel and natural groove, moving beyond the rigid confines of quantized grids.
Velocity sensitivity, a core feature, translates the force of each strike into varying sound intensity, enabling dynamic changes from soft ghost notes to powerful accents.
Moreover, many advanced pads incorporate aftertouch or pressure-sensing capabilities, allowing for continuous modulation of parameters, such as filter cutoff or delay feedback, after the initial pad strike.
This enables subtle, expressive swells or decays within a single hit, adding depth and organic movement to otherwise static sounds.
The immediate haptic feedback reinforces the connection between the musician and the instrument, fostering a more intuitive and responsive creative flow essential for intricate rhythmic programming in EDM.
Workflow Efficiency
Incorporating electronic drum pads significantly enhances workflow efficiency in the studio, streamlining the often-tedious process of drum programming and beat creation.
Instead of painstakingly clicking in notes on a piano roll or step sequencer, producers can literally “play” their beats in real-time, capturing immediate rhythmic ideas as they emerge.
This direct input method dramatically accelerates the initial sketching phase of a track, allowing for rapid iteration and experimentation with various rhythmic patterns.
MIDI mapping becomes highly intuitive, as users can effortlessly assign specific drum sounds, one-shots, or even complex melodic phrases to individual pads.
Furthermore, many drum pads feature dedicated controls for looping, quantization, and note repeat, further expediting the creation of tight, professional-sounding grooves.
This hands-on approach minimizes interruptions in the creative flow, keeping the focus on musicality rather than menu navigation.
Creative Inspiration
Electronic drum pads serve as powerful catalysts for creative inspiration, often leading producers down unexpected and innovative sonic paths.
The very act of jamming and improvisation on a drum pad can unlock new rhythmic ideas and percussive textures that might never arise from a grid-based programming environment.
By allowing for spontaneous exploration, pads encourage a departure from conventional, linear sequencing, fostering serendipity in musical composition.
Producers can freely experiment with different finger drumming techniques, experimenting with polyrhythms or unconventional time signatures without the immediate pressure of perfect quantization.
This tactile freedom encourages playful experimentation, transforming the abstract act of composition into a more engaging, performance-oriented experience that can spark entirely new directions for a track’s rhythmic foundation.
The physical interaction helps to internalize the groove, leading to more authentic and compelling rhythmic patterns.
Live Performance Potential
Beyond studio production, electronic drum pads possess immense live performance potential, enabling EDM artists to infuse their sets with spontaneity and dynamic control.
During a live show, pads allow performers to trigger samples, loops, and effects in real-time, providing an immediate and visually engaging element that captivates audiences.
Producers can dynamically manipulate filter sweeps, delay throws, or reverb swells by mapping these parameters to individual pads, adding an improvisational flair to pre-arranged tracks.
The ability to finger drum live, whether adding fills, percussion layers, or entirely new rhythmic variations, elevates a performance from simple playback to a truly interactive musical experience.
This direct engagement with the music hardware not only offers practical advantages but also enhances the overall stage presence and energy of an EDM DJ or live electronic musician.
Choosing the Right Electronic Drum Pad
Selecting the appropriate electronic drum pad requires careful consideration of various factors, as different models cater to distinct production needs and workflows.
A well-informed decision will ensure the chosen device seamlessly integrates into your existing setup and augments your creative process.
Types of Drum Pads
Electronic drum pads come in several primary configurations, each designed for specific applications and user preferences.
Understanding these distinctions is crucial for making an informed purchase.
Standalone MIDI Production Centers (e.g., Akai MPC series, Native Instruments Maschine):
- Description: These units are often self-contained groove boxes or production studios that integrate pads, sequencers, sampling capabilities, and often internal sound engines.
They can function independently of a computer or seamlessly integrate with DAW software. - Use Case: Ideal for beatmakers and producers who prefer a hardware-centric workflow, robust sampling capabilities, and live sequencing.
They excel at rapid idea generation and performance. - Examples: Akai MPC One, Akai MPC Live II, Native Instruments Maschine+, Native Instruments Maschine MK3.
Dedicated Pad Controllers (e.g., Novation Launchpad, Arturia BeatStep, Akai MPD series):
- Description: These are pure MIDI controllers focused primarily on pads, designed to interface directly with a DAW.
They typically lack internal sound engines or standalone sequencing, relying entirely on software for sound generation and advanced functionalities. - Use Case: Excellent for triggering clips in Ableton Live, finger drumming, controlling virtual instruments, and effect manipulation.
They offer a compact and often more affordable entry point. - Examples: Novation Launchpad Pro, Arturia BeatStep Pro, Akai MPD218, Akai MPD232.
Keyboard Controllers with Integrated Pads:
- Description: Many MIDI keyboard controllers now include a bank of performance pads (typically 8-16 pads) alongside the keys.
- Use Case: Convenient for producers who need both keyboard input for melodies and chords, and pads for drums or one-shots, all in a single device.
- Examples: Arturia KeyLab Essential, Native Instruments Komplete Kontrol M/A Series.
Key Features to Consider
When evaluating electronic drum pads, several key features directly impact their utility and suitability for EDM production.
A thorough review of these attributes will ensure the chosen pad aligns with your specific needs.
| Feature | Description | Impact on EDM Production |
|---|---|---|
| Number and Size of Pads |
Varies from 8 to 64 or more. Size affects playability and ergonomic comfort. |
More pads allow for larger drum kits or extensive clip launching. Larger pads offer better finger drumming precision. |
| Velocity Sensitivity | How accurately the pad registers the force of a strike, translating it to MIDI velocity data. |
Crucial for expressive, dynamic drum patterns and humanizing beats. High sensitivity means nuanced control. |
| Aftertouch/Pressure | The ability to sense continuous pressure after the initial strike for parameter modulation. | Enables expressive control over filter sweeps, pitch bends, or effect sends directly from the pad. |
| Connectivity | USB for MIDI and power, traditional 5-pin MIDI I/O, sometimes CV/Gate for modular gear. | Determines compatibility with DAWs, external hardware synthesizers, and modular setups. |
| Software Integration | Compatibility and bundled software (DAW versions, sound packs, editor applications). | Direct integration with popular DAWs (e.g., Ableton Live, FL Studio) streamlines setup and enhances workflow. |
| Portability & Build | Size, weight, and durability for studio use, gigging, or travel. |
Essential for live performers or producers who travel frequently. Durable construction ensures longevity. |
| Additional Controls | Knobs, faders, buttons, transport controls, LCD screens, built-in sequencers. | Augment control over DAW parameters, mixer channels, and provide visual feedback for complex setups. |
Budget Considerations
Budget plays a significant role in determining the available features and build quality of an electronic drum pad.
Entry-level models provide an accessible starting point for beginners, often focusing on core functionality like velocity-sensitive pads and basic MIDI connectivity.
As the price point increases, so does the sophistication of the device, offering features such as robust standalone capabilities, extensive sampling memory, dedicated sequencers, higher-quality pads, and advanced software integration.
Professional-grade units prioritize durability, comprehensive connectivity, and deep control over a wide range of musical parameters, making them suitable for demanding studio environments and rigorous live performances.
It’s advisable to balance desired features with financial limitations, investing in a device that meets current needs while allowing for future expansion.
Integrating Drum Pads into Your EDM Workflow
Seamless integration of an electronic drum pad into your existing EDM production workflow is paramount for maximizing its benefits.
This involves a systematic approach from initial setup to advanced performance techniques.
Setting Up Your Pad
Proper setup is the foundational step for utilizing your electronic drum pad effectively.
- Physical Connection: Connect the drum pad to your computer via a USB cable (most common) or a traditional 5-pin MIDI cable if your audio interface has MIDI I/O.
USB cables typically provide both data transfer and power. - Driver Installation: Many modern MIDI controllers are class-compliant, meaning they work immediately without additional drivers.
However, some advanced pads may require specific drivers provided by the manufacturer.
Download and install these from the official website. - DAW Recognition: Open your Digital Audio Workstation (DAW) (e.g., Ableton Live, FL Studio, Logic Pro, Cubase).
Navigate to the Preferences or Settings menu, usually under “MIDI” or “Controllers.” Your drum pad should appear in the list of recognized devices.
Enable its input and output ports. - MIDI Channel Assignment: Ensure your drum pad is transmitting MIDI data on the correct channel (typically MIDI Channel 10 for general MIDI percussion, but configurable).
This aligns with the MIDI input settings of your virtual instrument or drum rack within the DAW. - Latency Optimization: For optimal performance, especially during live playing, ensure your audio interface drivers are updated and your DAW’s buffer size is set appropriately to minimize audio latency.
A lower buffer size reduces latency but demands more CPU power.
Programming Drums and Percussion
Electronic drum pads revolutionize drum programming by allowing for a more natural and human-centric approach to rhythm creation.
- Finger Drumming Techniques: Develop foundational finger drumming skills by practicing basic drum patterns.
Assign kick, snare, hi-hats, and other percussive elements to comfortable pad layouts.
Focus on velocity dynamics to create varied intensity within your beats, mimicking the nuances of an acoustic drummer. - Layering Sounds: Assign multiple drum sounds to the same pad with velocity layering, where different samples trigger based on the force of your strike.
This creates a richer, more complex soundscape.
Alternatively, layer different drum sounds across multiple pads to build intricate rhythmic textures. - Creating Complex Rhythms: Experiment with polyrhythms by simultaneously playing different rhythmic patterns on separate pads.
Use the note repeat function (if available on your pad) for quick rolls, fills, and stutter effects, adding rhythmic complexity effortlessly. - Quantization vs. Human Feel: While quantization can snap your performance to the grid, resist over-quantizing to retain the natural human feel and subtle groove of your finger drumming.
Record with quantization off, then apply it lightly or selectively to specific elements.
Experiment with swing parameters in your DAW to further humanize your programmed rhythms.
Triggering Samples and One-Shots
Electronic drum pads excel at triggering samples and one-shots, making them invaluable for sample-based production in EDM.
- Assigning Individual Samples: Load your preferred drum samples, vocal chops, sound effects, or synthesizer one-shots into a drum rack or sampler instrument within your DAW.
Map each individual sample to a corresponding pad on your controller. - Creating Custom Drum Kits: Curate bespoke drum kits by combining sounds from various sources – 808s, 909s, acoustic drums, and foley – assigning them logically across your pads.
This allows for rapid access to a personalized palette of sounds. - Chopping Samples and Re-sequencing: For intricate sample manipulation, chop longer audio samples into smaller segments (e.g., individual drum hits, vocal phrases, melodic snippets).
Assign these chopped pieces to different pads, allowing you to re-sequence and rearrange them in real-time to create new melodic or rhythmic phrases.
This technique is fundamental for hip-hop-influenced EDM and future bass. - Dynamic Sample Triggering: Utilize velocity sensitivity to trigger different variations of a sample (e.g., an open hi-hat vs. a closed hi-hat based on strike force) or to crossfade between different samples.
This adds an organic dimension to your sample playback.
Controlling Effects and Parameters
Beyond simply triggering sounds, electronic drum pads can be mapped to dynamically control various effects and DAW parameters, adding expressive real-time modulation to your tracks.
- Mapping Pads to Effects: Assign pads to toggle or trigger effects on and off, or to engage momentary effects like a gated reverb or stutter effect.
For continuous control, map MIDI CC messages from your pads (if they have aftertouch or assignable knobs/faders) to parameters like filter cutoff, resonance, delay feedback, or reverb wet/dry mix. - Real-time Sound Manipulation: During a production session or live performance, use the pads to create dynamic filter sweeps on a bassline, introduce delay throws on a vocal sample, or dramatically change the reverb characteristics of a drum hit in real-time.
This interactive control allows for fluid sound design and mixing decisions on the fly. - Performance Macros: Create custom macro controls in your DAW that link multiple parameters to a single pad.
For instance, one pad could simultaneously control a high-pass filter, a bit-crusher, and a tremolo effect, allowing for complex transformations with a single press. - Automation Recording: Record your real-time pad-based manipulations as automation data directly into your DAW.
This captures the human nuances and dynamic changes in your performance, adding life and movement to your track’s arrangement.
Utilizing Built-in Sequencers/Arpeggiators (if applicable)
Many advanced drum pads, particularly the standalone production centers, feature built-in sequencers or arpeggiators that offer powerful standalone functionality.
- Onboard Pattern Creation: Use the hardware sequencer to directly program rhythmic patterns, basslines, or melodic phrases onto the pads, freeing you from constant computer interaction.
This can be particularly useful for quickly sketching out ideas or for live improvisation. - Step Sequencing: Some pads allow for step sequencing, where you program notes or drum hits step-by-step, offering a precise method for constructing grooves without real-time performance.
- Arpeggiation: If your pad has an arpeggiator, you can hold down notes or chords on the pads, and the arpeggiator will automatically generate rhythmic patterns based on those notes, adding instant melodic interest or rhythmic complexity to your productions.
- Live Arranging: Utilize the built-in sequencer to chain patterns together, create song sections, and trigger them in real-time, effectively building entire arrangements live from the hardware.
Advanced Techniques and Tips
Once familiar with the fundamentals, producers can explore advanced techniques to further enhance their EDM productions using electronic drum pads.
These methods push the boundaries of expressiveness and creativity.
Layering and Velocity Switching
Advanced sound design often involves intricate layering and velocity switching to create highly dynamic and responsive drum sounds.
- Multi-Sample Drum Racks: Construct sophisticated drum racks in your DAW where each pad triggers a stack of multiple, subtly different samples.
For instance, a snare drum hit might comprise a top snare, a body, and a transient layer. - Velocity-Dependent Samples: Implement true velocity switching, where entirely different samples are triggered based on the velocity of your strike (e.g., a soft ghost kick, a medium standard kick, and a hard distorted kick all on one pad).
This creates incredible realism and dynamic range. - Randomization and Round Robin: Incorporate randomization or round-robin sampling within your drum rack to cycle through slightly different samples for each hit at the same velocity.
This prevents the “machine gun” effect of identical hits and adds a natural, organic feel. - Parameter Variation: Beyond just switching samples, map velocity to vary parameters like pitch, decay time, or filter cutoff for individual drum hits, adding subtle movement and uniqueness to each strike.
Choke Groups
Implementing choke groups on your drum pad is essential for accurately simulating the natural behavior of acoustic drum elements, particularly for hi-hats and percussion.
- Realistic Hi-Hats: Create a choke group for your hi-hats (open hi-hat, closed hi-hat, pedal hi-hat).
When an “open hi-hat” is triggered, any subsequent “closed hi-hat” hit will immediately silence the open one, just as a real drummer would close the hat.
This provides authentic sound interaction. - Percussive Silence: Apply choke groups to other percussive elements like shakers or congas to prevent overlapping sounds from clashing or creating muddy mixes.
For example, a long shaker loop can be choked by a short, sharp cowbell hit. - Creative Silencing: Beyond realism, use choke groups creatively to generate rhythmic gaps or unique rhythmic textures.
For instance, a long, sustained synth pad could be assigned to a choke group with a rapid, percussive click, allowing the click to momentarily silence the pad, creating a rhythmic gate effect.
Using Scales and Chords
Electronic drum pads are not limited to just drums; their versatile grid layouts make them excellent tools for melodic applications, including scales and chords.
- Chromatic and Scaled Layouts: Configure your pad controller to operate in a chromatic layout (each pad represents a semitone) or, more musically, in a scaled layout where pads are automatically mapped to notes within a selected musical scale (e.g., C Major, A Minor).
This ensures all played notes are in key. - Triggering Chords: Assign entire chords to individual pads.
This allows for rapid chord progressions and the immediate triggering of complex harmonies, ideal for EDM breakdowns or melodic hooks.
Experiment with different voicings and inversions for each chord. - Arpeggiated Patterns: Use the pad’s arpeggiator (if available) or an arpeggiator within your DAW, combined with a scaled layout, to generate intricate melodic patterns and basslines from held notes on the pads.
This can lead to complex, evolving synth lines or rhythmic melodies. - Bassline Performance: Treat a row of pads as a bass guitar or synth bass keyboard.
With a simple monophonic synth loaded, you can finger drum basslines with surprising agility and groove.
Live Looping and Performance
Electronic drum pads are at the heart of many live electronic music performances, enabling dynamic looping and real-time arrangement.
- Building Arrangements Live: Integrate your drum pad with a looper pedal or the looping functionality within your DAW (e.g., Ableton Live’s Looper device).
Perform a drum beat, record it, then loop it.
Overdub new layers – basslines, melodies, effects – using the pads, gradually building a full track in real-time. - Interacting with Other Gear: Sync your drum pad’s clock via MIDI to other hardware synthesizers, drum machines, or effects units.
Use the pads to trigger patterns, change parameters, or mute/unmute channels across your entire hardware setup, creating a cohesive live rig. - Dynamic Song Sections: Map pads to trigger entire song sections (intro, verse, chorus, bridge, outro) or to jump between pre-arranged scenes in your DAW.
This provides unparalleled flexibility for structuring a live performance on the fly. - Improvisational Control: Dedicate a set of pads solely for improvisational fills, effect drops, or one-shot samples that can be spontaneously triggered to respond to the energy of the crowd or the flow of the set.
Developing Finger Drumming Skills
Mastering finger drumming is an ongoing process that significantly enhances your interaction with electronic drum pads.
- Practice Routines: Dedicate regular practice time to finger drumming exercises.
Start with simple four-on-the-floor patterns, then introduce snares on 2 and 4, followed by more complex hi-hat patterns. - Rhythm Games and Tutorials: Utilize online rhythm games or dedicated finger drumming tutorials that provide visual feedback and structured lessons.
Many reputable instructors offer free and paid content focusing on coordination and muscle memory. - Metronome and Tempo: Always practice with a metronome.
Gradually increase the tempo as your accuracy and consistency improve.
Focus on hitting the pads precisely on time and with consistent velocity. - Pad Layout Experimentation: Experiment with different pad layouts (e.g., assigning kick to your thumb, snare to index, hi-hats to middle finger) to find the most ergonomic and intuitive setup for your hand.
Experimentation
The true power of electronic drum pads lies in the willingness to experiment and push beyond conventional uses.
- Unconventional Sound Sources: Map pads to trigger non-drum sounds – recorded speech, environmental noises, granular synthesis textures – and manipulate them rhythmically.
- Creative Parameter Mapping: Map pads to control obscure parameters within synthesizers or effects, leading to unexpected and unique sonic transformations.
For example, controlling the decay of a delay with a pad press. - Breaking Rules: Deliberately break traditional rhythmic rules.
Play unquantized for a raw, gritty feel.
Use pads to trigger melodic fragments in a discordant way. - Sound Design on the Fly: Use pads as a tool for sound design itself.
Trigger a synth patch, then simultaneously use other pads or aftertouch to modulate its filter, envelope, or effects, creating evolving sounds in real-time.
Case Studies/Examples
Many prominent EDM artists and beatmakers widely utilize electronic drum pads, demonstrating their versatility and creative potential in diverse production contexts.
Artists like Mr. Carmack and Kaytranada are renowned for their highly expressive finger drumming during live performances and in their studio sessions, often incorporating complex rhythms and subtle velocity changes directly from their pads.
Producers like Flying Lotus are known to integrate pads not just for drums, but also for triggering intricate melodic loops and sample fragments, showcasing the pad’s role in constructing entire arrangements.
Furthermore, countless YouTube channels dedicated to finger drumming tutorials and live beat-making demonstrations (e.g., Jeremy Ellis, Decap) highlight the educational and performance-oriented aspects of these devices, inspiring a new generation of EDM producers to adopt a more tactile approach to their craft.
These examples underscore the drum pad’s transformation from a mere input device to a central instrument in modern electronic music creation.
Conclusion
Electronic drum pads represent an indispensable and highly valuable tool for any aspiring or established EDM producer.
They provide an unparalleled level of tactile control, significantly enhancing expressiveness and injecting a crucial human feel into digitally produced music.
The integration of these devices markedly improves workflow efficiency, accelerating the beat-making process and fostering a more fluid creative environment.
Critically, drum pads serve as a potent source of creative inspiration, encouraging improvisation and leading to novel rhythmic ideas that might remain undiscovered through conventional methods.
Moreover, their robust functionality for triggering samples, loops, and effects makes them exceptional instruments for dynamic and engaging live performances.
By embracing the versatility of electronic drum pads and diligently exploring their advanced capabilities, producers can unlock new dimensions of creativity, refine their EDM tracks, and deliver captivating live sets, solidifying their position as essential components of the modern music production studio.