Electronic drum pads are powerful instruments that extend beyond mere practice tools, offering a gateway to limitless sound design and sonic expression.
Their fundamental capability lies in triggering digital samples, but their true potential is unlocked when those raw sounds are sculpted and transformed through an effects chain.
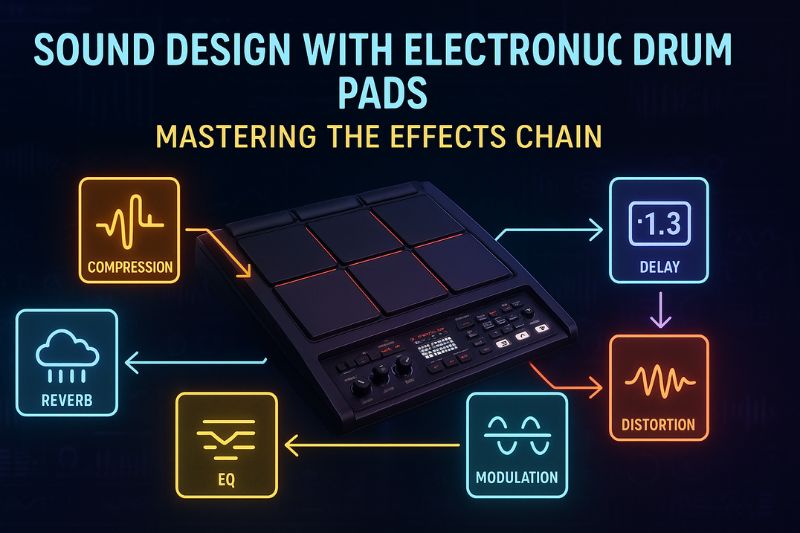
An effects chain is a sequence of audio processors, each altering the sound in a specific way, that collectively redefine a drum’s character, texture, and placement in a mix.
By moving beyond stock sounds, a musician or producer can develop a unique sonic signature, turning generic percussion into a dynamic, professional, and expressive performance that stands out in any musical context.
The deliberate application of effects is the critical bridge between simply playing samples and truly designing sound.
This article provides a comprehensive exploration of using effects chains with electronic drum pads, designed to elevate your percussive creations from standard to extraordinary.
We will begin by dissecting the essential building blocks, providing an in-depth analysis of the most crucial effects—from dynamic controllers like compressors to spatial enhancers like reverb and delay—and explaining their core functions and key parameters.
Subsequently, the article will illuminate the art of building an effective chain, emphasizing the critical importance of signal flow and the profound impact that effect order has on the final sonic output.
We will then compare and contrast the primary methods for applying these effects: using the limited but convenient onboard processors, integrating a tactile hardware pedalboard, or harnessing the near-limitless power of a Digital Audio Workstation (DAW).
Finally, we will delve into advanced creative techniques and pro-tips, offering actionable strategies to implement sophisticated sound design concepts.
This structured journey is vital for any artist seeking to master their electronic drum pad as a true instrument of sonic innovation.
The Building Blocks: Essential Effects for Electronic Drums
The most effective sound design for electronic drums begins with a deep understanding of individual audio effects, which are the fundamental components used to shape and enhance raw percussive sounds.
These processors can be categorized based on their function, whether it’s controlling volume, creating a sense of space, adding rhythmic complexity, or altering the tonal character of a drum hit.
Mastering these individual tools is a prerequisite for combining them into a cohesive and impactful effects chain.
Each effect possesses a unique set of parameters that allow for precise control over its behavior, and learning to manipulate these controls is essential for translating a creative vision into a sonic reality.
The following sections will break down the most vital effects, offering detailed explanations of their purpose, parameters, and specific applications within the context of electronic percussion.
This foundational knowledge empowers you to make intentional, informed decisions when sculpting your drum sounds, ensuring that each effect serves a clear purpose in your overall sonic palette.
Dynamics Processors: Compression and Limiting
Dynamics processors are crucial tools for controlling the volume envelope of electronic drum sounds, ensuring they are consistent, punchy, and well-placed within a mix.
The most important of these is the compressor.
Its primary function is to reduce the dynamic range of a signal—the difference between the loudest and quietest parts.
For drums, this means taming overly aggressive peaks from hard hits while simultaneously boosting the detail and body of softer hits.
The result is a more uniform, powerful, and perceivedly louder sound that can cut through a dense arrangement without overwhelming it.
A limiter is essentially a super-fast, high-ratio compressor, used as a protective tool to “brickwall” a signal and prevent it from exceeding a set ceiling, which is vital for avoiding digital clipping and distortion at the final output stage.
A deep understanding of a compressor’s main parameters is essential for its effective use.
Each control directly influences how the compressor reacts to the incoming audio signal, and their interplay determines the ultimate character of the compressed sound.
- Threshold: This parameter, measured in decibels (dB), sets the volume level at which the compressor begins to act. Any part of the signal that exceeds the threshold will be attenuated. A lower threshold means more of the signal is compressed, while a higher threshold affects only the loudest peaks.
- Ratio: The ratio determines how much the signal is reduced once it crosses the threshold. For example, a 4:1 ratio means that for every 4dB the input signal goes over the threshold, the output signal will only increase by 1dB. Higher ratios result in more aggressive compression.
- Attack: Measured in milliseconds (ms), the attack time controls how quickly the compressor starts reducing the signal after it crosses the threshold. A fast attack is ideal for taming sharp, sudden transients (like the initial “crack” of a snare), while a slow attack allows those transients to pass through before the body of the sound is compressed, which can enhance punch.
- Release: Also measured in milliseconds, the release time dictates how long it takes for the compressor to stop attenuating the signal after it drops back below the threshold. A fast release can make the sound more aggressive and loud, while a slow release can produce a smoother, more natural-sounding result.
- Make-up Gain: Because compression reduces the overall level of a signal, the make-up gain control is used to boost the entire compressed signal back up. This is what creates the effect of increased loudness and perceived power.
In practice, these settings are tailored to the specific drum.
A kick drum might benefit from a slow attack to preserve its initial “thump” and a medium release to enhance its boom, with a 4:1 ratio to even out its volume.
Conversely, a snare drum often requires a fast attack to control its sharp transient, a fast release to keep it sounding crisp, and a higher ratio (e.g., 6:1) to add significant crack and body.
Time-Based Effects: Reverb and Delay
Time-based effects are fundamental for creating a sense of space and adding rhythmic complexity to electronic drum sounds.
Reverb, or reverberation, simulates the sound of a physical environment by generating a series of complex, decaying echoes that occur when sound waves reflect off surfaces.
Its primary use in drum production is to move a sound out of a sterile, digital void and place it into a believable acoustic space, be it a small, tight drum booth, a large concert hall, or a cavernous cathedral.
Delay, on the other hand, is a more distinct and cleanly separated echo of the original sound.
It can be used subtly to add depth and dimension or as a prominent rhythmic element, with echoes timed to the tempo of the track to create intricate polyrhythms and hypnotic grooves.
The character of these effects is shaped by their key parameters.
For reverb, the most important controls are:
- Decay Time / RT60: This determines how long it takes for the reverberant tail to fade into silence. Short decay times create the impression of a small room, while long decay times suggest a vast space.
- Pre-delay: This parameter sets a small amount of time (in ms) between the initial dry sound and the onset of the reverb. Increasing the pre-delay can help the initial drum transient remain clear and defined before it’s washed out by the reverb, enhancing clarity.
- Mix / Wet/Dry: This controls the balance between the original, unprocessed (dry) signal and the processed (wet) reverb signal. A low mix percentage adds subtle ambiance, while a 100% wet signal would make the drum sound distant and ethereal.
- Size / Room Size: This parameter often adjusts a complex set of internal algorithms to simulate the dimensions of the virtual space, affecting the density and character of the early reflections.
For delay, the crucial parameters include:
- Delay Time: This sets the interval between the original sound and its echo. It can be set freely in milliseconds or, more commonly, synced to the project’s tempo and set to musical subdivisions like quarter notes, eighth notes, or sixteenth notes.
- Feedback: This controls how much of the delayed signal is fed back into the delay’s input, creating subsequent echoes. Low feedback results in a single echo, while high feedback can create a long, cascading trail of repeats.
- Mix / Wet/Dry: Similar to reverb, this balances the original sound with its echo.
Applying these effects requires careful consideration.
A short plate or room reverb with a low mix level can give a snare drum body and life without making it sound distant.
A long, dark hall reverb can be used dramatically on a single clap at the end of a phrase.
For delay, a “slapback” (a very short, single-repeat delay) can add thickness to a rimshot, while a ping-pong delay (where echoes alternate between the left and right stereo channels) can create a wide, engaging rhythmic pattern on hi-hats or percussion.
Modulation, Filter, and Saturation Effects
Beyond dynamics and space, a third category of effects is used to manipulate the core texture and tonal character of drum sounds.
Modulation effects introduce movement and depth by subtly altering the pitch and time of the signal.
This category includes the chorus, which thickens a sound by adding slightly detuned and delayed copies; the flanger, which creates a sweeping “jet engine” sound by mixing the signal with a delayed copy that is modulated by an LFO (Low-Frequency Oscillator); and the phaser, which creates a similar swirling effect using phase-shifting filters.
These are particularly effective on cymbals, hi-hats, and synth-based percussion to add a sense of life and prevent them from sounding static.
Filters and Equalizers (EQ) are tools for tonal shaping.
An EQ is used to boost or cut specific frequencies to alter the harmonic balance of a drum sound.
For instance, you might cut the boxy low-mid frequencies (around 300-500 Hz) from a snare to improve its clarity or add a high-frequency “shelf” boost (around 8-10 kHz) to hi-hats to make them sizzle.
Filters are a more extreme form of EQ, typically used to cut out all frequencies above (low-pass) or below (high-pass) a certain point.
A low-pass filter can make a drum kit sound as if it’s coming from another room, while a high-pass filter can thin out a sound, which is useful for creating breakdowns or transitions in a track.
Saturation and distortion effects add harmonic content, warmth, and grit to a sound.
Saturation is a subtle form of distortion, originally derived from overloading analog tape machines or vacuum tubes, that adds pleasing harmonics and gentle compression.
It can make a kick drum sound warmer and rounder or give a snare more body.
Distortion is a more aggressive version of this process, deliberately clipping the audio waveform to create a fuzzy, gritty, or industrial sound.
A related effect, bitcrushing, degrades the digital audio quality by reducing its sample rate and bit depth, resulting in a lo-fi, crunchy texture popular in chiptune and industrial music.
| Effect Category | Primary Function | Common Effects | Best Used On |
|---|---|---|---|
| Dynamics | Controls volume and punch | Compressor, Limiter, Gate | Kick, Snare, Drum Bus |
| Time-Based | Creates space and rhythm | Reverb, Delay, Echo | Snare, Vocals, Cymbals, Percussion |
| Modulation | Adds movement and texture | Chorus, Flanger, Phaser | Hi-Hats, Cymbals, Synth Percussion |
| Filter/EQ | Shapes tonal balance | Parametric EQ, Graphic EQ, Filters | All drum elements, especially for mixing |
| Saturation | Adds warmth and harmonics | Saturation, Distortion, Bitcrusher | Kick, Snare, Bass, Drum Bus |
Building Your Effects Chain: Signal Flow is Key
The order in which you arrange your effects, known as signal flow or the effects chain, fundamentally determines the final character of your drum sound.
Each effect in the chain processes the output of the one before it, meaning a change in order can lead to drastically different sonic outcomes.
For instance, placing a distortion pedal before a reverb will result in a distorted sound being placed within a reverberant space.
Conversely, placing the reverb before the distortion will cause the entire reverberant tail to be distorted along with the original sound, creating a much larger, more chaotic, and often-muddier texture.
Understanding this principle is not a mere technicality; it is the core artistic consideration in sound design with effects.
A classic and highly effective effects chain for individual drums or an entire drum bus often follows a logical progression from cleanup to dynamics, to character, and finally to spatial placement.
This structure provides a reliable starting point for building a professional and polished sound.
- Corrective EQ (Subtraction): The first step in the chain is typically subtractive equalization. This involves using an EQ to cut or notch out problematic frequencies, such as low-end rumble in a snare, excessive boxiness in a kick, or harsh ringing in a cymbal. By cleaning up the sound first, you ensure that subsequent effects are not needlessly amplifying undesirable elements of the source signal.
- Compression: Once the sound is cleaned up, a compressor is used to control its dynamics. Placing compression early in the chain allows you to create a consistent and punchy signal that will react more predictably to the character-adding effects that follow. It establishes the core dynamic foundation of the sound.
- Saturation / Distortion (Additive Character): With dynamics under control, you can now add harmonic content and character. Saturation or distortion will introduce new frequencies and a sense of warmth or aggression. Placing it after the compressor means the distortion unit receives a more consistent input level, leading to a more stable and controllable distortion effect.
- Creative EQ (Addition/Shaping): After adding new harmonic content via saturation, you may need to re-shape the tonal balance. This is where additive or “creative” EQ comes in. You can use it to boost the pleasing new frequencies introduced by the saturation, add a “thump” to the low end of a kick, or add “air” and “sizzle” to the high end of a snare or hi-hats.
- Modulation Effects: Effects like chorus, flanger, or phaser are typically placed after the core dynamic and tonal shaping is complete. This allows the modulation to add movement and texture to the fully-formed character of the drum sound.
- Time-Based Effects (Reverb & Delay): Spatial effects are almost always placed at the end of the chain. This is because you generally want to place the final, fully-processed sound into a virtual space. Applying reverb or delay earlier would mean that the spatial effect itself gets compressed, distorted, and EQ’d, which can lead to a messy and unnatural result.
While this order is a powerful default, the true art of sound design lies in knowing when to break the rules.
Experimentation is paramount.
For example, placing an EQ after a reverb allows you to shape the tone of the reverb tail itself, perhaps cutting the low frequencies to prevent muddiness or boosting the highs for a shimmery effect.
The “Send vs. Insert” Concept
A crucial concept in building effects chains, particularly within a DAW or on a mixing console, is the distinction between using effects as “inserts” or as “sends.” An Insert effect is placed directly onto a single audio track, and the entire signal from that track passes through the effect.
This is ideal for processors that fundamentally shape the core sound, such as EQ and compression.
You typically want to compress a single snare drum, not a small part of it.
A Send effect, by contrast, works in parallel.
You create a separate auxiliary (or “Aux”) track and place an effect (like reverb or delay) on it.
You then use a “send” knob on your primary drum track to route a duplicate copy of the signal to this aux track.
The original “dry” signal continues directly to the output, while the “wet” signal from the aux track is blended back in.
This approach has two major advantages:
- Efficiency: Instead of placing a separate reverb plugin on every single drum track (which would consume significant CPU power), you can create one or two high-quality reverb sends and route multiple drum tracks (snare, claps, percussion) to them in varying amounts.
- Cohesion: Sending multiple elements of your drum kit to the same reverb helps to “glue” them together, creating the convincing illusion that they are all being played in the same physical space.
| Signal Chain Approach | Description | Pros | Cons |
|---|---|---|---|
| Insert | The effect is placed directly in the signal path of a single track.
100% of the signal is processed. |
Direct, simple control. Ideal for shaping core tone (EQ, Compression). | CPU intensive if used for every track.
Can isolate sounds from each other. |
| Send (Parallel) | A copy of the signal is sent to an auxiliary track containing the effect.
The wet signal is blended with the dry. |
CPU efficient. Creates sonic cohesion (glues sounds together).
Allows multiple tracks to share one effect. |
Requires more complex routing (setting up aux tracks).
Less direct control than an insert. |
Your Setup, Your Choice: Hardware vs. Software vs. Hybrid
The method you choose for applying an effects chain to your electronic drum pads will be determined by your budget, workflow preference, performance needs, and desired level of control.
There are three primary approaches: using the effects built directly into your drum pad’s module, constructing a physical chain with hardware guitar pedals, or leveraging the immense power of a Digital Audio Workstation (DAW) on a computer.
Each method has a distinct set of advantages and disadvantages, and many professional musicians will use a hybrid approach that combines elements from all three to suit different situations, such as live performance versus studio recording.
Option 1: Using Onboard Effects
Nearly all modern electronic drum pads, from the entry-level to professional-grade models like the Roland SPD-SX or Alesis Strike MultiPad, include a selection of built-in effects.
These onboard processors offer the most immediate and convenient way to begin experimenting with sound design.
Pros of Onboard Effects:
- Convenience: No additional equipment is required. The effects are integrated directly into the hardware, making for a quick and simple setup.
- Zero Latency: Since the processing happens within the module’s dedicated hardware, there is no perceptible delay between hitting the pad and hearing the effected sound.
- Portability: The setup remains a single, self-contained unit, which is ideal for musicians who need a compact rig for travel and live performance.
- Integration: The effects are often designed to be easily assigned to specific pads and controlled by the physical knobs and buttons on the unit, creating a seamless workflow.
Cons of Onboard Effects:
- Limited Quality: The quality of onboard effects can vary significantly and may not match the sonic fidelity of dedicated hardware pedals or high-end software plugins.
- Less Flexibility: You are restricted to the effects provided by the manufacturer, and the routing options are often limited. For example, you may only be able to apply one or two effects to a single pad at a time and may lack the ability to freely change the order of the effects chain.
- Constrained Control: The number of editable parameters for each effect is often simplified compared to their software or hardware counterparts, offering less granular control over the sound.
To use onboard effects, you typically navigate to an “FX” or “EFFECTS” menu on your drum pad’s screen.
From there, you can select an effect type (e.g., Reverb, Delay, Flanger) and then assign it to a specific pad, a kit, or the master output.
The physical knobs on the unit can then be used to adjust key parameters like decay time or feedback in real-time.
Option 2: The Hardware Pedalboard Route
Using physical effects pedals, commonly associated with electric guitars, is a popular method for drummers seeking tactile control and a unique sonic character for their electronic pads.
This approach involves creating a physical effects chain by connecting a series of pedals with short patch cables.
The signal path for a hardware setup is straightforward: the audio output of the electronic drum pad is connected to the input of the first pedal in the chain.
The output of that pedal is then connected to the input of the second, and so on, with the output of the final pedal going to an amplifier, PA system, or an audio interface for recording.
This method appeals to performers who appreciate the hands-on, immediate nature of twisting a physical knob and hearing an instant change.
Each pedal has its own sonic footprint, and collecting pedals from different manufacturers allows you to build a highly personalized and unique sound palette.
However, this approach can become expensive quickly, and a large pedalboard requires a dedicated power supply and can be cumbersome to transport.
Option 3: The Power of a DAW (Digital Audio Workstation)
For the ultimate in flexibility, quality, and control, harnessing the power of a Digital Audio Workstation (DAW) is the definitive method.
A DAW is a software application, such as Ableton Live, Logic Pro X, or FL Studio, that is designed for recording, editing, and producing music.
This approach requires connecting your electronic drum pad to a computer via an audio interface.
An audio interface is a piece of hardware that converts the analog audio signal from your drum pad into a digital signal that your computer can understand, and vice versa.
The signal flow is as follows: Drum Pad Output → Audio Interface Input → USB/Thunderbolt Cable → Computer (DAW Software) → USB/Thunderbolt Cable → Audio Interface Output → Studio Monitors/Headphones.
Pros of a DAW-based Setup:
- Virtually Limitless Options: A DAW can host thousands of third-party “plugin” effects (in formats like VST, AU, or AAX), from free software to incredibly sophisticated emulations of classic analog gear. Your sonic palette is limited only by your computer’s processing power.
- Advanced Routing: DAWs offer complete freedom to create complex effects chains, including intricate parallel processing using sends and returns, which is difficult or impossible to achieve with onboard effects or most hardware setups.
- Total Recall and Automation: Every setting and parameter can be saved with your project file, allowing you to recall your exact sound instantly at a later date. Furthermore, you can “automate” any parameter, meaning you can program it to change over time, creating dynamic and evolving effects throughout a performance or recording.
Cons of a DAW-based Setup:
- Latency: The biggest potential drawback is latency—a perceptible delay between hitting the pad and hearing the sound from the computer. This is caused by the time it takes for the audio to be processed (the “buffer size”). While it can be minimized with a powerful computer and a high-quality audio interface, it is always a factor to manage.
- Complexity and Cost: This setup requires a computer, a DAW, an audio interface, and potentially the purchase of premium plugins, making it the most complex and potentially expensive option.
- Less Tactile: Controlling software plugins with a mouse and keyboard can feel less immediate and intuitive than twisting a physical knob on a pedal, though this can be mitigated by using a MIDI controller.
| Setup Method | Flexibility & Quality | Cost & Complexity | Portability & Immediacy | Latency |
|---|---|---|---|---|
| Onboard Effects | Low | Low | High | None |
| Hardware Pedals | Medium | Medium-High | Medium | None |
| DAW & Plugins | High | High | Low | Low (manageable) |
Creative Techniques and Pro-Tips
Mastering the foundational effects and setup options opens the door to more advanced and creative sound design techniques.
These methods often involve using effects or combinations of effects in unconventional ways to achieve iconic or unique sonic textures.
Implementing these professional strategies can dramatically elevate the quality and originality of your electronic drum productions, transforming standard beats into dynamic and memorable musical statements.
The following techniques are staples in modern music production and can be applied within a DAW environment to add a layer of sophistication to your drum tracks.
Gated Reverb
The gated reverb is an iconic drum sound, famously associated with the 1980s but still widely used today for its powerful, dramatic, and punchy character.
The technique creates the sound of a massive reverberant space that is abruptly cut off instead of decaying naturally.
This provides a sense of size and power without washing out the mix with a long reverb tail.
How to create a Gated Reverb effect:
- Use a Send: Set up a reverb on an auxiliary (aux) track as a send. Choose a reverb with a large room or hall algorithm and a long decay time (e.g., 2-4 seconds). Send your snare track to this reverb.
- Insert a Noise Gate: On the same aux track, place a noise gate after the reverb plugin. A noise gate is a dynamics processor that silences any signal that falls below a set threshold.
- Set the Gate’s Threshold: Adjust the gate’s threshold so that it opens and allows the loud initial part of the reverb to pass through but closes as the reverb tail begins to decay and fall below the threshold.
- Adjust Hold and Release: Fine-tune the gate’s
HoldandReleasecontrols to shape how quickly the reverb is cut off. A short hold and fast release will create a tight, abrupt cutoff, which is characteristic of the classic gated reverb sound.
Parallel Compression
Parallel compression, also known as “New York” compression, is a technique used to add punch and fatness to a drum track without sacrificing its natural dynamics and transients.
It involves blending a heavily compressed version of the signal with the original, uncompressed (dry) signal.
This gives you the best of both worlds: the weight and power of the compressed signal and the crisp, lively transients of the dry signal.
How to set up Parallel Compression:
- Create a Send: Just like with reverb, create an aux track and send your drum track (or the entire drum bus) to it.
- Aggressively Compress: Place a compressor on the aux track and use extreme settings: a very high ratio (e.g., 10:1 or higher), a fast attack to clamp down on the signal, and a fast release to create a pumping, energetic effect.
- Blend to Taste: Use the send fader on your original drum track and the channel fader on the aux track to carefully blend the heavily compressed signal in underneath the dry signal. Start with the compressed channel muted and slowly raise its volume until you feel the drums gain weight and excitement without losing their initial punch.
Sidechain Compression
Sidechain compression is a cornerstone of modern electronic music, used to create the characteristic “pumping” or “ducking” effect where one instrument’s volume is lowered in response to another.
The most common use is to make a synthesizer pad or bassline “duck” out of the way every time the kick drum hits.
This creates rhythmic energy and, more importantly, carves out space in the mix for the kick drum, allowing it to remain clear and powerful.
How to set up Sidechain Compression:
- Insert Compressor: Place a compressor on the track you want to affect (e.g., the synth pad or bassline track).
- Activate Sidechain Input: Locate the “Sidechain” or “Key Input” section of the compressor plugin and select the kick drum track as the input source.
- Adjust Compressor Settings: Now, the compressor will react to the kick drum’s signal instead of the synth’s. Set a relatively high ratio (e.g., 4:1 or 6:1) and adjust the threshold so that the compressor engages and reduces the synth’s volume by a few decibels every time the kick hits.
- Tune Attack and Release: The attack and release settings are crucial for timing the pumping effect. A fast attack will cause the synth to duck immediately, while the release time will determine how quickly it returns to its full volume. Tune the release time to the tempo of your track to create a smooth, rhythmic groove.
By experimenting with these techniques, you can add a professional polish and creative flair to your electronic drum tracks, moving far beyond the capabilities of basic effect application and into the realm of true sound sculpting.
Conclusion: Sculpt Your Signature Sound
The journey from triggering basic samples to sculpting a unique sonic identity is paved with the creative application of audio effects.
This article has systematically deconstructed the essential tools and techniques at your disposal, establishing that an electronic drum pad’s true power is realized not in its stock sounds, but in its potential for transformation.
We have explored the fundamental building blocks of sound design—from the dynamic control of compression to the spatial creation of reverb—and illuminated the critical importance of signal flow in an effects chain.
By understanding the distinct advantages and workflows of onboard effects, hardware pedals, and DAW-based plugins, you are now equipped to choose the setup that best aligns with your creative goals, budget, and performance context.
Ultimately, mastering an effects chain is about making intentional choices to craft a sound that is uniquely yours.
The advanced techniques of gated reverb, parallel compression, and sidechaining are not merely technical exercises; they are artistic methods for adding power, cohesion, and rhythmic energy to your music.
The principles and strategies outlined here provide a robust foundation, but the path forward is one of perpetual experimentation.
We encourage you to break the rules, to reorder your chains, to push parameters to their extremes, and to listen intently to the results.
It is through this process of discovery that you will transcend the role of a player and become a true sonic sculptor, shaping every percussive hit to perfectly serve your musical vision.