A drum practice pad is one of the most fundamental tools in a drummer’s arsenal, serving as far more than a mere substitute for an acoustic drum when quiet practice is necessary.
For the aspiring percussionist, from the beginner tapping out their first single strokes to the intermediate player refining complex rudiments, the choice of a practice pad represents a critical decision that profoundly influences muscular development, technical precision, and the seamless transition to a full drum kit.
A drummer might spend countless hours diligently working on their technique, yet remain unaware that the very surface they are practicing on could be subtly hindering their long-term progress.
The secret lies in a concept central to the physics of drumming: rebound.
This inherent “bounce” of the stick off a surface dictates how our muscles learn to react, how our hands develop control, and ultimately, how effectively our practice time translates into tangible skill on a real drum.
This article will delve into the nuanced world of practice pad rebound, exploring the distinct philosophies behind high-rebound and low-rebound surfaces.
We will dissect the unique benefits and potential drawbacks of each, compare them directly to help you identify which is best suited for specific goals, and provide a roadmap for integrating both into a balanced, highly effective practice regimen, ensuring your hard work on the pad pays off behind the kit.
What is Rebound and Why Does it Matter?
Rebound is the kinetic energy that is returned to the drumstick immediately following its impact with a playing surface.
In the simplest terms, it is the natural bounce-back you feel after a stroke.
Different materials absorb and reflect energy in vastly different ways; for instance, a hard gum rubber surface will return a significant amount of the initial energy back into the stick, creating a high degree of rebound, whereas a softer, more absorbent neoprene or specialized foam surface will dissipate much of that energy upon impact, resulting in a very low rebound.
This principle is not just a feature of practice pads but is fundamental to the feel of an entire acoustic drum set.
The tautly tuned mylar head of a marching snare drum, for example, possesses an extremely high rebound, allowing for crisp, articulate, and rapid-fire rudiments with minimal effort to lift the sticks.
Conversely, the looser head of a floor tom or the soft, giving surface of a large ride cymbal offers considerably less rebound, demanding more muscular effort from the player to lift the stick and prepare for the subsequent stroke.
Understanding this distinction is paramount because it reveals the two primary philosophies of practice pad training: one camp advocates for using high-rebound pads to refine technique and build speed with the assistance of the pad’s bounce, while the other champions low-rebound pads for building raw strength and endurance by forcing the muscles to work against resistance.
Practice Pad Materials and Their Rebound Characteristics
| Material | Typical Rebound Level | Primary Use Case | Analogy |
|---|---|---|---|
| Gum Rubber | High | All-purpose, technique, speed | A bouncy superball |
| Silicone | Very High | Articulation, finger control | Glass surface |
| Neoprene | Low | Strength building, workout | A dense foam mat |
| Recycled Car Tire | Medium-Low | General practice, moderate workout | Asphalt road |
| Specialized Foam | Very Low | Maximum resistance training | A pillow or sandbag |
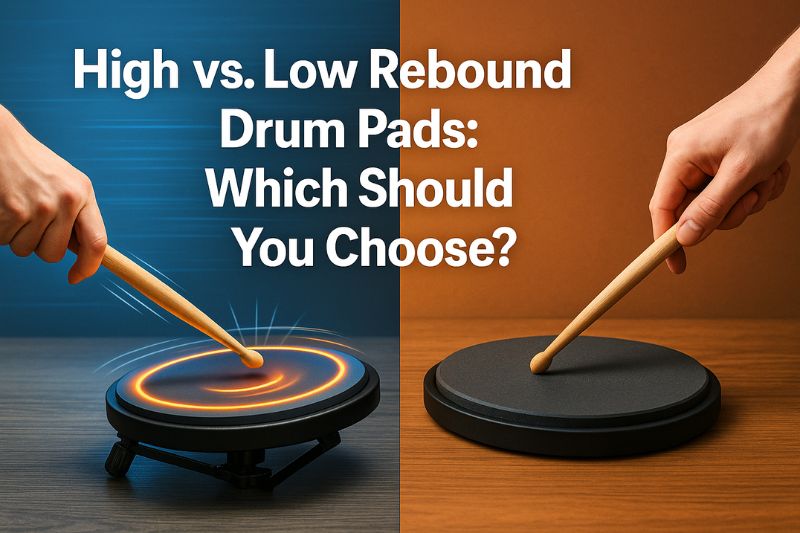
The Case for High Rebound Pads (“The Sprinter’s Track”)
A high-rebound practice pad acts as a magnifying glass for your drumming technique, providing an energetic and responsive surface ideal for refining intricate patterns and developing speed.
These pads, typically constructed from hard gum rubber or silicone, offer a lively, almost effortless feel, where the stick seems to leap back into the hand after each stroke.
The experience is analogous to a sprinter training on a modern, springy track; the surface assists the athlete, allowing them to focus on form, turnover, and top-end speed rather than battling the surface itself.
This environment is exceptionally beneficial for the detailed work of drumming.
It allows a player to meticulously work on their stick control, developing the subtle finger and wrist motions required for clean double-stroke rolls, crisp paradiddles, and other complex rudiments.
Because the pad does much of the work in “lifting” the stick, the player can engage in longer, more focused practice sessions on speed and endurance without being prematurely halted by muscle fatigue.
Furthermore, the sheer fun factor of a high-rebound pad cannot be understated; its lively and engaging response can be highly motivating, encouraging more frequent and enjoyable practice, which is a critical component for progress, especially for beginners.
However, the very advantages of a high-rebound pad can mask underlying deficiencies and lead to significant drawbacks if it is used exclusively.
The most common pitfall is what is often termed the “Practice Pad Hero” syndrome.
A drummer may develop flawless-sounding rudiments on their bouncy pad, only to find that their technique crumbles when they move to a floor tom or a less-responsive cymbal on their acoustic kit.
This happens because they have become reliant on the pad’s rebound to do the heavy lifting, and their muscles have not been adequately conditioned to create the rebound themselves.
This reliance leads to the second major issue: neglected muscle development.
The smaller, crucial muscles in the fingers and wrists responsible for pulling the stick up from the drumhead do not receive a proper workout.
Over time, this can lead to a technique that is fast but lacks power, depth, and adaptability, ultimately hindering a drummer’s versatility and dynamic control on a real drum set.
The Case for Low Rebound Pads (“The Sandy Beach”)
A low-rebound practice pad provides a challenging, absorbent surface that forces a drummer to build foundational strength and impeccable consistency.
These pads, often made from softer, denser rubber compounds, neoprene, or other specialized “workout” materials, feel relatively “dead” to the touch, offering minimal assistance to the stick after it strikes.
The most effective analogy is that of a runner training on a stretch of soft, deep sand; every single stride requires a powerful, deliberate effort to lift the foot and push off, building immense strength and endurance in the process.
This is precisely what a low-rebound pad does for a drummer’s hands.
It compels the player to actively and consciously lift the stick after every single stroke, thereby engaging and strengthening the critical muscle groups in the fingers, wrists, and even forearms.
This type of practice is an unparalleled “workout” for your chops, building the power needed to play with authority and control across any surface.
Moreover, the unforgiving nature of a low-rebound surface acts as an honest mirror, mercilessly exposing any and all inconsistencies in your stroke technique.
You simply cannot cheat on a dead surface; a weak or poorly executed stroke will not be saved by a helpful bounce.
This forces the drummer to develop perfectly even and consistent strokes, which is the bedrock of good drumming.
Consequently, one of the greatest benefits of this demanding practice is a remarkably smoother transition to the acoustic kit.
After spending time building strength on a low-rebound pad, playing on the tighter, more responsive surfaces of snare drums and tom-toms feels comparatively effortless and far more controllable.
However, the difficulty of these pads can also be a significant drawback.
For beginners, or even intermediate players attempting to work on high-speed patterns, the sluggish and unresponsive feel can be incredibly discouraging.
It can make practice feel like a chore and may lead to the development of bad habits if the player is not careful.
To compensate for the lack of rebound, an untrained drummer might begin to use too much arm and not enough wrist, or introduce tension into their grip, which not only leads to sloppy technique but can also increase the risk of repetitive strain injuries.
Application Guide: Matching Pad to Practice Goal
- Goal: Increase Maximum Speed
- Primary Pad: High Rebound
- Reasoning: Allows focus on motion economy and reducing tension at high tempos without being limited by muscular endurance.
- Supporting Exercise: Practice single-stroke rolls and doubles, gradually increasing the metronome marking.
- Goal: Build Hand Strength & Endurance
- Primary Pad: Low Rebound
- Reasoning: Forces every muscle in the chain (fingers, wrists, arms) to work to lift the stick, building raw power.
- Supporting Exercise: Play through accent patterns like “Bucks” or sustained single-stroke rolls at a moderate, controlled tempo for extended periods.
- Goal: Improve Rudiment Cleanliness
- Primary Pad: High Rebound
- Reasoning: The high response highlights inconsistencies in the heights and timing of grace notes and diddles.
- Supporting Exercise: Practice paradiddles, flams, and drag rudiments at a very slow tempo, listening intently for evenness.
- Goal: Develop Consistency for Kit Transition
- Primary Pad: Low Rebound
- Reasoning: Simulates the feel of less-responsive surfaces on a drum kit, like floor toms, ensuring your technique is solid.
- Supporting Exercise: Play simple grooves and fills on the pad as you would on the kit, focusing on a consistent, full sound for every note.
High vs. Low Rebound: A Head-to-Head Comparison
Choosing between high and low rebound pads requires a clear understanding of how each directly serves different aspects of a drummer’s development.
While one builds the engine, the other polishes the chassis.
A direct comparison reveals a symbiotic relationship rather than a rivalry, where the weaknesses of one are the strengths of the other.
For muscle development, the low-rebound pad is the undisputed champion, functioning as a veritable weight room for your hands by demanding constant muscular engagement.
The high-rebound pad, in contrast, places far less focus on the lifting muscles, prioritizing finesse over force.
When considering the realism of the feel in relation to an acoustic drum set, the low-rebound pad more closely emulates the response of a slackened floor tom or a soft cymbal, preparing a drummer for the least responsive surfaces they will encounter.
A high-rebound pad feels more like a highly-cranked marching snare, which, while part of the spectrum of real-drum feels, is less representative of the kit as a whole.
For a beginner, this comparison becomes nuanced; the high-rebound pad offers an encouraging and fun introduction, allowing them to grasp the basic feel of a bouncing stick, while the low-rebound pad, though more challenging, can instill fundamentally stronger and more correct habits from day one, if practiced with caution.
Detailed Feature Showdown
| Feature | High Rebound Pad | Low Rebound Pad |
|---|---|---|
| Primary Training Focus | Technique, articulation, speed, finesse, motion economy.
Excellent for cleaning up rudiments. |
Strength, power, endurance, consistency, muscle development.
Excellent for building “chops.” |
| Acoustic Kit Analogy | Feels like a high-tension marching snare drum or a small, tight tom-tom. | Feels like a low-tension floor tom, a soft ride cymbal, or even a pillow in extreme cases. |
| Effect on Muscles | Develops the “control” muscles for managing an already-existing bounce. | Develops the “creation” muscles for actively lifting the stick when no bounce is present. |
| Feedback Mechanism | Exposes inconsistencies in timing and articulation.
A sloppy double-stroke roll will sound audibly messy. |
Exposes inconsistencies in power and stroke height.
A weak stroke will produce almost no sound or feel. |
| Psychological Impact | Can be highly motivating and fun, promoting longer practice sessions.
Risks creating overconfidence. |
Can be demanding and fatiguing, potentially leading to frustration.
Fosters discipline and mental toughness. |
| Risk of Misuse | Can lead to an underdeveloped technique that is overly reliant on the pad’s assistance. | Can lead to tension and improper large-muscle compensation if the player is not focused on correct form. |
| Best for Beginners? | Good Start: Offers an easier, more encouraging entry point to learn basic stick motion. | Beneficial Challenge: Instills good habits and strength early on, but requires more careful self-monitoring. |
How to Use Both for a Balanced Routine
The most accomplished drummers understand that a truly comprehensive practice routine should incorporate both high and low rebound pads to achieve a fully balanced skillset.
Rather than viewing them as an “either/or” proposition, they should be seen as complementary pieces of training equipment, much like a weightlifter uses both heavy weights for strength and lighter weights for explosive speed.
By strategically switching between the two surfaces, you can build raw power and then apply that power with precision and finesse.
This dual approach ensures that no aspect of your physical technique is neglected, building hands that are not only strong and fast but also controlled, consistent, and highly adaptable to any musical situation or playing surface you might encounter.
An effective routine will use each pad for its specific strengths, creating a whole that is far greater than the sum of its parts.
A Sample Integrated Practice Routine (45 Minutes)
- Phase 1: Warm-up (5-10 minutes)
- Surface: High Rebound Pad
- Goal: To gently increase blood flow to the hands and wrists and activate the neural pathways for drumming.
- Exercises:
- Single strokes at a slow, relaxed tempo (60-80 bpm).
- Slow double strokes, focusing on the evenness of the bounces.
- Wrist-turning exercises like the “stone-killer” to loosen up.
- Phase 2: The Workout (15 minutes)
- Surface: Low Rebound Pad
- Goal: To build foundational strength, power, and muscular endurance.
- Exercises:
- Sustained single-stroke rolls at a powerful but controlled medium tempo (90-110 bpm). Focus on pulling the stick up with your fingers/wrists.
- Accent-to-tap exercises. Play a loud accent followed by a series of quiet taps (e.g.,
Rlll Rlll RlllorRrrr Llll). The dead surface will force you to control the dynamics. - Heavy single-stroke patterns, ensuring full wrist strokes for every note.
- Phase 3: Technique & Speed Application (15 minutes)
- Surface: High Rebound Pad
- Goal: To take the strength built in Phase 2 and apply it to faster, more intricate patterns where technique is paramount.
- Exercises:
- Speed bursts. Push your single-stroke or double-stroke roll to your maximum tempo for 15-20 seconds, rest, and repeat.
- Complex rudiments. Work on paradiddle variations, flams, drags, and ratamacues. The responsive surface will allow you to hear the details clearly.
- Finger control exercises, focusing on executing patterns using only your fingers while keeping your wrists still.
- Phase 4: Cool-down (5 minutes)
- Surface: Either pad (High rebound is often more comfortable)
- Goal: To gradually lower the intensity and allow the muscles to relax, preventing stiffness.
- Exercises:
- Return to slow single strokes, just as in the warm-up.
- Light stretching of the fingers, wrists, and forearms.
Conclusion: Choose Your Pad for Your Purpose
Ultimately, the debate between high and low rebound practice pads resolves not by crowning one as superior, but by recognizing them as specialized tools designed for distinct and equally important tasks.
Neither pad is inherently better or worse; their value is defined entirely by the specific purpose for which they are used.
The journey to becoming a well-rounded drummer is a multifaceted one, requiring the development of a complex ecosystem of skills that includes strength, speed, endurance, finesse, and consistency.
To neglect one area is to limit your potential in all others.
Therefore, the most critical takeaway is to shift your perspective on the practice pad.
It is not merely a tool for keeping the neighbors happy; it is a sophisticated piece of athletic training equipment. Your choice of pad should be as deliberate and goal-oriented as a sprinter choosing between a springy track for speed work and a sandy beach for resistance training.
Ask yourself before each session: “What is my primary goal today? Am I building my engine, or am I polishing the finish?” By answering that question, you can choose the right tool for the job, ensuring that every minute of your practice is maximally effective and moves you one step closer to your drumming aspirations.