The relentless pursuit of the perfect bass drum pedal feel is a journey familiar to every drummer, from the garage novice to the seasoned touring professional.
Drummers invest significant time and resources into selecting a primary or double-bass pedal, meticulously evaluating drive types, footboard lengths, and cam shapes.
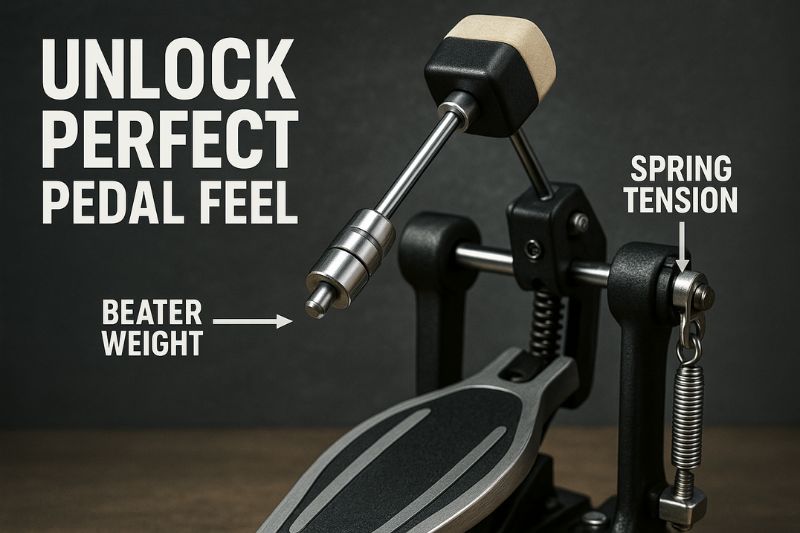
However, the most profound and granular control over a pedal’s performance often lies not in its core construction, but in its smallest, most overlooked components: the pedal accessories.
Specifically, beater weights and springs are the unsung heroes of pedal customization, offering a vast spectrum of adjustments that can fundamentally transform your connection to the instrument.
These simple yet powerful parts allow you to dictate the power, speed, and response of your kick drum, tailoring the pedal’s action to your unique physique, playing style, and musical application with incredible precision.
Understanding how to manipulate these elements is the key to unlocking a new echelon of comfort, efficiency, and raw power in your playing.
This comprehensive guide will delve into the world of these essential pedal accessories, providing you with the knowledge to stop fighting your gear and start making it an extension of your musical intent.
We will begin by thoroughly exploring the function of bass drum beater weights, analyzing how adding or subtracting mass impacts the momentum and force of your stroke and detailing the various types available on the market.
Subsequently, we will demystify the mechanics of drum pedal springs, explaining how spring tension acts as the engine for your pedal’s return speed and how to perform a proper adjustment.
Finally, and most crucially, we will examine the synergistic relationship between weights and springs, teaching you how to balance these two forces to achieve a state of perfect equilibrium for your playing style.
By the end of this article, you will be equipped with the expertise to confidently modify your pedal, troubleshoot feel-related issues, and ultimately find the bespoke setup that allows your feet to execute the patterns you hear in your head with effortless fluidity.
Everything You Need to Know About Bass Drum Beater Weights
What Are Beater Weights and What Do They Do?
Beater weights are precisely machined, attachable masses designed to be affixed to the shaft of a bass drum beater, serving as a primary tool for altering its physical properties.
These accessories, typically crafted from metals like steel, brass, or aluminum, come in various shapes and sizes, from small, discreet collars to larger, more impactful blocks.
The fundamental purpose of a beater weight is to modify the beater’s overall mass and change its center of balance, which directly influences the physics of its swing.
By adding weight, you increase the beater’s inertia and momentum as it travels towards the drumhead, resulting in a more forceful impact.
This is directly analogous to the difference between swinging a light tack hammer versus a heavy sledgehammer; the sledgehammer requires more energy to get moving but strikes with exponentially greater force due to its superior mass.
In the context of drumming, this translates to a more powerful and resonant note from the bass drum with each stroke.
The core concept behind their function is the manipulation of kinetic energy, which is intrinsically linked to both mass and velocity.
A heavier beater, once set in motion, carries more momentum, making it less susceptible to being stopped or slowed by the resistance of the drumhead upon impact.
This results in a fuller transfer of energy, causing the head to resonate more completely and produce a deeper, more substantial tone.
Furthermore, the placement of the weight along the beater shaft allows for nuanced adjustments to the pedal’s feel.
Placing a weight closer to the beater head maximizes the “end-heavy” feel, creating a powerful, pendulum-like swing.
Conversely, placing it closer to the cam assembly can make the pedal feel slightly more balanced and quicker to initiate movement.
Ultimately, beater weights provide a simple, non-permanent method for drummers to experiment with the fundamental trade-off between power and speed, allowing them to find the ideal combination for their sound.
The Impact of Beater Weights on Your Playing
The decision to add or remove beater weights has a direct and immediately noticeable impact on both the sonic character of your bass drum and the physical sensation under your foot.
Opting for a heavier feel by adding one or more weights dramatically increases the power and volume of each stroke, creating a fatter, punchier, and more commanding sound.
This added mass drives the beater head deeper into the drumhead for a fraction of a second longer, resulting in a pronounced low-end “thump” and significant attack that can cut through a dense mix of guitars and cymbals.
Consequently, this setup is overwhelmingly preferred by drummers in louder genres like rock, metal, and punk, where the kick drum needs to be a driving, visceral force that the audience can feel as much as hear.
The trade-off for this power is that it requires more physical effort from the player’s leg to initiate the stroke and control the added momentum, which can sometimes feel more sluggish for extremely fast or intricate patterns.
Conversely, choosing a lighter feel by using a beater with no additional weights allows for a completely different playing experience, prioritizing speed and articulation over raw power.
A lighter beater requires significantly less effort to move, enabling the drummer to play faster and more complex patterns with greater ease and less fatigue over long periods.
The resulting sound is typically more controlled and articulate, with a quicker attack and less overwhelming low-end resonance, making it an ideal choice for genres like jazz, funk, and fusion where nuance and dynamic subtlety are paramount.
Beyond the simple heavy-versus-light dichotomy, the position of the weight on the beater shaft introduces another layer of control.
Sliding a weight up and down the shaft alters the beater’s balance point, which affects the swing and rebound characteristics.
This level of adjustability empowers drummers to fine-tune their kick drum pedal parts to achieve an unprecedented level of control over their sound and feel.
Types of Beater Weights & How to Choose
The market for pedal accessories offers a variety of beater weight designs, each with a unique method of attachment and adjustment, allowing drummers to select a system that best suits their needs for convenience, security, and versatility.
The most common and accessible design is the clip-on or slide-on weight, which is typically a cylindrical or rectangular piece of metal with a channel that fits around the beater shaft and is secured by one or more drum key-operated tension rods.
Their primary advantage is the ease with which they can be added, removed, or repositioned, making them perfect for drummers who are still experimenting to find their preferred feel or who might want to change their setup between different musical situations.
This design allows for rapid, on-the-fly adjustments without the need to disassemble any part of the pedal.
Another popular option is the memory lock style weight, which functions similarly to a standard drum hardware memory lock.
This type clamps securely onto the beater shaft and not only adds mass but also serves as a marker, ensuring that the weight is returned to the exact same position every time the beater is re-installed.
This is invaluable for drummers who have found their perfect balance point and require absolute consistency in their setup, especially for touring musicians who frequently break down and reassemble their kits.
Finally, many pedal and beater manufacturers now offer beaters with built-in adjustable weight systems.
These often feature threaded inserts within the beater head itself, into which small, weighted discs (typically 10g or 20g) can be screwed.
This provides a very clean, integrated look and feel, with the added benefit that the weights are securely housed within the beater head, eliminating any possibility of them shifting or vibrating during play.
Table 1: Comparison of Beater Weight Types
| Weight Type | Primary Advantage | Best For | Considerations |
|---|---|---|---|
| Clip-on/Slide-on | Maximum adjustability and ease of use | Drummers experimenting to find their ideal feel; quick changes. | Can potentially shift or vibrate loose if not tightened securely. |
| Memory Lock Style | Extreme security and positional consistency | Drummers who have a set preference and need repeatable setups. | Less convenient for quick, on-the-fly adjustments. |
| Integrated (Built-in) | Secure, clean aesthetic; no external parts | Players wanting a permanent, hassle-free solution. | Limited to the specific beater model; less universal. |
When deciding which type to choose, the best advice for a drummer new to this concept is to start with a versatile and adjustable set.
A simple clip-on weight, or a beater that comes with several interchangeable weights, provides the perfect platform for experimentation.
This allows you to experience the full spectrum of feels, from ultra-light to powerfully heavy, and to discover how the weight’s position affects the pedal’s response.
This process of trial and error is the most effective way to understand the bass drum beater comparison and ultimately determine what configuration best complements your personal playing style and the demands of your music.
Demystifying Drum Pedal Springs: Your Engine for Speed and Response
The Role of the Spring in Your Drum Pedal
The spring is the active engine of a bass drum pedal, serving the critical function of returning the beater and footboard to their resting positions after a stroke has been played.
While the drummer’s foot provides the force to initiate the forward motion, it is the stored potential energy in the stretched spring that provides the force for the return motion.
The core adjustment related to this component is its tension, which dictates the amount of resistance the pedal offers against the downward press of the foot and, conversely, the speed and force with which it pulls the beater back from the drumhead.
Think of the spring as the counterbalance to your leg’s action; a perfectly adjusted spring works in harmony with your movements, making the pedal feel like a seamless and responsive extension of your foot, while a poorly adjusted spring can make the pedal feel sluggish, overly resistant, or disconnected.
Every drum pedal has a mechanism for adjusting this tension, typically involving a knurled nut or a drum key-operated bolt at the base of the spring assembly.
Tightening this mechanism compresses or stretches the spring further (depending on the design), increasing its tension and the amount of force it exerts.
Loosening it has the opposite effect, reducing the tension and the return force.
This single adjustment is one of the most powerful tools a drummer has for customizing their pedal’s feel. It directly controls the “fight back” of the footboard, influencing everything from the speed of repeated strokes to the amount of physical energy required to play.
Mastering drum pedal tension tips is therefore not just about maintenance, but about actively sculpting the pedal’s performance characteristics to match your desired playing experience.
How Spring Tension Shapes Your Pedal’s Feel
The level of tension applied to the pedal’s spring fundamentally shapes its feel and response, creating a trade-off between power and speed that the player must navigate.
Opting for a high-tension setting, where the spring is tightened considerably, results in a much faster and more forceful return of the beater from the drumhead.
This rapid rebound is highly advantageous for playing quick successive notes, such as double or triple strokes, as the beater is reset to its starting position almost instantaneously, ready for the next impact.
Many drummers feel that a higher tension provides a more direct and connected sensation, where the footboard seems to shadow the foot’s every movement without any lag or sloppiness.
However, this heightened responsiveness comes at a cost.
The increased tension means that more leg power is required to depress the footboard and execute a stroke in the first place.
For some, this can feel “stiff,” “heavy,” or overly resistant, potentially leading to muscle fatigue more quickly, especially during long playing sessions or in musical styles that don’t require constant, rapid-fire kick patterns.
On the other end of the spectrum, a low-tension setting creates a much different playing experience, characterized by a “looser,” “softer,” and more fluid feel.
With less resistance from the spring, the footboard requires significantly less effort to press down, which can feel more comfortable and natural, particularly for players who utilize more ankle-based techniques (like heel-down) or who play in lower-volume settings.
This can promote a more relaxed playing approach and reduce physical strain.
The primary drawback of lower tension is a slower beater return.
The reduced pulling force means the beater takes fractionally longer to rebound from the head and reset.
For fast, articulate patterns, this can create a “sloppy” or “disconnected” feeling, where the player’s foot is ready for the next stroke before the pedal is.
This can make it challenging to execute clean, evenly spaced double strokes and can feel unresponsive to players accustomed to a more immediate pedal action.
Table 2: High Tension vs. Low Tension
| Feature | High Spring Tension | Low Spring Tension |
|---|---|---|
| Feel | Stiff, resistant, connected, immediate | Loose, soft, fluid, effortless |
| Beater Return | Very fast and forceful | Slower and more gentle |
| Pros | Excellent for speed and repeated strokes; feels very responsive. | Requires less leg power; reduces fatigue; feels more relaxed. |
| Cons | Requires more effort to play; can feel fatiguing. | Can feel “sloppy” or disconnected; slower for rapid patterns. |
| Best For | Metal, Speed Rock, Funk (for articulate doubles) | Jazz, Blues, Singer-Songwriter, Heel-Down players |
How to Adjust Your Pedal’s Spring Tension (A Quick Guide)
Adjusting the spring tension on your bass drum pedal is a straightforward process that can yield dramatic results.
While the exact mechanism can vary slightly between manufacturers, the principles are universal.
Following a methodical approach will help you find your ideal setting efficiently.
A Step-by-Step Guide to Tension Adjustment:
- Locate the Adjustment Mechanism:
- First, identify the spring assembly on your pedal.
- You will see a spring connected between the cam/hub assembly and a lower anchor point.
- At this lower point, there will be an adjustment mechanism, most commonly a pair of knurled nuts (one for adjusting, one for locking) or a single, drum key-operated bolt.
- Start from a Neutral Position:
- Before making any changes, it’s often helpful to start from a point of zero tension to feel the full range of adjustment.
- Carefully loosen the locking nut (the one on the bottom, if you have two) and then fully loosen the main adjustment nut until the spring is at its most relaxed state.
- Make Small, Incremental Changes:
- Begin to tighten the main adjustment nut.
- The key to this process is to make very small changes at a time—a quarter-turn or a half-turn is plenty.
- After each small adjustment, sit at the kit and play the pedal.
- Pay close attention to how the feel changes.
- Does it feel more responsive? Does it feel too stiff?
- Test with Your Playing Style:
- Don’t just play single notes.
- Test the new setting by playing the types of patterns you use most often.
- If you play a lot of fast double strokes, test those.
- If you play slow, powerful grooves, test that feel.
- The right tension for one style may not be the right tension for another.
- Listen as Well as Feel:
- Pay attention to how the tension affects your sound.
- A higher tension might cause the beater to pull away from the head faster, potentially creating a slightly more open, resonant tone.
- While the effect is subtle compared to beater choice, it is still a factor.
- Secure the Setting:
- Once you find a tension that feels comfortable, responsive, and suited to your playing, securely tighten the locking nut (if present) against the main adjustment nut.
- This will prevent the vibrations from your playing from causing the setting to loosen over time.
- Consult Your Manual:
- If you are ever unsure about the specific mechanism on your pedal, always refer to the manufacturer’s manual.
- It will provide a clear diagram and instructions for your particular model, which is one of the most important kick drum pedal parts to understand.
The Synergy: How Beater Weights and Springs Work Together
The true art of pedal customization lies in understanding the crucial synergistic relationship between beater weight and spring tension; these two elements do not exist in a vacuum, and an adjustment to one will almost certainly impact the performance of the other. Achieving a state of perfect pedal equilibrium is about balancing the momentum generated by the beater’s mass with the return force generated by the spring’s tension.
A heavy beater requires a stronger spring to pull it back from the head quickly, while a light beater can feel overly stiff and choked if paired with a spring that is too tight.
Thinking of these two components as a team, rather than as separate adjustments, is the key to unlocking a truly personalized and efficient pedal feel.
This interplay can be best understood through practical examples.
Imagine you want a powerful, driving kick sound for your rock band.
Your first step would be to add a beater weight.
However, this added mass now makes the pedal feel sluggish and slow on the return stroke.
The beater seems to “dwell” on the head for too long, making it difficult to play faster fills.
The solution is not to simply accept this sluggishness, but to counteract it by increasing the spring tension. By tightening the spring, you increase the return force, effectively “helping” the heavier beater rebound more quickly.
The goal is to find the sweet spot where you have the power of the added weight, but the spring is just tight enough to make the pedal feel responsive and not slow.
Conversely, consider a scenario where you want an ultra-light, fast, and fluid feel for playing intricate jazz patterns.
You would start by removing all beater weights and perhaps even switching to a naturally lighter beater (like a felt or fleece model).
Now, the pedal feels quick, but the spring tension that worked for your old, heavier setup now feels incredibly stiff and resistant.
It requires too much effort to press the pedal down, and the footboard jumps back with a jarring force.
The solution here is to decrease the spring tension. By loosening the spring, you reduce the resistance, allowing the light beater to be moved with minimal effort, creating that “buttery” smooth feel you’re looking for.
The pedal becomes an effortless extension of your foot, perfectly matched to the low-mass beater.
Finding Your Ideal Balance:
- Goal: Maximum Power & Volume:
- Start by adding a beater weight.
- Then, incrementally increase spring tension until the pedal’s return feels responsive and not sluggish.
- Goal: Maximum Speed & Articulation:
- Start by removing all beater weights.
- Then, incrementally decrease spring tension until the pedal feels fluid and effortless, without being “sloppy” or disconnected.
- Goal: A Balanced, All-Around Feel:
- Start with a medium-weight beater (or a single, small weight) and a medium spring tension.
- Adjust each component in small increments, one at a time, until you find a combination that feels versatile for various playing styles.
Ultimately, the key takeaway is that beater weights and springs are two sides of the same coin. The weight determines the momentum of the stroke, while the spring determines the speed of the recovery.
The process of finding your perfect feel is a balancing act between these two forces, a methodical exploration to discover the equilibrium point where the pedal feels most comfortable, efficient, and musically inspiring to you.
Conclusion: Experiment and Find Your Perfect Feel
In conclusion, the journey to perfecting your bass drum pedal’s performance is a deeply personal one that extends far beyond the initial purchase.
The true potential for customization is unlocked when you engage with its most fundamental accessories: the beater weights, which govern the power and momentum of your stroke, and the springs, which control the speed and responsiveness of its return.
By understanding that beater weights add mass to create a fatter, more powerful impact at the cost of some agility, and that spring tension provides the reactive force to counterbalance that mass, you gain complete control over the physics of your pedal.
These components are not static features but dynamic tools waiting to be adjusted to your exact specifications.
The single most important piece of advice is to not be afraid to experiment. Set aside some dedicated practice time with a drum key and an open mind.
Make one small adjustment at a time—add a weight, turn the spring nut a quarter-turn—and then play, feel, and listen intently to the result.
This methodical process of trial and error is invaluable. It will teach you more about your own playing preferences and the mechanics of your gear than any article or video ever could.
By systematically exploring the relationship between weight and tension, you will eventually discover that perfect equilibrium where the pedal ceases to be a piece of hardware and becomes a truly transparent extension of your musical ideas, allowing you to execute any rhythm with comfort, power, and precision.
Take control of your gear, and you will undoubtedly take control of your sound.