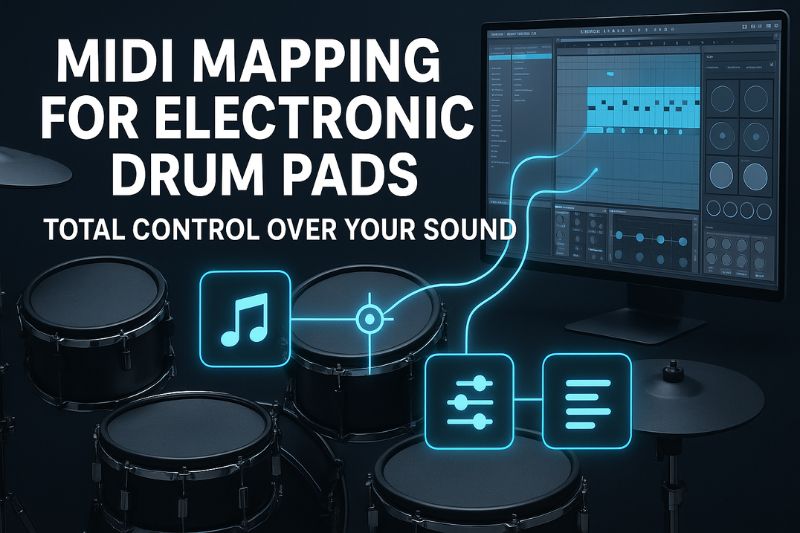
MIDI mapping is the single most powerful tool for transforming your electronic drum kit from a simple practice instrument into a fully customized, expressive percussion powerhouse.
This process involves assigning the digital signals generated by your drum pads to trigger specific sounds, functions, or effects within a software environment, effectively allowing you to build your dream instrument from the ground up.
By moving beyond the often-limited sounds pre-loaded in a drum module, you gain access to an infinite sonic palette and can create a setup that is perfectly tailored to your physical playing style and creative workflow, a paradigm shift that fundamentally enhances both playability and artistic expression.
This article will serve as a definitive guide to mastering the art and science of MIDI mapping for your electronic drum pads.
We will begin by demystifying the core concepts of MIDI itself, ensuring you have a solid foundation before proceeding.
Subsequently, we will explore the profound benefits of creating a custom map, providing the motivation to personalize your setup for improved ergonomics, an expanded sound library, and a more streamlined creative process.
From there, we will detail the essential hardware and software toolkit required to get started, offering a comparative look at popular Digital Audio Workstations (DAWs).
The heart of this article is a meticulous, step-by-step walkthrough of the mapping process, followed by a crucial, in-depth troubleshooting section designed to help you navigate and resolve the most common issues like latency, crosstalk, and incorrect note assignments.
Ultimately, this comprehensive journey will empower you to take complete control over your electronic drum kit, unlocking a new level of creativity and personalization.
What is MIDI Mapping for Electronic Drum Pads?
Demystifying MIDI
Musical Instrument Digital Interface, or MIDI, is a technical standard and communications protocol that allows electronic instruments, computers, and other related devices to communicate performance information with one another.
It is crucial to understand that MIDI is not an audio signal; it carries no sound itself. Instead, it is a stream of digital data, a set of instructions that details the mechanics of a performance.
This data includes which note was played (e.g., which pad was struck), the velocity of the hit (how hard the pad was struck), how long the note was held, and other control parameters like aftertouch or pedal position.
Think of it as a digital form of sheet music or a player piano roll rather than an audio recording.
This distinction is fundamental because it makes MIDI incredibly flexible; since it’s just data, you can easily edit it, change the instrument that plays it back, correct timing mistakes, and alter dynamics long after the original performance has been recorded.
The Role of the Drum Module and DAW
The electronic drum module acts as the brain of your kit and the primary translator in the MIDI communication chain.
When you strike a pad, the internal sensor (typically a piezoelectric trigger) registers the physical impact and its force.
The drum module instantly converts this analog vibration into a digital MIDI message, assigning it a specific MIDI Note Number and a velocity value.
This data is then sent out from the module, typically through a USB or traditional 5-pin MIDI port.
A Digital Audio Workstation (DAW) is the software environment on your computer that receives these MIDI messages.
Inside the DAW, you load a software instrument, such as a high-end drum sampler Virtual Studio Technology (VST) plugin or a native drum machine.
The DAW routes the incoming MIDI data from your drum module to this plugin, which then interprets the instructions.
When the plugin receives, for example, MIDI Note 38 with a velocity of 110, it knows to play its “acoustic snare drum” sample at a corresponding volume level, sending that audio to your headphones or speakers.
Defining MIDI Mapping
MIDI mapping, at its core, is the process of creating a personalized set of rules that dictate which sound or action is triggered when you strike a specific pad.
While your drum module comes with a default map (e.g., the top-left pad sends MIDI Note 48, which the module’s internal sound engine interprets as a hi-hat), custom MIDI mapping allows you to override this and create your own associations within your DAW or VST plugin.
For example, you can tell your software, “When you receive MIDI Note 48 from my drum kit, I want you to play the sound of a cowbell” or “trigger the recording of a new clip.” This is typically accomplished using a “MIDI Learn” function in the software, which listens for the next incoming MIDI message and automatically assigns it to a selected parameter.
This remapping capability transforms your drum pads from a fixed instrument into a versatile and fully configurable MIDI controller, opening up a universe of creative possibilities far beyond standard percussion.
Why Custom MIDI Map Your Electronic Drum Pads? The Benefits of a Personalized Setup
Ergonomics and Playability
Arranging your drum pads through custom MIDI mapping allows you to create a kit layout that perfectly conforms to your unique physical playing style and comfort.
Every drummer has a different physical build, reach, and preference for how their kit components are positioned.
Instead of being forced to adapt to a hardware manufacturer’s default layout, you can assign any sound to any pad.
This means you can place your most frequently used sounds, like the kick, snare, and hi-hats, on the pads that are most comfortable and natural for you to strike.
This ergonomic optimization can lead to more fluid and efficient playing, reduce the risk of repetitive strain, and ultimately make your practice sessions and performances feel more intuitive and enjoyable.
You are no longer fighting the instrument; you are making it an extension of your body.
Unleashing a Universe of Sounds
The single most exciting benefit of MIDI mapping is breaking free from the sonic limitations of your drum module’s built-in sound library.
While stock sounds have improved, they often cannot compare to the meticulously sampled, multi-layered, and dynamic sounds available in professional drum VST plugins like Superior Drummer 3, Addictive Drums 2, or GetGood Drums.
By mapping your pads to trigger these high-quality samples, you can make your electronic kit sound indistinguishable from a world-class acoustic kit recorded in a professional studio.
Furthermore, your creative palette is not limited to drums.
You can assign any sound imaginable to your pads: melodic loops, vocal chops, orchestral stabs, synthesized sound effects, or bass notes.
This transforms your drum kit into a comprehensive performance instrument, capable of launching entire song sections or adding complex textural layers to a live performance.
Enhancing Creativity and Workflow
A thoughtfully designed MIDI map can dramatically enhance your creative process and streamline your music production workflow.
You can create different mapping presets for various genres or even specific songs, allowing you to instantly call up a completely different kit and sound palette at the click of a button.
For producers and solo performers, this efficiency is revolutionary.
You can assign pads to control essential DAW functions—such as starting and stopping playback, arming tracks for recording, triggering loops in Ableton Live’s Session View, or toggling effects on and off.
This eliminates the need to constantly switch between your drumsticks and your computer mouse and keyboard, allowing you to stay in the creative flow and capture ideas as they happen.
Layering sounds, where a single pad strike triggers multiple samples simultaneously (e.g., a snare and a clap), is another powerful technique for creating rich, modern drum tones, made simple through custom mapping.
The Essential Toolkit: What You’ll Need
Successfully embarking on your MIDI mapping journey requires a specific set of hardware and software components working in harmony.
Having the right tools will not only make the process possible but also significantly more efficient and rewarding.
The following tables and lists outline the necessary equipment and key software features to look for.
| Component | Function | Examples |
|---|---|---|
| Electronic Drum Kit | The physical interface you play.
It must have MIDI output capabilities. |
Roland V-Drums Series, Alesis Nitro Mesh/Surge, Yamaha DTX Series |
| Computer | The central processing unit that runs your DAW and VST plugins. | Any modern Windows PC or Apple Mac with sufficient RAM (8GB+) and processing power. |
| Audio Interface | Converts digital audio from the computer to an analog signal for speakers/headphones.
Essential if using 5-pin MIDI, as it provides MIDI In/Out ports. |
Focusrite Scarlett Series, PreSonus AudioBox, Universal Audio Apollo |
| DAW Software | The program that hosts your virtual instruments and where you record, edit, and map MIDI. | Ableton Live, Logic Pro X, Reaper, FL Studio, Cubase |
| Cables | To connect your hardware. | USB A-to-B (for direct module-to-computer connection), 5-pin MIDI cables (for connecting to an audio interface). |
Hardware Deep Dive
Your electronic drum kit is the starting point.
The critical feature is its ability to send MIDI data, which virtually all modern kits can do via a USB Type-B port.
This allows for a direct connection to your computer.
Older or more professional-grade modules may also feature traditional 5-pin MIDI DIN connectors.
If your module only has a 5-pin MIDI Out port, an audio interface becomes non-negotiable.
The interface connects to your computer via USB/Thunderbolt and serves two purposes: it provides the physical 5-pin MIDI In port to receive data from your drums, and it handles audio output, providing a high-quality signal to your headphones or studio monitors with much lower latency than your computer’s built-in headphone jack.
Software Deep Dive
The Digital Audio Workstation (DAW) is your command center.
While many DAWs exist, those popular for electronic drumming share some key features.
When choosing a DAW, consider the following:
- Intuitive MIDI Editing: A clear and powerful Piano Roll or MIDI editor is essential for fine-tuning your performances.
- Simple MIDI Learn Functionality: The process of assigning controls should be straightforward.
- Low-Latency Performance: The DAW should be stable and efficient to handle real-time playing.
- VST/AU Plugin Support: It must be able to host third-party drum sampler plugins, as this is where you’ll get your best sounds.
- Flexible Routing: The ability to easily route MIDI and audio between tracks.
Here is a comparison of some popular DAWs highlighting their strengths for drummers:
| DAW | Strengths for Drummers | Learning Curve | Common Use Case |
|---|---|---|---|
| Ableton Live | Unmatched for live performance and loop/clip launching. Simple drag-and-drop workflow and powerful “Drum Rack” instrument.
Excellent MIDI effect devices. |
Moderate | Live Performance, Electronic Music Production, Songwriting |
| Logic Pro X | (Mac Only) Massive library of high-quality stock sounds, including the versatile “Drum Kit Designer” and “Drum Machine Designer.” Robust MIDI editing and comping features. | Moderate | Studio Production, Songwriting, Film Scoring |
| Reaper | Extremely customizable, affordable, and lightweight. Offers deep MIDI routing and scripting capabilities for advanced users who want to build a truly bespoke workflow. | Steep (due to customization) | Power Users, Home Studios, Post-Production |
| FL Studio | Famous for its pattern-based sequencer and fast Piano Roll workflow, making it a favorite for beat-making and electronic genres. | Moderate | Hip-Hop and EDM Production, Beat-Making |
| Cubase | A long-standing industry standard with powerful MIDI editing tools, including logical editors and excellent drum mapping features within its “Groove Agent” instrument. | Moderate to Steep | Professional Studio Recording, MIDI Composition |
A Step-by-Step Guide to MIDI Mapping Your Drum Pads
This section provides a universal, step-by-step process for mapping your electronic drum pads.
While the specific menu names or locations may vary slightly between different DAWs, the underlying principles and workflow remain consistent across all major music production software.
The Initial Connection
The first step is to physically establish communication between your drum module and your computer.
- Connect Your Hardware:
- If using USB: Connect a USB Type-B cable from the “USB to Host” or “USB Computer” port on your drum module directly to an available USB port on your computer. This single cable will carry the MIDI data and often makes the kit “plug-and-play.”
- If using 5-pin MIDI: Connect a 5-pin MIDI cable from the “MIDI Out” port on your drum module to the “MIDI In” port on your audio interface. Then, ensure your audio interface is connected to your computer via its USB or Thunderbolt cable.
- Install Drivers: Most modern electronic drum kits are “class-compliant,” meaning they don’t require special drivers. However, it is always best practice to visit the manufacturer’s website (Roland, Alesis, Yamaha, etc.) and download the latest driver for your specific model. This ensures the most stable connection and performance. Install the driver before proceeding.
- Power On: Turn on your audio interface (if using one) first, then your computer, and finally your electronic drum module.
Setting Up Your DAW
With your hardware connected, you now need to configure your software to recognize and listen to your drum kit.
- Open DAW Preferences: Launch your DAW and navigate to its settings or preferences menu. This is often found under “Options,” “Setup,” or the application’s name in the main menu bar (e.g., “Live” > “Preferences” in Ableton Live).
- Configure MIDI Input: Find the MIDI or MIDI/Sync tab. You should see a list of available MIDI input devices. Locate your electronic drum kit or audio interface in this list and ensure it is enabled or checked. If you don’t see your device, go back to the previous step and troubleshoot your connections and drivers.
- Create an Instrument Track: Close the preferences and create a new track in your project. Be sure to select “MIDI Track” or “Software Instrument Track,” not an “Audio Track.”
- Load a Drum Plugin: On this newly created track, load a virtual instrument. This could be a drum VST like Addictive Drums 2 or your DAW’s native drum sampler, such as Logic’s “Drum Kit Designer” or Ableton’s “Drum Rack.”
- Arm the Track: To hear anything, you must “arm” the track for recording. This tells the DAW to listen for incoming MIDI on that specific track. There is usually a red “record” or “arm” button on the track itself. Once armed, hitting a pad on your kit should produce a sound from the plugin and show activity on the track’s MIDI meter.
The Mapping Process: The “MIDI Learn” Function
This is where you customize the link between your physical pads and the software’s sounds.
The “MIDI Learn” feature is your most important tool.
- Enter MIDI Map Mode: Locate the MIDI mapping function in your DAW or plugin. This might be a button labeled “MIDI,” “Learn,” “Map,” or it could be a key command (e.g.,
Cmd + Min Ableton Live). In some plugins, you may need to right-click on a parameter to find the “Learn MIDI Assignment” option. - Select a Sound/Parameter: Within your drum plugin’s interface, click on the drum piece you want to map. For example, click on the image of the snare drum or the pad labeled “Snare” in the software.
- Strike the Physical Pad: With the software parameter selected and MIDI Learn mode active, simply strike the physical pad on your electronic drum kit that you want to use for the snare sound.
- Confirm the Assignment: The software will detect the incoming MIDI note from your pad and instantly assign it to control the snare sound. You have just created your first custom mapping.
- Repeat for All Pads: Continue this process—select a new sound in the software, then strike the desired physical pad—for all the components of your kit (kick, toms, cymbals, etc.) until your entire layout is configured to your liking.
- Exit MIDI Map Mode: Once finished, be sure to disable MIDI Learn mode to prevent accidental reassignments.
Saving Your Custom Map
After meticulously crafting your perfect layout, the final and most crucial step is to save your work as a preset. If you don’t, your custom map will be lost as soon as you close the project or load a different sound kit.
- Plugin Presets: Most VST plugins have their own preset manager. Look for a “Save” or “Save Preset” option within the plugin’s window. Give your map a descriptive name, like “My Rock Kit Layout” or “Live Performance Map.”
- DAW Presets: You can often save the entire track—with the plugin and its custom map loaded—as a track preset or template within your DAW. This allows you to quickly drag and drop your fully configured drum setup into any new project.
Taking the time to save your presets will build a library of custom layouts that will massively accelerate your workflow in the future.
Troubleshooting Common MIDI Mapping Issues
Even with a perfect setup, you may encounter issues.
This section addresses the most common problems drummers face when mapping their kits and provides clear, actionable solutions to get you back on track.
Troubleshooting Quick Reference
| Issue | Common Causes | Primary Solutions |
|---|---|---|
| No Sound / No Signal | – Incorrect physical connections. – Device not enabled in DAW. – Track not armed for recording. – Wrong MIDI channel. |
– Double-check all USB/MIDI cables.
– Verify the kit is active in DAW’s MIDI preferences. – Click the track’s “Arm/Record” button. – Ensure the module and DAW are on the same MIDI channel (usually Ch. 10 for drums). |
| Latency (Delay) | – Audio buffer size is too high. | – Lower the buffer size in DAW’s audio preferences (e.g., 256, 128, or 64 samples).
Find the lowest setting without audio crackles. |
| Crosstalk / False Triggers | – Pad sensitivity is too high.
– Vibration from one pad travels through the rack and triggers another. |
– Lower the “Sensitivity” or “Gain” on the problem pad(s) in your drum module’s settings. – Increase the “Threshold” setting in the module. |
| Incorrect Sounds Triggering | – Mismatched MIDI note mapping between module and software. | – Perform a full remap using the “MIDI Learn” function.
– Use a preset map in your VST that matches your drum kit brand (e.g., a “Roland” or “Alesis” map). |
| Inconsistent Velocity | – Velocity curve setting doesn’t match your playing style. | – Adjust the “Velocity Curve” in your drum module or VST plugin (try Linear, Log, or Exponential settings). |
No Sound or Signal
This is the most frequent and frustrating initial problem.
The solution is usually simple and systematic.
- Check Physical Connections: Start with the most obvious. Is the USB cable firmly plugged into both the module and the computer? If using an interface, is the MIDI cable going from the module’s OUT to the interface’s IN? Is the interface powered on?
- Verify DAW Settings: Re-open your DAW’s MIDI preferences and confirm that your drum kit or interface is listed and enabled. If it’s not there, the issue is with your driver or physical connection.
- Arm the Correct Track: Ensure the software instrument track you created is armed for recording. The record button on the track should be on and likely flashing. Without this, the DAW is not listening for MIDI on that track.
- Check MIDI Channel: Most drum modules and drum VSTs default to MIDI channel 10. Check your module’s global settings to ensure it’s transmitting on channel 10, and check that your DAW track is set to receive on “All Channels” or specifically channel 10.
Crosstalk (False Triggers)
Crosstalk occurs when the vibration from striking one pad travels through the drum rack and is strong enough to trigger the sensor of an adjacent pad.
For example, you hit the snare, but you also hear a faint tom sound.
- Adjust Threshold: In your drum module’s advanced settings, find the “Threshold” parameter for each pad. The threshold is the minimum force required to register a hit. By increasing the threshold on the pad that is being falsely triggered, you tell it to ignore these weaker, unintended vibrations.
- Lower Sensitivity: If increasing the threshold isn’t enough, try slightly lowering the “Sensitivity” or “Gain” of the pad that is being falsely triggered. This makes the pad less reactive overall.
- Mechanical Isolation: Ensure all your pads are securely clamped to the rack. Sometimes, simply creating a bit more physical space between two problem pads can significantly reduce the vibration transfer.
Latency (Delay)
Latency is the delay between when you strike a pad and when you hear the corresponding sound from your computer.
A noticeable delay makes playing feel disconnected and un-rythmic.
- Lower the Buffer Size: This is the most effective solution. In your DAW’s audio preferences, find the “Buffer Size” setting. A high buffer size (e.g., 1024 samples) gives your computer more time to process audio, making it more stable but increasing latency. A lower buffer size (e.g., 128 or 64 samples) reduces latency but puts more strain on your computer’s CPU. Your goal is to find the lowest possible buffer size that doesn’t result in audio glitches, clicks, or pops.
- Use an Audio Interface: A dedicated audio interface with its own ASIO (on Windows) or Core Audio (on Mac) drivers will always provide lower latency performance than a computer’s built-in soundcard.
Inconsistent Velocity
This issue arises when your playing dynamics don’t translate accurately to the software.
You might feel like you have to hit the pads extremely hard to get a loud sound, or conversely, even your softest hits sound too loud.
- Adjust the Velocity Curve: In both your drum module and your VST plugin, there will be a “Velocity Curve” setting. This controls the relationship between how hard you hit the pad (input velocity) and the volume of the resulting sound (output velocity).
- Linear: A direct 1:1 relationship.
- Logarithmic (Log): You can achieve louder sounds with less force, good for players with a lighter touch.
- Exponential (Exp): Requires more force to achieve louder sounds, offering more dynamic range at lower volumes for nuanced playing.
- Experiment with these settings until the response feels natural to your playing style.
Conclusion: Your Drums, Your Rules
Mastering the intricacies of MIDI mapping is an investment of time that pays immeasurable dividends in playability, creativity, and sonic quality.
It represents the crucial step from being a user of an electronic instrument to becoming the architect of your own personalized percussive environment.
By moving beyond the factory settings, you are no longer constrained by the limitations of your drum module’s internal library or its default layout.
You gain the power to harness world-class drum sounds, build ergonomic setups that feel like a natural extension of your body, and streamline your workflow in ways that keep you locked in the creative zone.
The process may present initial challenges, but as we have seen, every common problem has a logical solution.
We encourage you to embrace experimentation, to build and rebuild your maps, and to discover the unique and powerful combinations that work for you.
Your drums should not dictate how you play; you should dictate how they perform. With the knowledge from this guide, you now have the tools to make that a reality.