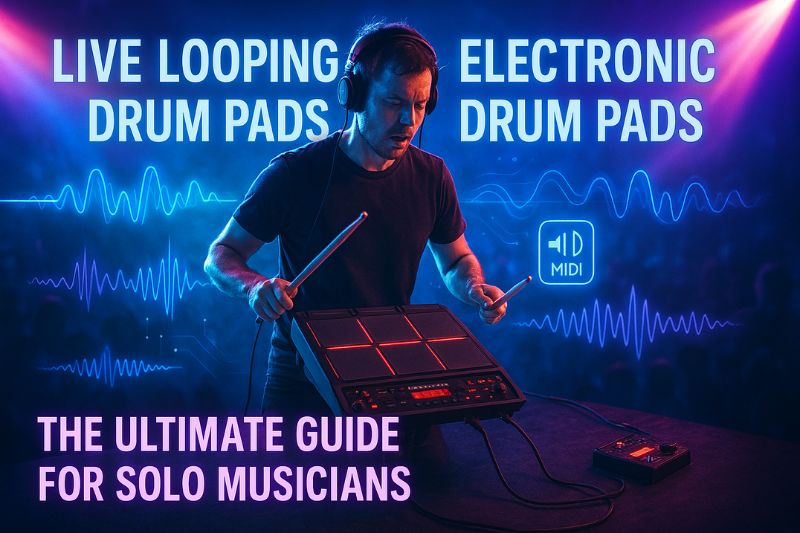
Imagine a solo musician taking the stage, an expectant hush falling over the crowd.
With a few deft taps on a set of electronic drum pads, a simple, infectious beat emerges.
Another tap, and a layer of intricate hi-hats joins the rhythm.
Within moments, a complex, multi-layered percussive foundation fills the room, built from scratch right before the audience’s eyes.
This captivating process is the essence of live looping, a performance technique that empowers musicians to construct entire sonic landscapes in real time.
By using electronic drum pads as their instrument, performers can harness a universe of sounds, from the punch of a vintage drum machine to the organic timbre of acoustic percussion, all triggered from a single, compact interface.
The synergy between electronic drum pads and live looping technology has unlocked a new frontier of creative expression, particularly for solo artists, producers looking to bring their studio creations to the stage, and drummers aiming to expand their percussive palette.
This comprehensive guide will serve as your roadmap into the exhilarating world of live looping with electronic drum pads.
We will begin by exploring the manifold benefits of this dynamic combination, illustrating why it has become such a popular choice for modern musicians seeking both creative liberty and practical efficiency.
From there, we will delve into the essential gear you’ll need to build your own looping setup, breaking down the options from entry-level to professional-grade equipment.
To ensure you can hit the ground running, we will provide a clear, step-by-step tutorial for creating your first loops using both hardware and software solutions.
To elevate your looping skills, we will then share advanced techniques and tips for crafting more sophisticated and musical arrangements.
Finally, we will address common challenges you might encounter and offer practical solutions, ensuring your journey into live looping is as smooth and rewarding as possible.
Why Use Electronic Drum Pads for Live Looping? The Benefits
The primary advantage of using electronic drum pads for live looping lies in the unparalleled creative freedom and spontaneity they afford the performer.
Unlike pre-recorded backing tracks, live looping is an interactive process where musical ideas can be conceived, executed, and layered in the heat of the moment.
This immediacy allows for dynamic performances that can adapt to the energy of the room or the artist’s own improvisational whims.
An electronic drum pad, with its array of assignable sounds, becomes a powerful command center for this creativity.
A single pad can trigger a thunderous kick drum, while the one next to it might unleash a melodic sample or a textured atmospheric sound, enabling the construction of a complete rhythmic and sonic structure from a series of spontaneous, intuitive gestures.
This method transforms the performance from a static recitation into a vibrant, evolving musical conversation.
Furthermore, this setup uniquely empowers a solo musician to build incredibly complex and evolving rhythmic arrangements that would typically require multiple percussionists.
The process begins with a foundational beat—perhaps a simple kick and snare pattern.
With the first loop established, the performer can then overdub additional layers.
Intricate hi-hat patterns, ghost notes on the snare, tom fills, and auxiliary percussion like cowbells or tambourines can be seamlessly woven into the sonic tapestry.
With multi-track loopers, a performer can even create separate, distinct drum patterns on different tracks, allowing them to switch between a verse beat and a chorus beat, or to introduce a percussive breakdown, all with the tap of a pedal or pad.
This ability to stack and manipulate rhythmic layers grants a single artist the percussive power and complexity of a full ensemble.
Employing live looping with electronic drum pads significantly enhances live performances by making them more visually and sonically engaging.
The audience is no longer just a passive listener; they become witnesses to the act of creation itself.
Watching a performer meticulously build a track from the ground up, layer by layer, is an inherently compelling experience.
It demystifies the music-making process in a way that is both educational and entertaining.
The sonic benefit is equally profound.
Instead of being confined to a static backing track, the artist can create a performance with a dynamic arc, building tension by gradually adding elements and releasing it by stripping them away.
This level of control results in a more organic and “live” feel that resonates powerfully with audiences.
From a purely practical standpoint, the combination of electronic drum pads and a looper offers a remarkably portable and compact setup. For the gigging musician, this is a game-changer.
An entire rig, capable of producing the sound of multiple full drum kits and a percussion section, can often be packed into a single backpack or case.
Contrast this with the logistical nightmare of miking and transporting an acoustic drum kit.
This portability is not just about convenience; it opens up performance possibilities in smaller venues, at open mic nights, or for street busking, where a full acoustic setup would be impractical or impossible.
The small footprint on stage also leaves more room for other instruments and performers, making it an ideal solution for musicians working in diverse and often space-constrained environments.
Finally, the immense sound versatility of electronic drum pads is a key reason for their dominance in the live looping scene.
Modern drum pads and samplers come pre-loaded with a vast library of high-quality sounds, ranging from meticulously sampled acoustic drum kits to iconic electronic and synthesized drum machine tones.
The creative potential extends even further, as most pads allow users to load their own custom samples.
This means a performer can trigger not just drum sounds, but also bass lines, keyboard chords, vocal hooks, or atmospheric soundscapes—all from the same interface.
This capability effectively transforms the electronic drum pad from a mere percussion instrument into a comprehensive music production and performance station, allowing for the creation of fully realized arrangements on the fly.
Essential Gear for Live Looping with Electronic Drum Pads
To begin your journey, you will need to assemble a few core components, with the most crucial being the electronic drum pad itself.
These devices come in various configurations, the most common for looping being multi-pad units like the iconic Roland SPD-SX PRO or the versatile Alesis Strike MultiPad.
These all-in-one solutions feature multiple velocity-sensitive pads, an extensive built-in sound library, and, most importantly, the ability to sample audio directly and function as a MIDI controller.
When selecting a pad, crucial features to consider include the quality and feel of the pads, the amount of onboard storage for your own samples, the intuitiveness of the user interface, and the I/O options for connecting to other gear.
For those on a tighter budget or with simpler needs, smaller four-pad units or even single trigger pads can be an effective starting point, especially when paired with a capable external looper or software.
The second critical piece of equipment is the looping device, which can be either a dedicated hardware unit or a software-based solution.
Hardware loopers, often in the form of foot pedals or tabletop stations, are a popular choice for their tactile control and road-worthy durability.
Entry-level pedals such as the TC Electronic Ditto or Boss RC-1 offer straightforward, one-button looping, which is excellent for learning the fundamentals.
More advanced loop stations, like the Boss RC-505mkII (a tabletop unit popular with beatboxers and electronic artists) or the floor-based RC-600, provide multiple stereo tracks, built-in effects, extensive memory, and MIDI synchronization capabilities.
This MIDI sync is particularly vital for drummers, as it allows the looper’s tempo to be perfectly locked with a drum machine, a DAW, or even the drum pad itself, ensuring every layer is rhythmically flawless.
Alternatively, you can use a software looper, which typically involves running a Digital Audio Workstation (DAW) on a laptop.
DAWs like Ableton Live are renowned for their powerful and flexible looping capabilities, particularly the “Session View,” which is designed specifically for non-linear, loop-based composition and performance.
Using a DAW provides virtually unlimited tracks, access to a universe of VST instruments and effects, and advanced editing features that are unavailable on most hardware loopers.
To use a DAW for live looping, you will need a reliable computer, the software itself, and an audio interface.
The audio interface is a crucial bridge that allows you to get high-quality sound from your electronic drum pad into the computer and send the final audio mix out to speakers or a PA system.
Comparison of Popular Electronic Drum Pads for Looping
| Model | Pads | Key Features | Best For |
|---|---|---|---|
| Roland SPD-SX PRO | 9 | 32GB internal memory, large color display, advanced routing, onboard effects, customizable pad LEDs, extensive I/O | Professional touring, studio integration, and serious live performers who need maximum reliability and features. |
| Alesis Strike MultiPad | 9 | Onboard sampler & looper, 32GB storage, 4.3″ color screen, customizable RGB pad lights, built-in audio interface | Performers and producers looking for an all-in-one solution with a powerful feature set at a competitive price point. |
| Yamaha DTX-Multi 12 | 12 | 1,200+ onboard sounds, advanced pad layering and stacking, multiple playing modes (stick, hand, finger) | Drummers and percussionists who need a wide variety of high-quality world percussion and acoustic drum sounds. |
| Alesis SamplePad 4 | 4 | 10 preset kits, ability to load custom samples via SD card, compact and affordable | Beginners or drummers looking to add a few essential electronic sounds or backing tracks to their acoustic setup. |
Beyond these core components, a few essential accessories will complete your live looping rig and ensure a smooth workflow.
Essential Accessories Checklist:
- Cables: You will need high-quality audio cables (typically 1/4″ TS or TRS) to connect your drum pad to your looper and your looper to your mixer or speakers. If you are using MIDI to sync your devices, you will also need standard 5-pin MIDI cables or a USB cable if your gear supports MIDI over USB.
- Headphones or Monitors: For practice and sound design, a good pair of studio headphones is indispensable for hearing the nuances of your sounds and the accuracy of your loops. For performance, you’ll need a powered speaker, PA system, or an in-ear monitor (IEM) system to hear yourself clearly on stage.
- Stands: A sturdy, adjustable stand for your electronic drum pad is crucial for ergonomic playing. Likewise, if you’re using a laptop and audio interface, a reliable stand for that equipment will keep it secure and within easy reach.
- Power Supply: Ensure you have the correct power supplies for all your electronic gear and consider using a power strip with surge protection to safeguard your equipment.
- Footswitches (Optional but Recommended): Even if your looper has buttons, an external footswitch can provide hands-free control over functions like starting/stopping loops, undoing a layer, or switching between tracks. This is particularly useful for musicians who are playing an instrument with their hands.
Getting Started: A Step-by-Step Guide to Your First Drum Loop
The first step in creating a drum loop with a hardware looper is to properly set up and connect your gear.
You will begin by connecting the audio output of your electronic drum pad to the audio input of your looper pedal or station using a 1/4″ instrument cable.
Then, connect the audio output of the looper to your amplifier, PA system, or headphones so you can hear both the live sound and the subsequent loops.
Before you start playing, it’s highly advisable to enable a rhythm guide or metronome on your looper.
This internal click will be your timing reference, ensuring that your first loop is rhythmically solid, which is the foundation upon which all other layers will be built.
With your gear connected and your tempo set, you are ready to record your first layer using a hardware looper.
Creating a Loop with a Hardware Looper:
- Start Recording: Press the looper’s footswitch once to begin recording. The timing of this press is crucial; aim to hit it precisely on the “one” or the first beat of a measure as indicated by the metronome.
- Play Your First Pattern: Immediately after starting the recording, play a simple, foundational beat on your drum pads. A great starting point is a basic kick and snare pattern (e.g., kick on beats 1 and 3, snare on beats 2 and 4). Play this pattern for a set number of measures, such as two or four.
- Close the Loop: To stop recording and immediately start playback, press the footswitch again. Just like the starting press, the timing of this closing press is critical. You must press it exactly on the “one” of the measure after your phrase ends. The looper will now continuously play back the beat you just recorded.
- Overdubbing Layers: With your foundational loop playing, press the footswitch once more to enter overdub mode. Now, you can play a new part over the top of your existing loop. A good second layer is a hi-hat pattern. Play the hi-hats for the full duration of the loop.
- Exit Overdub Mode: Once you’re satisfied with your new layer, press the footswitch again to exit overdub mode and return to playback. The looper will now play both your original kick/snare beat and the new hi-hat pattern together as a single, more complex loop. You can continue this process, adding more percussive elements like cymbals, toms, or hand percussion with each pass.
Using a software looper, such as Ableton Live, offers a different workflow that is centered around MIDI or audio clips in a computer environment.
The initial setup requires connecting your electronic drum pad to your computer via a USB cable or a MIDI interface, and then connecting your audio interface’s output to your speakers.
In your DAW, you will create a new MIDI track and select your drum pad as the MIDI input device.
Load a drum rack or a similar virtual instrument onto the track, which will allow the MIDI notes from your pads to trigger drum sounds within the software.
Just as with a hardware looper, activating the DAW’s metronome or click track is an essential first step for maintaining precise timing.
With your software environment configured, you can now record your first loop as a MIDI clip.
Creating a Loop with a Software Looper (Ableton Live):
- Set Tempo and Arm Track: First, set the project’s tempo (BPM) in your DAW. Then, “arm” the MIDI track for recording, which tells the software to listen for incoming MIDI data on that specific track.
- Start Recording: In Ableton Live’s Session View, click the record button on an empty clip slot on your armed track. This will typically start a one-bar count-in before the recording begins.
- Play Your Beat: After the count-in, play your beat on the electronic drum pads. The DAW will capture your performance as MIDI data rather than audio.
- Loop the Clip: Once you’ve played your part, the clip will automatically begin looping based on the length you set or the software’s default. You can now see your performance as a MIDI clip in the Session View grid.
- Quantize for Perfect Timing: A major advantage of software looping is the ability to quantize. Select the MIDI notes within the clip and apply quantization to snap them perfectly to the rhythmic grid. This is an excellent way to clean up minor timing imperfections.
- Overdubbing and Layering: To add another layer, you can simply keep the loop playing and record on top of the same MIDI clip (if your DAW’s overdub function is enabled). Alternatively, you can create a new MIDI track, load another drum rack or instrument, and record a separate clip. This method of using multiple tracks is powerful, as it allows you to mute, solo, or apply different effects to each individual percussive element (e.g., add reverb to just the snare), giving you immense control over your mix.
Techniques and Tips for Better Live Looping
The single most critical skill in live looping is timing, as every layer’s coherence depends on the rhythmic integrity of the first loop.
To master this, you must internalize the rhythm and practice consistently with a metronome.
When you press the pedal to start and stop the recording, you are defining the loop’s length and rhythmic feel.
Practice hitting the switch precisely on the downbeat (the “one” of the measure) to create seamless loops.
Many advanced loopers feature MIDI clock synchronization, which is a powerful tool for drummers.
By syncing your looper to your drum pad or DAW’s internal clock, the looper can automatically start and stop recording in perfect time with the master tempo, removing the margin for human error and ensuring your loops are always perfectly in the pocket.
To prevent your loops from sounding robotic and monotonous, you must leverage dynamic variation. Most modern electronic drum pads are velocity-sensitive, meaning they respond to how hard you hit them.
Use this feature to your advantage by playing with varying velocities to create accents and ghost notes, which will imbue your patterns with a more human and expressive feel.
For instance, your kick and snare can be strong and punchy, while your hi-hats can have a mix of soft and hard hits to create a more dynamic groove.
When overdubbing, think about sonic space.
If your first loop is a dense kick and snare pattern, your next layer might be a sparser percussion part that complements the main beat rather than competing with it.
This creates a loop that is not only rhythmically interesting but also sonically balanced.
Strategic sound selection is paramount for creating loops that are clear, powerful, and musically compelling.
Before you even begin a performance, take the time to build a cohesive kit or a palette of sounds that work well together.
Think like a producer: choose a kick drum and a bass sound that occupy different frequency ranges to avoid a muddy low end.
Select snare drums, claps, and hi-hats that complement each other’s character.
Don’t be afraid to experiment beyond traditional drum sounds.
Many electronic drum pads allow you to load your own samples, so you can trigger melodic phrases, atmospheric textures, or vocal chops to add unique layers to your loops.
A well-curated sound palette is the foundation of a professional-sounding live looping performance.
Comparison of Popular Looping Pedals/Stations
| Model | Type | Key Features | Best For |
|---|---|---|---|
| Boss RC-505mkII | Tabletop Station | 5 stereo tracks, large color display, extensive I/O (including XLR with phantom power), deep effects engine, MIDI sync | Vocalists, beatboxers, multi-instrumentalists, and electronic musicians who need maximum hands-on control. |
| Boss RC-600 | Floor-Based Station | 6 stereo tracks, 9 assignable footswitches, large circular loop indicator, deep effects engine, MIDI sync | Guitarists, keyboardists, and instrumentalists who need powerful, hands-free control over a multi-track looping setup. |
| TC Electronic Ditto+ | Compact Pedal | Single footswitch, 60-minute loop time, unlimited overdubs, color display, USB for loop import/export | Beginners or musicians who need a simple, high-quality, and compact looper for practice and basic layering. |
| Electro-Harmonix 720 | Compact Pedal | 720 seconds (12 minutes) of stereo recording time, 10 loop slots, reverse and 1/2 speed effects | Players who want a bit more functionality than a basic looper, including the ability to save loops and add simple effects. |
Moving beyond a single, repetitive pattern requires thinking about arrangement and song structure. Most advanced loopers have multiple memory slots or tracks that can be used to store different loops independently.
You can leverage this to build out different sections of a song.
For example, you could create a sparse, hi-hat-driven beat for your verse on Track 1, a more powerful, full-kit groove for your chorus on Track 2, and a percussive breakdown for your bridge on Track 3.
By switching between these tracks during your performance, you can create a dynamic arrangement that evolves and tells a musical story, keeping the listener engaged from start to finish.
For the ultimate hands-free experience, mastering MIDI control is essential. Many modern drum pads and loopers can send and receive MIDI Control Change (CC) messages.
This allows you to assign looper functions—such as record, play, stop, undo, clear track, or activate effects—to the pads on your electronic drum kit.
Imagine being able to start recording a loop by hitting a crash cymbal pad, stop it with a cowbell pad, and clear the loop with a rimshot, all without ever taking your hands off your sticks or your feet off your pedals.
This level of integration creates an incredibly fluid and intuitive workflow, allowing you to focus entirely on the musical performance rather than the technical operation of your gear.
Common Challenges and How to Overcome Them
Perhaps the most frequent challenge for newcomers to live looping is maintaining precise timing, which results in loops that feel disjointed or “off.” This almost always stems from imprecision when starting or stopping the recording.
The solution is twofold: diligent practice and leveraging technology. Consistently practicing with a metronome will build your internal clock and muscle memory for hitting the footswitch at the exact right moment.
However, for the most reliable results, especially in a live setting, using MIDI sync is the best solution.
By designating one device (your drum pad, DAW, or a dedicated drum machine) as the master clock and slaving your looper to it, you eliminate the possibility of human timing error, ensuring your loops are always perfectly synchronized to the master tempo.
Another common issue is creating loops that sound “muddy” or sonically cluttered, where individual elements are indistinct.
This happens when too many sounds are layered on top of each other, competing for the same space in the frequency spectrum.
To overcome this, approach your loops with the mindset of a mix engineer.
Pay attention to EQ and sound selection.
If your kick drum has a lot of low-end energy, choose a bass line sample that sits slightly higher in the frequency range.
Use panning to spread your sounds across the stereo field; for example, pan your hi-hats slightly to one side and a shaker to the other to create a sense of width and separation.
Most importantly, remember that less is often more. A loop with a few well-chosen, complementary parts will almost always sound more powerful and clear than a loop crammed with dozens of competing layers.
At some point, every musician encounters a creative block, feeling stuck in the rut of creating the same types of repetitive loops.
The key to breaking through this is to actively seek out new approaches and limitations. If you always loop in 4/4 time, challenge yourself to create a loop in 3/4 or 7/8.
If you always start with a drum beat, try beginning with a melodic or atmospheric sample instead.
Introduce a new piece of gear or a new sound pack to force yourself out of familiar habits.
Another powerful technique is to use the looper’s effects, such as reverse or half-speed, to mangle your existing loops into something new and unexpected.
These creative constraints and experiments can often spark fresh ideas and lead you in exciting new musical directions.
The complexity of modern looping gear can itself be a significant hurdle, leading to frustration and a steep learning curve.
The best way to overcome this technological overwhelm is to adopt a “start simple” philosophy. Don’t try to master every single feature of your multi-track looping station on day one.
Instead, focus on mastering the absolute basics: recording, overdubbing, and clearing a single loop.
Once you are completely comfortable with that fundamental workflow, you can gradually begin to explore more advanced features, one at a time.
Read the manual, watch tutorial videos online, and join user forums to learn from the experience of others.
By building your knowledge incrementally, you can master your equipment without feeling discouraged.
Common Looping Problems and Solutions
- Problem: Loops are not seamless and have a noticeable “hiccup” or gap.
- Solution: Focus on the timing of your start and stop presses. Practice with a metronome until you can consistently press the switch on the downbeat. Use your looper’s quantize feature or MIDI sync if available.
- Problem: The overall volume of the loop becomes too loud and distorted with each new overdub.
- Solution: Be mindful of the “loop level” or “playback level” knob on your looper. Some loopers automatically lower the volume of previous layers slightly with each overdub. If yours doesn’t, you may need to play the new layers more softly or adjust the output volume of your drum pad.
- Problem: Accidentally recording a mistake into the loop.
- Solution: Nearly all modern loopers have an “undo” function, often triggered by pressing and holding the main footswitch. This will remove the last overdub you recorded. Practice using the undo function so it becomes a quick and natural reflex.
Inspiring Examples
To see the incredible potential of this technique in action, one only needs to look at the burgeoning community of artists who have made it a cornerstone of their sound.
Performers like Kink, a Bulgarian electronic music producer and DJ, masterfully use drum pads and hardware to build intricate techno and house tracks live on stage, demonstrating a deep integration of looping, synthesis, and performance.
On platforms like YouTube, artists such as Elise Trouw and Gnarly have gained millions of views for their impressive multi-instrumental looping performances, where electronic drum pads often form the rhythmic foundation upon which they layer bass, guitar, keyboards, and vocals.
These artists showcase not just technical proficiency but also a profound musicality, using the technology as an instrument for genuine creative expression.
Analyzing their performances can provide invaluable insight into arrangement, sound design, and stage presence.
Conclusion
Live looping with electronic drum pads represents a profound convergence of rhythmic performance and modern music technology.
It offers a pathway to unprecedented creative autonomy, allowing solo musicians to construct intricate, full-band arrangements and producers to deconstruct and perform their studio creations in a dynamic live setting.
From the immediate, tactile feedback of a hardware pedal to the boundless possibilities of a software-based setup, the tools available today empower artists to build sonic worlds from the ground up, in real time.
While the journey involves mastering timing, cultivating a producer’s ear for sound selection, and overcoming the occasional technical hurdle, the rewards are immense.
The ability to spontaneously create, layer, and manipulate rhythm is a skill that not only enhances your technical proficiency but fundamentally deepens your musical expression.
We encourage you to embrace the learning process, start with the basics, and not be afraid to experiment.
The path to becoming a proficient live looper is paved with practice and creative exploration.
Let your curiosity guide you as you explore different sounds, rhythms, and song structures.
The technology is merely a canvas; your creativity is the paint.
Now, plug in, press record, and start building your first loop.
Share your creations, connect with the vibrant online community of loop artists, and discover the exhilarating freedom of crafting music, one layer at a time.