A stable, responsive, and reliable connection between your kick pedal and bass drum pad forms the very foundation of a fulfilling electronic drumming experience, yet it is an aspect that is frequently overlooked until problems arise.
The frustration of a wandering kick pedal, a wobbly kick tower causing misfires, or the unnerving sight of a beater slowly chewing through an expensive mesh head are all common maladies that can transform a passionate practice session into a disheartening battle against your own equipment.
These issues, stemming from the dynamic forces of your playing and the often-unforgiving physics of incompatible gear, can severely hinder your progress, compromise your timing, and ultimately diminish your enjoyment of the instrument.
Fortunately, a vast array of specialized kick pedal attachments for bass drum pads exists, from simple but effective beater patches to sophisticated anchoring systems, all designed to eradicate these problems and create a rock-solid, dependable setup that feels like a natural extension of your body.
This comprehensive guide will meticulously explore the universe of kick pedal attachments for bass drum pads, providing you with the knowledge to diagnose the specific issues plaguing your setup and implement the most effective solutions.
We will begin by dissecting the common culprits behind misbehaving gear, from the dreaded “pedal creep” to the nuanced problems of a poor clamp connection.
Subsequently, we will delve into a multi-layered defense strategy, starting with methods to secure your pedal directly to the pad, followed by advanced anchoring techniques to immobilize your entire kick tower.
Furthermore, we will illuminate the critical role of beater patches and the nuanced selection of the right beater to protect your investment and refine your sound.
To ensure you are thoroughly equipped, we will also compare integrated kick systems, explore ingenious DIY hacks from the drumming community, and answer the most frequently asked questions on the topic, empowering you to build a kick drum setup that is not only stable and durable but also perfectly tailored to your playing style.
Why Your Kick Pedal and Pad Aren’t Behaving: The Common Problems
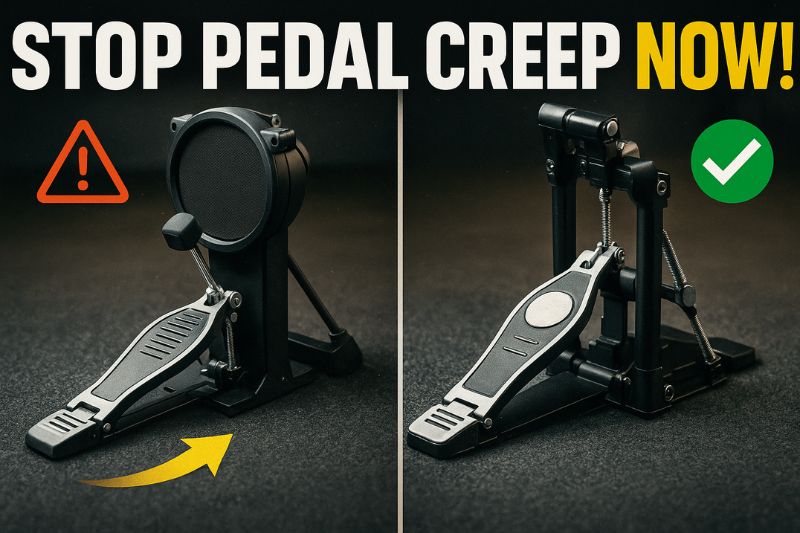
The relentless forward slide of a bass drum pedal during an intense playing session, a phenomenon drummers aptly call “pedal creep,” is one of the most common and exasperating issues, caused primarily by the repeated forward force of your foot meeting the resistance of the pad on a low-friction surface.
Each stroke you play transfers a small amount of kinetic energy into the pedal, and without sufficient grip, this energy manifests as incremental forward movement.
On smooth surfaces like hardwood, laminate, or tile, the standard rubber grips on the bottom of most pedals offer minimal resistance.
Even on carpet, the pedal can “walk” as its spurs or velcro fail to get a secure purchase in the pile.
This constant migration forces you to awkwardly adjust your seating position mid-song, disrupting your posture, concentration, and timing, and turning what should be an expressive performance into a distracting and uncomfortable ordeal.
Similarly, the entire bass drum pad unit, often referred to as a “kick tower,” can wander across the floor due to the cumulative force generated from your playing.
This issue is particularly prevalent with lighter, more compact electronic drum kits where the kick tower lacks the sheer mass to resist the momentum of repeated impacts from the beater.
The built-in spurs on these towers are often too short or dull to effectively dig into carpets, and on hard surfaces, they can be entirely useless without a protective mat, leading to the entire assembly shifting with every powerful stroke.
This movement not only forces you to constantly reposition the unit but also strains the connection cable to your drum module, risking damage and signal loss, and fundamentally destabilizing the ergonomics of your entire kit.
A wobbly connection, characterized by a loose and ill-fitting pedal clamp on the kick tower’s lip, introduces instability that can lead to a host of performance-inhibiting problems, most notably inaccurate or double-triggering.
The issue arises because the clamping mechanisms on many kick pedals are designed with the standardized, thicker wooden hoops of acoustic bass drums in mind.
In contrast, the mounting lips on electronic kick towers are often thin, oddly shaped, or made of plastic, creating a poor mating surface for the clamp.
This tenuous grip allows for subtle but significant movement of the pedal relative to the pad.
As the beater strikes, the pedal can shift, causing the beater to land in an inconsistent spot or even recoil and strike the pad a second time, resulting in frustrating “ghost notes” that clutter your playing and undermine the precision of your performance.
Finally, direct and unprotected beater impact poses a significant threat of damage to the surface of your bass drum pad, gradually wearing down and eventually breaking the mesh or rubber material.
Different beater materials interact with pad surfaces in distinct ways; hard plastic or wood beaters, while offering a sharp attack, concentrate the force of each stroke onto a tiny area, accelerating wear and tear.
Even standard felt beaters, which seem softer, can be abrasive over time, shedding fibers and slowly grinding away at delicate mesh heads.
This continuous assault not only compromises the structural integrity of the pad, leading to costly replacements, but it also affects the pad’s rebound and feel, altering the triggering response and forcing you to compensate for the changing surface dynamics, ultimately degrading the playability of your electronic kit.
The First Line of Defense: Securing Your Pedal to the Pad
A standard kick pedal clamp operates on a simple yet effective mechanical principle, designed to securely fasten the pedal’s base plate to the bottom hoop of a bass drum.
The mechanism typically consists of a jaw-like assembly located at the front of the pedal, which is tightened by a T-bolt or wing screw.
As you tighten the screw, the clamp’s “jaw” closes onto the bass drum hoop (or in this case, the kick tower’s lip), pulling it tightly against a stationary anchor point on the pedal’s frame.
This action creates a firm, stable connection that prevents the pedal from detaching or wobbling during play.
A crucial component of this system is the small rubber or plastic pad on the clamp itself, which serves to protect the hoop from being scratched or dented by the metal clamp, a feature that is equally important for preserving the integrity of an electronic kick tower’s mounting lip.
Troubleshooting a poor fit between your kick pedal and kick tower is often the first critical step toward a stable setup, as many electronic kit towers feature thin or unconventionally shaped lips that are incompatible with pedal clamps designed for acoustic drums.
This mismatch is a primary source of instability.
Fortunately, there are several effective solutions to this problem.
Common Solutions for a Poor Pedal-to-Pad Fit:
- DIY Shims: This is the most common and often most effective solution. By inserting a small piece of material—a shim—into the gap between the pedal clamp and the kick tower lip, you can create a much snugger and more secure connection.
- Rubber: A piece of dense rubber (from an old mouse pad or a hardware store) is an excellent choice as it provides both bulk and grip, helping to absorb vibrations.
- Wood: A small, custom-cut piece of wood can provide a very solid and stable connection point.
- Metal: While less common, a small metal plate can also work, though it’s important to cushion it with tape to prevent scratching.
- Hoop Protectors: Many companies manufacture products designed to protect wooden acoustic bass drum hoops from pedal clamps, and these can be ingeniously adapted for electronic kits.
- Products like the Gibraltar SC-BDHG Wood Hoop Guard or the Pearl HPP2 Metal Hoop Protector can be attached to the kick tower’s lip. These devices not only protect the lip but also provide a thicker, more standardized surface for your pedal’s clamp to grab onto, instantly improving stability.
While the market for aftermarket clamps and adapters specifically designed for electronic drum kick towers remains a niche, some manufacturers and third-party companies do offer specialized products to solve persistent connection problems.
These solutions are born from the recognition that the one-size-fits-all approach of traditional pedal clamps often fails in the diverse world of electronic percussion.
For instance, a company might produce an adapter plate that attaches permanently to the kick tower, providing an idealized, thick “hoop” for any standard pedal to clamp onto.
Others may offer replacement clamp assemblies for popular pedal models with jaws specifically profiled to fit the thin lips of major e-kit brands like Roland or Alesis.
Searching online forums and specialty drum shops with terms like “kick tower pedal adapter” or “[Your Pedal Brand] e-drum clamp” can sometimes uncover these purpose-built solutions that offer a more elegant and reliable fix than DIY methods.
Anchors Aweigh: How to Stop Your Setup from Moving
Properly utilizing the built-in spurs that come equipped on most kick towers is your initial and most direct method for preventing the unit from sliding forward on carpeted surfaces.
These small, often retractable metal spikes are designed to dig into the fibers of a rug or carpet, creating a physical barrier against forward motion.
To use them effectively, you must first ensure they are fully extended and angled slightly forward, towards the direction of force.
Once positioned, press down firmly on the top of the kick tower to drive the points of the spurs deep into the carpet pile.
It’s crucial to check that they have achieved a solid purchase; a half-hearted placement will allow the tower to “hop” over the spurs.
For drummers on hard surfaces, these spurs are generally retracted to allow the tower’s rubber feet to make contact with the floor, though their anti-slip capability in this configuration is often minimal.
The unsung hero in the quest for stability, and often the single most effective solution for preventing both pedal creep and tower wander, is a high-quality drum rug.
A good drum rug works on multiple fronts: first, it provides a consistent, high-friction surface for your entire setup, instantly improving the grip of your pedal’s base and the kick tower’s rubber feet.
Second, and most importantly, it provides the ideal medium for your pedal’s and tower’s spurs and velcro to latch onto.
The dense, low-pile carpet of a dedicated drum rug allows spikes to dig in securely and provides a perfect mating surface for the hook-and-loop fasteners found on the bottom of many pedals.
This combination effectively locks the components in place, unifying your throne, stands, pedal, and kick tower into a single, cohesive unit that is highly resistant to movement, regardless of your playing intensity or the type of floor underneath.
For drummers who require the ultimate in stability or find that a rug alone isn’t sufficient, dedicated kick drum anchors and stabilizers offer a robust and targeted solution.
These devices are purpose-built to prevent any forward movement of the kick drum or pad by creating an immovable backstop for the unit.
| Anchor/Stabilizer Type | Mechanism of Action | Ideal Surface | Pros | Cons |
|---|---|---|---|---|
| Velcro-Based Block (e.g., KickBlock) | A high-density foam block faced with an aggressive hook-side Velcro. | Drum Rug / Carpet | Extremely effective, lightweight, easily repositionable. | Requires a compatible rug/carpet surface to function. |
| Spurred Floor Anchor | A heavy metal plate or bar with adjustable, aggressive spurs that dig into the floor. | Carpet / Wood | Very secure on carpet, some models have rubber feet for hard floors. | Can damage wood floors if not used carefully, can be heavy. |
| External Stop Block | A simple, often weighted block (wood or rubber) placed behind the pedal or tower. | Any | Inexpensive (especially DIY), versatile, non-damaging. | Can be less secure than other methods, may shift itself if too light. |
Some manufacturers also produce pedal-specific anchors, which are attachments designed to add extra gripping power directly to the bass drum pedal itself.
These can be a great option for drummers who are generally happy with their kick tower’s stability but struggle specifically with “pedal creep.” These attachments often take the form of small, add-on modules that screw into the pedal’s baseplate.
They might feature retractable spurs, similar to those on a kick tower, allowing you to add spike-based anchoring to a pedal that didn’t originally have it.
Other variations include plates that extend from the pedal and are covered in industrial-grade Velcro, providing a much larger surface area to grip a drum rug than the small strips that come standard on many pedals.
This approach can be a clean and integrated way to add significant stability without introducing a separate, external blocking device into your setup.
Protect Your Investment: Beater Patches for Pad Longevity
You absolutely need a beater patch on your electronic bass drum pad because it serves as a crucial sacrificial layer that absorbs and distributes the focused impact of the beater, thereby preventing premature wear and catastrophic failure of the pad surface.
Without a patch, the repetitive, high-velocity strikes from your beater—especially hard plastic or wood models—will inevitably degrade the mesh or rubber material of your pad.
The patch acts as a shield, protecting the delicate and expensive pad from the abrasive and concussive forces of every stroke.
This small and inexpensive accessory dramatically extends the life of your kick pad, saving you from costly repairs or replacements, while also ensuring a consistent playing surface and trigger response over the long term.
The difference in wear patterns is stark: felt beaters can grind and fray mesh, while plastic beaters can dent and eventually puncture rubber, both of which are entirely preventable with the simple application of a quality patch.
Beater patches are available in several materials and sizes, allowing you to choose the one that best suits your beater type, playing style, and whether you use a single or double pedal.
The material of the patch has a subtle but noticeable effect on the attack of your sound and the feel of the pedal’s rebound.
| Patch Material | Primary Characteristic | Effect on Sound | Durability | Best For |
|---|---|---|---|---|
| Nylon | Flexible and smooth | Provides a slightly softer, rounder attack. | Good | Felt or rubber beaters; players seeking a less “clicky” sound. |
| Plastic | Hard and slick | Creates a very sharp, pronounced, and “clicky” attack. | Very Good | All beater types, especially plastic/wood; players in rock/metal genres. |
| Kevlar/Aramid | Woven and extremely tough | Offers a focused, punchy attack somewhere between nylon and plastic. | Excellent | All beater types; heavy hitters and double bass players. |
These patches also come in different shapes and sizes.
The most common are small circular patches for single pedals and larger oval or oblong patches designed to accommodate the impact points of two beaters for a double bass pedal setup.
Applying a beater patch is a simple and straightforward process, but proper preparation is key to ensuring it adheres securely and lasts for a long time.
A poorly applied patch can peel off or shift, diminishing its effectiveness and potentially leaving a sticky residue.
Step-by-Step Patch Application Guide:
- Clean the Surface:
- Thoroughly clean the area of the kick pad where the beater makes contact.
- Use a small amount of isopropyl alcohol on a lint-free cloth to remove any dust, oils, or residue.
- Allow the surface to dry completely.
- Determine the Impact Point:
- Re-attach your kick pedal and gently press the beater against the pad head.
- Observe exactly where the center of the beater rests.
- You can even make a tiny, non-permanent mark with a pencil or a small piece of tape to guide your placement.
- Peel and Position:
- Carefully peel the adhesive backing off the patch, being mindful not to touch the sticky surface with your fingers.
- Using your mark as a guide, carefully position the patch on the kick pad, ensuring it is centered on the beater’s impact point.
- Press and Secure:
- Press down firmly on the center of the patch and work your way outwards to the edges, smoothing out any air bubbles.
- Applying firm, even pressure is crucial for activating the pressure-sensitive adhesive.
- Some drummers will use a roller or even the curved side of a drumstick to burnish the patch and ensure a strong bond.
- Allow to Cure:
- For the best possible adhesion, allow the patch to sit and cure for at least a few hours (or as recommended by the manufacturer) before you begin playing on it.
- This gives the adhesive time to form its strongest bond with the pad surface.
It’s All in the Beater: Choosing the Right “Attachment” for the Job
The type of beater you use significantly affects the feel and sound on an electronic drum kit by altering the physical interaction with the pad, which in turn influences the trigger sensor and the resulting MIDI signal.
The mass, shape, and material of the beater head determine the rebound characteristics you’ll feel through the pedal.
A harder, denser beater (like plastic or wood) will typically provide a faster, more pronounced rebound from a mesh or rubber pad, feeling very direct and articulate.
Conversely, a softer, more absorbent beater (like felt or rubber) will have a slightly slower, mushier rebound.
Sonically, while the drum module is responsible for the actual sound produced, the physical impact noise—the “click” of the beater hitting the pad—is very real and can be picked up by microphones or heard acoustically in a quiet room.
A hard plastic beater creates a sharp, audible click, while a felt or rubber beater is much quieter on impact.
Choosing a beater type that is suitable for electronic pads involves balancing your desired feel, acoustic impact noise, and the long-term health of your kick pad.
While any beater can be used with the addition of a proper patch, some are inherently better suited for the materials used in electronic kick towers.
| Beater Type | Common Materials | Feel/Rebound on Pad | Acoustic Noise | Pad Durability Risk (w/o Patch) |
|---|---|---|---|---|
| Hard Plastic/Wood | Acrylic, Nylon, Maple, Oak | Fast, sharp, articulate rebound. | High (sharp “click”) | High |
| Felt | Medium to high-density felt | Medium rebound, can feel slightly “spongy.” | Low-Medium (dull “thud”) | Medium (can cause abrasive wear on mesh) |
| Rubber | Hard or soft density rubber | Medium-fast rebound, good balance. | Low (quiet “thump”) | Low-Medium |
| Dual-Sided | Typically Plastic/Felt | Versatile, offers two distinct feels. | High/Low-Medium | High/Medium |
| Specialty | Foam, Wool, Trigger-specific designs | Varies greatly by design. | Varies greatly | Varies greatly |
For many electronic drummers, a medium-hard rubber beater often represents the ideal compromise.
It provides a positive and articulate rebound that is close to the feel of a felt beater on an acoustic head, while being significantly quieter and gentler on the pad surface than a hard plastic beater.
Summary of Beater Characteristics for E-Drums:
- Plastic/Wood Beaters:
- Pros: Sharpest attack, fastest rebound, great for articulating fast patterns.
- Cons: Loudest acoustic noise, highest risk of damaging the pad. A patch is mandatory.
- Felt Beaters:
- Pros: Traditional feel, quiet impact sound.
- Cons: Can wear down mesh heads over time through abrasion, may feel sluggish to some players.
- Rubber Beaters:
- Pros: Excellent all-around choice, quiet, good rebound, relatively gentle on the pad surface.
- Cons: The feel may not be preferred by players accustomed to hard beaters.
- Specialty & Dual-Sided Beaters:
- Pros: Offer versatility (dual-sided) or are optimized for specific tasks like low-volume practice (foam/wool) or perfect triggering.
- Cons: Can be more expensive, specific designs may not suit all playing styles.
All-in-One Solutions: Integrated Kick Pad and Pedal Systems
It is wise to consider a complete, integrated kick pad and pedal system primarily when you are a beginner purchasing your first electronic drum kit or when your primary goal is guaranteed, out-of-the-box compatibility and ease of setup.
These all-in-one solutions, often included with entry-level to mid-range electronic drum sets, are designed by the manufacturer to work perfectly together.
This eliminates the guesswork and potential frustration of trying to match a third-party pedal to a kick tower with a non-standard mounting lip.
For a new drummer, this means less time spent troubleshooting and more time spent playing and learning.
It’s also a pragmatic choice for anyone who values convenience and simplicity over the nuanced customizability that comes with sourcing components individually.
Several popular examples of these integrated systems are found bundled with some of the best-selling electronic drum kits on the market, each designed to provide a functional and reliable experience for their target user.
A prime example is the Alesis Nitro Mesh Kick Pad Tower & Pedal, which includes a compact kick tower and a single chain-drive pedal.
This system is known for being functional and providing everything a beginner needs to get started.
Another ubiquitous system is the combination of a Roland KD-10 Kick Pad with a compatible Roland pedal.
While often sold separately, Roland ensures its own pedals mate perfectly with the robust and quiet KD-10 pad, offering a more substantial and stage-ready feel that appeals to intermediate players looking for an upgrade from their initial kit.
These systems are engineered as a cohesive unit, ensuring the pedal’s clamp fits the tower’s lip precisely and the beater is appropriate for the pad’s surface.
Despite their convenience, choosing an integrated system comes with a distinct set of pros and cons that must be weighed against your personal needs and long-term drumming aspirations.
The primary advantage is, without question, the convenience and assurance of compatibility, offering a true plug-and-play experience.
These bundles are also typically more cost-effective than purchasing a comparable pad and pedal separately.
However, the most significant drawback is the inherent lack of customization and potential for limitation as your skills advance.
The included pedals are often basic, single-chain models that may lack the smooth action, adjustability, and robust build quality of higher-end, standalone pedals from brands like DW, Tama, or Pearl.
As you become a more discerning player, you may find the included pedal feels sluggish, noisy, or lacks the features you desire, forcing you to upgrade anyway and rendering the initial “all-in-one” benefit moot.
DIY Hacks from the Drumming Community
A curated list of clever, budget-friendly solutions from the global drumming community can provide ingenious and effective answers to common stability problems, often utilizing readily available household or hardware store items.
Drummers are natural innovators, and forums like Reddit’s r/edrums and various online groups are treasure troves of shared knowledge.
One of the most popular hacks involves using industrial-grade Velcro or hook-and-loop tape.
By applying a large section of the “hook” side to the entire bottom plate of your kick pedal and the base of your kick tower, you can create an incredibly strong bond with any drum rug, far surpassing the small, factory-installed strips.
This simple modification provides a massive increase in surface area and gripping power, effectively locking the components in place for even the most aggressive playing.
Another highly effective and popular DIY solution is building a custom wooden stop block, a simple project that creates a physical barrier to prevent any forward creep.
This typically involves fastening two pieces of wood together into an “L” shape.
The kick tower and/or the heel of the kick pedal rests against the vertical part of the “L,” while the horizontal part extends underneath the pedal and is held in place by the player’s body weight via the throne.
Some drummers will even cut a notch for the kick tower’s base to sit in for added security.
This method is exceptionally effective on any surface, requires no modification to your gear, and can be built for just a few dollars, offering a near-foolproof solution to movement issues.
For drummers playing on hard surfaces like wood or tile where a drum rug isn’t practical, using non-slip matting offers a fantastic alternative to prevent sliding.
This material, often sold as tool chest liner, kitchen shelf liner, or router pads, is a rubbery mesh that provides an exceptional amount of grip.
By cutting a piece to place under your kick tower and another to place under your entire pedal, you dramatically increase the coefficient of friction between your gear and the slippery floor.
This is an inexpensive, non-adhesive, and completely reversible solution that effectively dampens vibrations and stops both the pedal and the pad from wandering without risking any damage to your floors.
Frequently Asked Questions (FAQ)
Q: Can I use a double bass pedal on any kick drum pad?
A: While you can physically place a double bass pedal in front of most electronic kick drum pads, several factors determine if it will work effectively.
The first consideration is the width of the pad’s playing surface.
Most modern kick towers, like the Roland KD-10 or the Alesis Strike Pro kick, are designed with enough surface area to accommodate the slightly off-center impacts from both the primary and slave beaters.
However, on smaller, more compact pads found on entry-level kits, you may find that one or both beaters strike too close to the edge, resulting in poor triggering or a less-than-ideal feel.
Secondly, and just as importantly, you absolutely must use a double bass drum beater patch. The concentrated impacts of two beaters will shred an unprotected pad in short order.
Finally, because you are generating twice the force and more complex vibrations with a double pedal, ensuring your entire setup is securely anchored is paramount.
The combination of a quality drum rug and a dedicated anchor like a KickBlock is highly recommended to prevent the tower from shifting and wobbling under the strain.
Q: Will a beater patch affect the triggering of my electronic drum pad?
A: Generally, a properly applied beater patch will not negatively affect the triggering of your electronic drum pad; in fact, it can sometimes improve consistency.
The piezo trigger sensor inside the pad is designed to respond to vibration transferred through the head and foam layers.
A thin patch does not significantly dampen this vibration.
However, in some rare cases, particularly with very thick patches or drum modules with highly sensitive default settings, you may notice a slight change in the velocity curve.
If you find that you need to hit the pad harder than before to achieve maximum volume, a simple adjustment in your drum module’s settings can easily compensate for this.
Navigate to the “Trigger Settings” or “Pad Settings” menu for the kick drum channel and slightly increase the “Sensitivity” or “Gain” parameter.
A small tweak is usually all that is required to restore the exact feel and response you had prior to applying the patch.
Q: What’s the best way to stop my kick pedal from moving on a hardwood floor?
A: The single best and most recommended way to stop your kick pedal from moving on a hardwood floor is to use a quality, rubber-backed drum rug. This solution is superior because it addresses multiple problems at once without risking damage to your floor.
The rug provides a surface that your pedal’s built-in spurs or velcro can grip, and its rubber backing prevents the entire rug from sliding on the slick wood.
It also protects the floor from being scratched by your throne, stands, and any accidental contact with the pedal.
If a full-sized rug is not an option due to space or aesthetic reasons, the next best solution is to use a large piece of non-slip matting, such as a high-grip yoga mat or industrial tool chest liner, placed underneath both the kick tower and the pedal.
Avoid any solutions that involve adhesives, tapes, or sharp spurs making direct contact with the hardwood, as these will almost certainly leave residue or permanent marks and indentations on the floor’s delicate finish.
Conclusion
In summation, achieving a state of complete stability and reliability with your electronic kick drum setup is not a matter of luck, but a result of systematically addressing the key points of failure with the right attachments and techniques.
The primary solutions revolve around a three-pronged strategy: first, securing the physical clamp connection between the pedal and the kick tower using shims or adapters; second, anchoring the entire unit to the floor with effective tools like a drum rug, built-in spurs, or dedicated stabilizers to eliminate “creep” and “wander”; and third, protecting the pad’s playing surface and optimizing its feel by applying a durable beater patch and selecting an appropriate beater.
By understanding and implementing these solutions, you transform your kick drum from a source of frustrating instability into a dependable and responsive instrument that you can play with confidence and power.
Ultimately, a stable and personalized kick drum setup is a fundamental component in unlocking your full potential as a drummer, allowing you to focus purely on your performance, timing, and creativity.
The confidence that comes from knowing your gear will not shift, wobble, or fail you mid-fill is invaluable, enabling you to push your boundaries and play with greater precision and expression.
Don’t let the seemingly minor but profoundly frustrating issues of an unstable setup hold back your progress.
Invest the time to diagnose your specific problems and apply the solutions outlined in this guide, and you will be rewarded with a more enjoyable, productive, and inspiring drumming experience.
What are your favorite kick pedal attachments or DIY hacks? Share your tips in the comments below!
Want to enhance your practice routine even further?
Check out our guide to the Best Drum Practice Pads for quieter, more controlled practice anywhere.