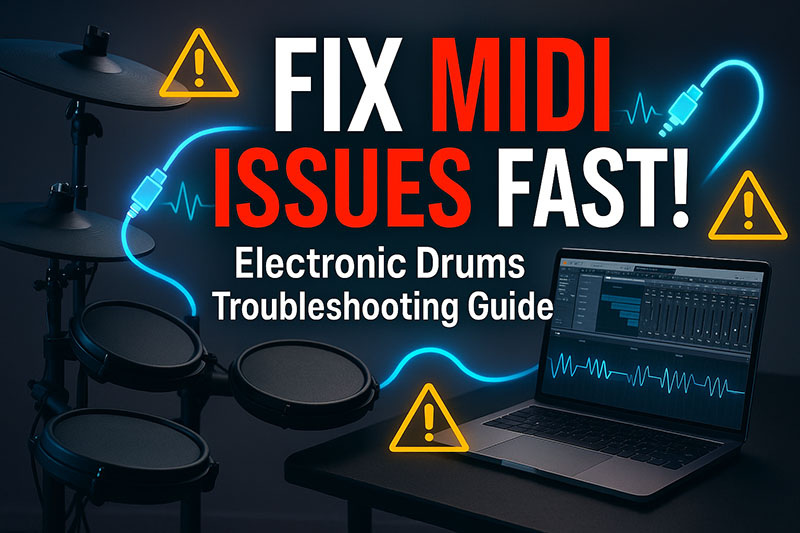
Understanding the intricacies of MIDI (Musical Instrument Digital Interface) is paramount for any electronic drummer seeking to unlock the full potential of their instrument, as troubleshooting common MIDI issues can significantly enhance performance and recording capabilities.
This comprehensive guide will navigate the complexities of MIDI connectivity and functionality with electronic drums, offering a systematic approach to diagnosing and resolving typical problems that range from silent pads to frustrating latency.
Readers will learn how to identify the root cause of their MIDI woes by meticulously examining physical connections, scrutinizing software settings within their drum module and DAW (Digital Audio Workstation), and employing advanced diagnostic techniques such as MIDI monitoring.
The article will delve into specific scenarios like no sound, incorrect notes, and latency, providing actionable solutions that ensure a seamless and expressive drumming experience.
Introduction to MIDI and Electronic Drums
What is MIDI?
MIDI (Musical Instrument Digital Interface) acts as a universal communication protocol for electronic musical instruments, enabling devices to exchange performance data rather than audio signals.
This digital language facilitates the transmission of information such as note on/off messages, velocity, pitch bend, and control changes (CC messages), all without carrying any actual sound.
Its primary function in modern music production is to provide a standardized method for various electronic instruments, computers, and software applications to interact, orchestrating complex musical arrangements and offering unparalleled control over synthesized sounds.
How MIDI Works with Electronic Drums
MIDI operates with electronic drums by translating physical drumming actions into digital commands, which then dictate how a sound module or software instrument will respond.
When a drummer strikes a drum pad, the drum module converts that physical impact into a MIDI message that includes the specific note value corresponding to the pad hit and the velocity (how hard it was struck).
This digital information then flows from the drum module, typically via a MIDI cable or USB connection, to a computer or other MIDI-compatible device, such as a DAW.
Within the DAW, the incoming MIDI data triggers virtual instruments or samples, allowing drummers to record their performances, experiment with different drum kits, and manipulate various parameters with granular control, effectively transforming their physical playing into a versatile digital input.
Common Scenarios for MIDI Issues
Identifying the symptoms of MIDI issues is the first step toward effective troubleshooting, as problems often manifest in predictable ways.
The most common scenario is no sound, where striking the drum pads produces no audible output from the connected software or hardware, suggesting a complete breakdown in the MIDI signal path or an absence of sound generation.
Another frequent occurrence is incorrect notes/sounds, indicating that the MIDI messages are being received but are triggering the wrong sounds or pitches, often a result of MIDI note mapping discrepancies or incorrect MIDI channel assignments.
Furthermore, latency or delay presents a significant challenge, where there’s a noticeable lag between striking a pad and hearing the corresponding sound, severely impacting timing and feel.
Lastly, intermittent connection issues, characterized by sporadic dropouts or unreliable triggering, can be particularly frustrating, suggesting a less stable connection or occasional data loss.
Basic Troubleshooting Steps
Check Physical Connections
Ensuring all physical connections are secure and correctly configured is the most fundamental and often overlooked step in resolving MIDI issues.
- MIDI cables: The most critical check involves verifying that MIDI cables are correctly plugged into the designated MIDI IN and MIDI OUT ports on both the drum module and the receiving device (e.g., MIDI interface, audio interface, or another MIDI-compatible device).
A common mistake is connecting OUT to OUT or IN to IN, which will prevent any data transmission. - USB cables: If using a USB connection for MIDI data, confirming that the USB cable is firmly inserted into a functioning USB port on both the drum module and the computer is essential.
Faulty USB ports or damaged cables can easily disrupt the MIDI flow. - Power supply: Verifying that the power supply for all involved devices – including the drum module, MIDI interface, and computer – is connected and functional ensures that each component has sufficient power to operate correctly and transmit MIDI data.
- Cable integrity: Visually inspecting all cables for any signs of damage, such as bends, kinks, fraying, or exposed wires, is crucial.
Even minor damage can lead to intermittent connections or complete signal loss.
Verify Software Settings
Properly configuring software settings on both the drum module and the DAW is critical for successful MIDI communication, as misconfigurations are a frequent cause of connection failures.
Drum Module Settings
Confirming the correct configuration within the drum module’s internal settings is paramount for ensuring it outputs MIDI data as expected.
- MIDI channels: Setting the appropriate MIDI channels is vital, as both the drum module and the receiving device (e.g., DAW) must be set to transmit and receive on the same channel for communication to occur.
Many modules allow for global MIDI channel settings or individual channel assignments for each drum pad. - Local control: Disabling local control on the drum module is often necessary when using a DAW or external sound source, as keeping it enabled can cause the module to trigger its internal sounds simultaneously with the external sounds, leading to a “doubling” effect or unwanted echoes.
- MIDI output enable: Verifying that the MIDI output function is enabled within the drum module’s settings is fundamental, as some modules have a toggle to activate or deactivate MIDI data transmission.
DAW (Digital Audio Workstation) Settings
Accurately configuring the DAW’s settings is essential for it to correctly receive and interpret the MIDI data from the electronic drums.
- MIDI input device selection: Selecting the correct MIDI input device within the DAW’s preferences or settings is the first step, ensuring that the DAW recognizes the drum module (or its connected MIDI interface) as a source of incoming MIDI data.
- MIDI track arming: Arming the specific MIDI track in the DAW for recording or monitoring is necessary, as this tells the DAW to listen for incoming MIDI messages on that particular track.
If a track is not armed, no MIDI data will be received or processed. - Correct instrument/plugin loaded: Loading the appropriate virtual instrument or plugin onto the MIDI track is vital, as this provides the sounds that will be triggered by the incoming MIDI notes from the drum module.
Without a sound source, even correctly received MIDI data will produce no audible output. - MIDI monitoring: Enabling MIDI monitoring on the track allows you to hear the sounds of the virtual instrument as you play the electronic drums, providing immediate feedback and confirming that MIDI data is being correctly transmitted and received.
Operating System MIDI Settings
Verifying the operating system’s recognition and configuration of MIDI devices is a crucial preliminary step before troubleshooting within a DAW.
- Device recognition: For Windows users, checking the Device Manager under “Sound, video and game controllers” or “Universal Serial Bus controllers” for your MIDI interface or drum module ensures the operating system detects the hardware.
On macOS, the Audio MIDI Setup utility, found in Applications/Utilities, provides a graphical representation of connected MIDI devices and their status.
A greyed-out or absent icon indicates a lack of recognition. - Driver installation/updates: Confirming that the correct and most up-to-date drivers are installed for your MIDI interface or electronic drum module is paramount.
Manufacturers frequently release updated drivers to improve compatibility, stability, and performance.
Visiting the manufacturer’s support website is the best way to acquire the latest drivers.
Advanced Troubleshooting Techniques
Isolate the Problem
Effectively troubleshooting complex MIDI issues often requires systematically isolating the problematic component, which involves testing each part of your setup independently.
Test Each Component Separately
Testing individual components ensures that each element in the MIDI chain functions correctly on its own before being integrated into a larger system.
- Test drum module MIDI output with a different device: Connecting the drum module’s MIDI OUT to a known working hardware synthesizer or another MIDI-compatible device, and then playing the drum pads, can quickly determine if the drum module itself is successfully transmitting MIDI data.
If the external device responds, the drum module’s MIDI output is likely functioning. - Test DAW MIDI input with a different MIDI controller: Plugging a different, known-working MIDI controller (e.g., a keyboard controller) directly into your computer’s MIDI interface or USB port and verifying that the DAW receives input from it can confirm that the DAW’s MIDI input capabilities are operational.
If the DAW responds to the alternate controller, the issue may lie with the drum module’s output or its connection. - Try different MIDI cables: Given that faulty cables are a common cause of connectivity issues, systematically swapping out your existing MIDI cables with new or known-good cables can quickly rule out physical damage or internal breaks as the source of the problem.
This simple step can often save significant troubleshooting time.
Minimal Setup Testing
Reducing the complexity of your setup to its absolute core components can help pinpoint where the problem originates by eliminating potential interferences or misconfigurations.
- Remove all unnecessary devices from the chain: Disconnect any and all non-essential MIDI devices, USB hubs, or other peripherals from your computer and your MIDI chain.
Start with just the electronic drums connected directly to your MIDI interface or computer, then add components one by one to see at what point the issue reappears.
This “divide and conquer” approach helps isolate the faulty link.
MIDI Monitoring and Diagnostics
Utilizing MIDI monitoring software is an indispensable tool for advanced troubleshooting, providing a real-time view of the MIDI data flow and helping to diagnose communication issues at a granular level.
MIDI Monitor Software
MIDI monitoring software allows users to observe the raw MIDI messages being transmitted and received by their system, offering crucial insights into connectivity problems.
- How to use MIDI monitoring tools: Programs like MIDI-OX for Windows or MIDI Monitor for macOS capture and display all incoming and outgoing MIDI data.
To use them, simply open the software, select your MIDI input device (your drum module or MIDI interface), and then strike your drum pads.
The monitor will show a stream of data. - Interpreting MIDI data: By observing the data, you can confirm whether note on/off messages are being transmitted when you strike a pad, whether the velocity values are consistent with your playing dynamics, and if any other CC messages or unexpected data are being sent.
If you see no data, the problem lies before the monitor.
If you see incorrect data, the drum module’s output or its internal settings may be at fault.
Check for MIDI Loops
MIDI feedback loops can cause unpredictable behavior, system crashes, and even infinite echoing, making their identification and prevention crucial.
- Understanding MIDI feedback loops and how to prevent them: A MIDI loop occurs when MIDI data is sent from a device, processed, and then routed back to the original device, creating an endless cycle.
This typically happens when a DAW or MIDI interface sends MIDI data back to the same port it received it from, and the sending device’s MIDI THRU function is active.
To prevent this, ensure that MIDI THRU is disabled on devices that don’t need to re-transmit incoming MIDI, and carefully manage your routing within your DAW, avoiding sending MIDI output from a track back to the input that’s receiving data from your drum module.
Always check your DAW’s MIDI routing preferences and turn off any “echo” or “soft thru” options that might be enabled by default.
Driver and Firmware Updates
Keeping your drivers and firmware current is a critical maintenance practice that can proactively prevent and resolve a multitude of MIDI-related issues, as manufacturers frequently release updates to enhance compatibility, fix bugs, and improve performance.
Drum Module Firmware
Updating the firmware of your electronic drum module is often necessary to ensure optimal performance, compatibility with newer operating systems, and access to the latest features.
- How to check for and install updates: Visit the manufacturer’s official website for your specific drum module model.
Look for a “Support,” “Downloads,” or “Firmware” section.
The website will typically provide instructions on how to check your current firmware version and a detailed guide on the update process, which often involves downloading a file and transferring it via USB or a dedicated utility. - Benefits of updated firmware: Newer firmware versions can resolve known bugs, improve MIDI timing and stability, enhance compatibility with various DAWs and operating systems, and sometimes introduce new features or improve the responsiveness of drum pads.
Audio Interface/MIDI Interface Drivers
Ensuring that your audio interface or dedicated MIDI interface has the most stable and current drivers installed is paramount for reliable MIDI communication and overall system stability.
- Ensure the latest stable drivers are installed: Just like with drum module firmware, regularly check the manufacturer’s website for your audio interface or MIDI interface.
Download and install the latest stable version of their drivers.
Beta drivers should generally be avoided unless you are specifically testing a fix for an issue you are experiencing and are comfortable with potential instability.
Outdated or corrupted drivers are a common cause of MIDI dropouts, latency, and device recognition failures.
Addressing Specific Issues
Targeted solutions for specific MIDI problems are essential, as different symptoms often point to distinct underlying causes requiring unique diagnostic approaches.
No Sound/Missing Notes
When encountering a complete absence of sound or sporadically missing notes, the troubleshooting should focus on the entire signal chain, from the drum module’s output to the DAW’s sound generation.
- Correct MIDI channel assignments: The most frequent cause of no sound or missing notes is a mismatch in MIDI channel assignments.
Verify that the drum module is transmitting on the same MIDI channel that the DAW track or virtual instrument is configured to receive on.
Many drum modules default to MIDI channel 10 for drums, but this can be customized. - Velocity sensitivity issues: If notes are occasionally missing or sound very faint, the velocity sensitivity settings on the drum module or within the DAW’s instrument may be too high, preventing quieter hits from registering as a valid MIDI “note on” event.
Adjusting the sensitivity curves can help capture a wider dynamic range. - Drum module’s MIDI note assignments: Confirm that the drum module’s MIDI note assignments for each pad correspond to the notes expected by your virtual drum instrument or DAW’s drum map.
For instance, a snare drum hit might be assigned to MIDI note 38 (Snare Drum 1) on the module, but your software instrument might expect MIDI note 40 for its snare.
Discrepancies here will result in the wrong sound or no sound at all.
Latency/Delay
Experiencing a noticeable delay between striking a pad and hearing the sound is a common and frustrating issue, often pointing to processing bottlenecks or incorrect buffer settings.
- Buffer size settings in DAW: The audio buffer size within your DAW’s audio preferences is a primary determinant of latency.
A smaller buffer size reduces latency but demands more CPU power, potentially leading to audio dropouts if your system is overloaded.
A larger buffer size increases latency but provides more processing headroom.
Experiment with different buffer sizes, finding a balance between acceptable latency and stable performance. - Driver optimization (ASIO for Windows, Core Audio for macOS): Ensuring you are using the optimal audio drivers for your operating system is crucial.
On Windows, installing and selecting an ASIO driver (like ASIO4ALL or your audio interface’s dedicated ASIO driver) in your DAW provides the lowest latency performance.
On macOS, Core Audio is the default low-latency audio architecture and generally performs well. - System performance issues: High CPU usage, insufficient RAM, or a slow hard drive can contribute to overall system sluggishness, indirectly increasing latency for MIDI processing.
Close unnecessary applications, ensure your computer meets the recommended specifications for your DAW, and consider upgrading hardware if performance issues persist.
Incorrect Notes/Sounds
When drum pads trigger unexpected or incorrect sounds, the problem invariably lies in how MIDI notes are mapped or how channels are assigned.
- MIDI note mapping conflicts: The most common reason for incorrect sounds is a mismatch between the MIDI note value sent by a specific drum pad and the note value that the virtual instrument or sample library expects for a particular drum sound.
Most electronic drum modules allow you to reassign the MIDI note number sent by each pad.
You may need to consult your virtual instrument’s documentation to see its default MIDI note map and adjust your drum module accordingly. - General MIDI standards vs. custom mappings: While the General MIDI (GM) standard provides a common set of drum note assignments (e.g., MIDI note 36 for Kick Drum, 38 for Snare), many virtual instruments or drum samplers use their own custom mappings.
Always check the specific mapping of the instrument you are using and adjust your drum module’s output to match, or use your DAW’s built-in MIDI mapping tools to re-route incoming notes.
Intermittent Connection
Sporadic connection issues, characterized by occasional dropouts or unreliable triggering, can be particularly frustrating and often point to less stable physical or electrical problems.
- Faulty cables: Even seemingly minor damage to MIDI cables or USB cables can cause intermittent data loss.
Swapping out suspect cables with known-good ones is a quick and effective diagnostic step. - USB port issues: A loose or damaged USB port on either the computer or the drum module can lead to intermittent disconnections.
Try different USB ports on your computer, especially those directly on the motherboard rather than front-panel ports or USB hubs. - Power fluctuations: Unstable power from a wall outlet or an unreliable power supply to your drum module or MIDI interface can cause devices to briefly lose power and disconnect, leading to intermittent MIDI data.
Using a power conditioner or an uninterruptible power supply (UPS) can mitigate this.
Here’s a table summarizing common MIDI issues and their primary solutions:
| Issue Symptom | Primary Cause | Solution |
|---|---|---|
| No Sound | Incorrect MIDI Channel, No Instrument Loaded | Verify MIDI channels (module/DAW), Load Virtual Instrument, Check MIDI Output Enable |
| Incorrect Notes | MIDI Note Mapping Mismatch | Adjust Drum Module MIDI Note Assignments, Use DAW MIDI Mapping Tools, Refer to GM Standard |
| Latency/Delay | High Buffer Size, Suboptimal Drivers | Reduce DAW Buffer Size, Install Latest ASIO/Core Audio Drivers, Optimize System Performance |
| Intermittent | Faulty Cables, USB Port Issues, Power Instability | Replace Cables, Try Different USB Ports, Ensure Stable Power Supply |
| MIDI Loop | MIDI THRU enabled, Incorrect Routing | Disable Local Control, Disable MIDI THRU, Correct DAW Routing, Use MIDI Monitor Software to detect loops |
Prevention and Best Practices
Proactive measures and adherence to best practices significantly reduce the likelihood of encountering MIDI issues, fostering a more stable and efficient electronic drumming setup.
Proper Setup and Cable Management
Meticulous attention to physical setup and cable management is fundamental for maintaining reliable MIDI connections and preventing common problems.
- Organized cabling: Neatly routing and labeling your MIDI cables and USB cables prevents tangles and accidental disconnections.
Avoid excessive bends or knots that could damage internal wires. - Avoid interference: Keep MIDI and audio cables separate from power cables where possible to minimize electromagnetic interference, which can sometimes disrupt digital signals.
- Secure connections: Ensure all cables are firmly seated in their respective ports.
Loose connections are a common cause of intermittent issues.
Regular Software and Firmware Updates
Consistently updating your system’s software and hardware firmware is a crucial preventative measure against a wide array of MIDI-related instabilities and compatibility problems.
- Stay current: Regularly check the manufacturer’s websites for your electronic drum module, MIDI interface, audio interface, and DAW for the latest firmware and driver updates.
These updates often include critical bug fixes, performance enhancements, and improved compatibility with newer operating systems. - Read release notes: Before updating, always review the release notes to understand what changes have been made and if there are any known issues or specific installation instructions.
Understanding MIDI Basics
A solid foundational understanding of how MIDI operates empowers users to diagnose problems more effectively and set up their systems with greater precision.
- MIDI signal flow: Comprehending the basic MIDI signal flow – from the drum module’s MIDI OUT, through an interface, to the DAW’s MIDI IN, and then to a virtual instrument – allows for a logical troubleshooting path.
- MIDI messages: Familiarity with common MIDI messages such as note on/off, velocity, and control change (CC) messages helps in interpreting MIDI monitoring software output and understanding how your electronic drums communicate with other devices.
Backing Up Settings
Regularly backing up the settings of your electronic drum module and DAW can save significant time and frustration if configurations are accidentally altered or corrupted.
- Module presets: Many electronic drum modules allow you to save your custom kits, MIDI note assignments, and global settings to an external drive or computer.
This ensures that you can quickly restore your preferred setup if issues arise. - DAW templates: Create and save DAW templates that include your preferred MIDI input device settings, MIDI track configurations, and default virtual instruments.
This streamlines your workflow and ensures a consistent starting point for your drum sessions.
Here’s a list of best practices for maintaining a healthy MIDI setup:
- Use Quality Cables: Invest in well-shielded, durable MIDI cables and USB cables to minimize signal degradation and physical damage.
- Dedicated USB Ports: Whenever possible, connect your electronic drum module or MIDI interface to a dedicated USB port on your computer, bypassing USB hubs which can sometimes introduce power or data issues.
- Optimize Computer Settings: Ensure your computer’s power settings are configured for “High Performance” to prevent the OS from throttling CPU or USB power during MIDI operations.
Disable unnecessary background applications. - Isolate Ground Loops: If you experience hum or buzz in your audio, investigate potential ground loops that can sometimes manifest as intermittent MIDI glitches.
- Documentation is Key: Keep user manuals for your drum module and DAW handy.
They often contain specific troubleshooting sections or detailed explanations of MIDI features.
Below is a table outlining the common MIDI messages and their functions, which is useful for interpreting MIDI monitor data:
| MIDI Message Type | Description | Electronic Drum Relevance |
|---|---|---|
| Note On | Indicates a key or pad has been pressed, specifying its note number and velocity. | Sent when a drum pad is struck, triggering a sound. Includes the specific MIDI note (e.g., 36 for kick) and how hard it was hit (velocity). |
| Note Off | Indicates a key or pad has been released. | Sent when a drum pad hit decays or is released, ending the sound. Less critical for drums unless using sustained samples. |
| Velocity | Specifies how hard a key or pad was pressed (from 0 to 127). | Crucial for dynamic drumming; a higher velocity value typically triggers a louder or more accented sound. |
| Control Change (CC) | Used to transmit controller data (e.g., volume, pan, expression, sustain). | Can be used for foot pedal control (e.g., hi-hat pedal opening/closing), volume of individual pads, or triggering effects. |
| Program Change | Changes the sound or “patch” on a MIDI device. | Can be used to switch between different drum kits or instrument presets on a virtual instrument or sound module. |
| Pitch Bend | Alters the pitch of a note. | Less common for typical drum sounds, but could be used for specialized percussion effects or pitched samples. |
| System Exclusive (SysEx) | Manufacturer-specific data for unique functions and settings. | Used for firmware updates, backing up/restoring drum module settings, or sending unique commands. |
Conclusion
Successfully troubleshooting MIDI issues with electronic drums hinges upon a methodical approach, beginning with basic checks and progressing to advanced diagnostics.
By meticulously inspecting physical connections—ensuring MIDI cables and USB cables are secure and functional, and power supplies are robust—you establish a solid foundation for reliable communication.
Thoroughly verifying software settings within the drum module (like MIDI channels and local control) and the DAW (including MIDI input device selection and track arming) is equally crucial, as misconfigurations here are common culprits.
When basic steps fall short, advanced troubleshooting techniques such as isolating components, employing MIDI monitoring software to interpret raw MIDI data, and updating drivers and firmware become invaluable tools.
Addressing specific problems like no sound (often due to incorrect MIDI note assignments or velocity sensitivity), latency (requiring buffer size adjustments and driver optimization), incorrect notes (stemming from MIDI note mapping conflicts), and intermittent connections (potentially caused by faulty cables or USB port issues) demands targeted solutions.
Ultimately, adopting preventative measures like proper setup and cable management, consistent software and firmware updates, a clear understanding of MIDI basics, and diligent backing up of settings will drastically enhance your electronic drumming experience.
Should persistent problems arise, consulting your drum module or DAW manufacturer’s support resources and engaging with online communities can provide tailored assistance, ensuring that your journey with electronic drums remains smooth and musically fulfilling.