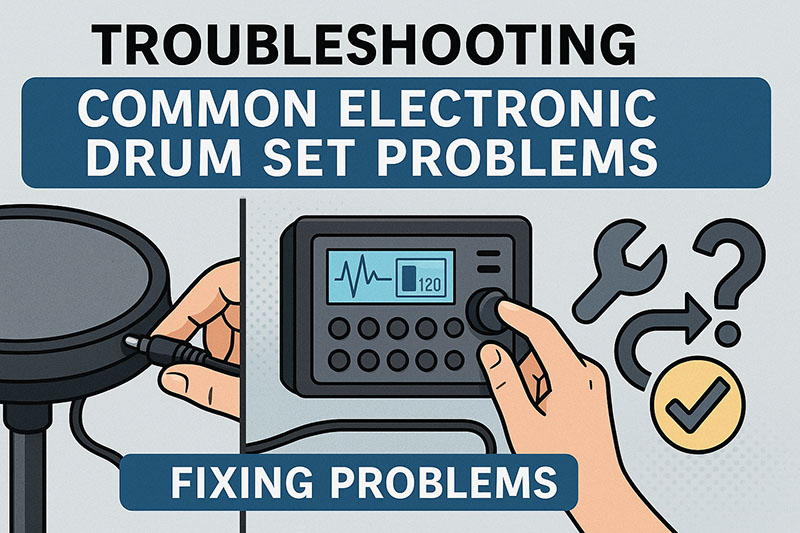
Electronic drum sets represent a significant advancement in percussive technology, offering diverse sounds, controllable volume, and flexible practice options.
For musicians seeking the Best Electronic Drum Set, reliability and consistent performance are paramount.
However, like any complex electronic instrument, e-drums can encounter technical glitches that interrupt your playing experience.
Understanding Troubleshooting Common Electronic Drum Set Problems is therefore an essential skill for any owner, ensuring your kit remains in optimal condition and continues to meet your musical needs.
This article will systematically explore typical issues encountered with electronic drum kits, ranging from fundamental connectivity problems to intricate trigger settings and module malfunctions.
We will delve into practical, step-by-step solutions for common woes such as pads not triggering, dealing with unwanted double hits, resolving pedal inconsistencies, and addressing issues with the drum module or external connections, empowering you to diagnose and fix these problems effectively and efficiently.
Initial Checks: The Foundation of Troubleshooting
Before delving into complex diagnostics, conducting fundamental checks establishes a crucial baseline.
Does your electronic drum set receive adequate power and are all components properly connected? Verifying the power supply is a primary step; ensure the adapter connects securely to both the wall outlet and the drum module, confirming it’s the correct voltage and amperage specified by the manufacturer.
Subsequently, inspect all cables linking drum pads, cymbals, and pedals to their respective inputs on the drum module; loose or incorrect connections frequently cause performance issues.
A thorough visual inspection of these cables and connectors helps identify visible damage like kinks, cuts, or bent pins that could impede signal flow.
Furthermore, confirming that your headphones or amplifier are correctly plugged into the appropriate outputs on the module and their volume controls are adequately raised prevents the common frustration of thinking there is no sound when the output simply isn’t directed or amplified properly.
Within the drum module itself, reviewing basic settings is equally vital.
Is the master volume level on the module turned up sufficiently? Sometimes, a simple mute setting or extremely low volume setting is the culprit behind a perceived lack of sound from the entire electronic drum kit.
Similarly, confirm the module is set to the desired drum kit or instrument sound; an unintended setting might produce unexpected or absent sounds.
As a final step for general, inexplicable issues, consulting your user manual to perform a factory reset can sometimes clear software glitches by restoring the module to its original settings, though this should be approached with caution as it will erase any personalized configurations.
Here is a quick checklist for initial troubleshooting:
- Verify Power Supply Connection
- Confirm Module is Powered On
- Check All Pad/Pedal Cable Connections to Module Inputs
- Inspect Cables/Connectors for Damage
- Ensure Headphones/Amplifier Connected to Module Outputs
- Check Master Volume Level
- Confirm Correct Drum Kit/Sound is Selected
Pad and Cymbal Triggering Issues
Pads or cymbals failing to produce sound upon being struck is a prevalent problem with electronic drum sets.
If a specific drum pad or electronic cymbal produces no sound, the most probable cause is often its connection; check the cable firmly inserted at both the pad’s output and the module’s designated input.
To definitively rule out the cable as the source of the problem, swap it with a known working cable from another pad; if the previously non-triggering pad now works, the original cable is faulty and requires replacement.
Alternatively, connect the problematic pad to a different input on the drum module (if your module has spare assignable inputs); if it triggers correctly on the new input, the original input port on the module might be damaged, suggesting a potential need for module repair or service.
Lastly, within the drum module’s settings, verify the sensitivity level for that specific pad is not set too low, preventing it from registering your hits.
When a drum pad or cymbal triggers inconsistently or only produces a weak sound, it indicates the module is not reliably detecting your strikes at the desired intensity.
Adjusting the sensitivity and threshold settings in the drum module is crucial here; sensitivity determines how easily a pad triggers from softer hits, while threshold sets the minimum force required to produce any sound.
Experimenting with these values allows you to calibrate the pad to your playing style and the pad’s responsiveness.
The physical sensor within the pad might also be misaligned or worn; this often requires opening the pad, which is best left to individuals comfortable with electronics or potentially requires consulting the manufacturer’s support or a qualified technician to avoid causing further damage.
Additionally, ensuring you are using proper striking technique and suitable drumsticks for e-drums (often nylon-tipped to preserve mesh heads) can improve triggering consistency.
One of the more frustrating issues is double triggering, where a single strike on a pad or cymbal produces two or more sounds.
This occurs when the pad’s sensor registers multiple vibrations from a single hit, often from the stick bouncing slightly or the head vibrating after the initial strike.
Addressing this involves adjusting the retrigger cancel or mask time settings in the drum module; retrigger cancel tells the module to ignore subsequent trigger signals for a very short period after the initial one, effectively filtering out bounce-back.
Increasing this value slightly usually resolves double triggering.
Lowering the sensitivity of the affected pad can also help, making it less likely to pick up faint secondary vibrations.
Physically, check for loose components on the pad itself or the drum rack that might be vibrating excessively; tightening screws and ensuring pads are mounted securely can sometimes mitigate this issue.
Crosstalk is another triggering anomaly where hitting one pad inadvertently triggers a sound from a different pad.
This typically happens due to vibrations traveling through the drum rack or frame, which are then picked up by the sensors in adjacent pads.
Your drum module likely has specific crosstalk cancellation settings designed to mitigate this; these settings usually involve telling the module to reduce the sensitivity of other pads slightly when a nearby pad is struck forcefully.
Experimenting with these settings for the pads involved in the crosstalk helps the module differentiate between intentional strikes and sympathetic vibrations.
Physically inspecting your setup to ensure no pads are touching each other or the drum rack directly is also a fundamental step; adjusting the positioning of pads and ensuring all mounting hardware is tight can significantly reduce vibration transfer.
Table 1: Common Pad/Cymbal Triggering Problems & Solutions
| Problem | Description | Primary Cause(s) | Common Troubleshooting Steps |
|---|---|---|---|
| No Sound | Hitting the pad produces no sound. | Loose cable, faulty cable, bad input on module, low sensitivity. | Check/Swap Cable, Test on Different Input, Adjust Sensitivity. |
| Inconsistent/Weak | Pad sometimes doesn’t trigger or sounds very quiet. | Low sensitivity, high threshold, worn sensor, technique. | Adjust Sensitivity/Threshold, Check Striking Technique, Inspect Pad (advanced). |
| Double Triggering | One hit produces multiple sounds. | Pad bounce-back vibrations, high sensitivity, module settings. | Adjust Retrigger Cancel/Mask Time, Lower Sensitivity, Check Mounting Tightness. |
| Crosstalk | Hitting one pad triggers sound from another. | Vibration transfer through rack/frame, module settings. | Adjust Crosstalk Cancellation, Ensure Pad Isolation, Tighten Mounting Hardware. |
Drum Module Problems
The drum module, often referred to as the “brain” of the electronic drum set, is the central processing unit that interprets trigger signals and produces sound.
If the module itself fails to power on, the most probable cause is an issue with the power supply.
Test the power adapter by plugging it into a different working outlet; if the issue persists, and you have a compatible adapter from another device (matching voltage and polarity exactly), you could test if the original adapter is faulty.
Never use an adapter with different specifications, as this can damage the module.
If trying a different outlet or a known working compatible adapter doesn’t resolve the issue, the problem likely lies within the drum module’s power circuitry, necessitating contact with manufacturer support.
When the module freezes or exhibits erratic behavior, such as unresponsive buttons or unexpected sound changes, it often indicates a temporary software glitch.
Performing a simple power cycle – turning the module off, waiting a few seconds, and turning it back on – can frequently resolve these temporary states by resetting the internal processor.
Checking for available firmware updates for your specific drum module is also a critical maintenance step; manufacturers often release updates to fix bugs, improve performance, and add new features.
Visiting the manufacturer’s website, downloading the latest firmware, and following their specific update instructions can resolve many module-related issues.
If issues persist, a factory reset might be necessary to clear any corrupted settings, but be aware this will erase your custom configurations.
Problems with connected MIDI devices or software controlling the module can also cause erratic behavior; try disconnecting external devices to see if the module functions normally on its own.
Experiencing poor sound quality or distortion directly from the module’s outputs (heard through headphones or an amplifier) suggests an issue with the audio signal processing or output circuitry.
Begin by checking the audio cables connecting the module to your listening device; ensure they are fully inserted and undamaged.
Testing with a different pair of headphones or a different amplifier helps determine if the issue lies with the module’s output or the external listening equipment.
Verify that the module’s master output level and individual kit/instrument volume levels are not set excessively high, which can introduce digital distortion or clipping.
The quality of the sound samples or the effects settings within the module could also contribute to perceived poor sound; try selecting a different, standard kit sound to see if the problem persists, suggesting an issue with specific sounds or internal processing.
Table 2: Common Drum Module Issues & Solutions
| Problem | Description | Primary Cause(s) | Common Troubleshooting Steps |
|---|---|---|---|
| Module Not Turning On | The drum module does not power up. | Faulty power supply/adapter, internal power issue. | Check Outlet, Test Power Adapter, Contact Manufacturer Support. |
| Module Freezing/Erratic | Unresponsive buttons, unexpected behavior. | Software glitch, firmware issue, conflicting external device. | Power Cycle Module, Check for/Install Firmware Updates, Factory Reset, Disconnect External Devices. |
| Poor Sound Quality | Distortion, crackling, or generally bad audio output. | Faulty audio cables, high output levels, internal processing. | Check Audio Cables, Test with Different Headphones/Amp, Adjust Volume Levels, Test Different Kit Sounds. |
Pedal Issues (Hi-Hat and Kick)
Pedals, specifically the kick pedal and hi-hat pedal, are critical components for dynamics and rhythm but can be prone to issues due to mechanical movement.
If your kick pedal is not triggering the bass drum sound or is double triggering, first verify the cable connection from the kick pad (or kick trigger) to the designated kick input on the drum module.
Ensure the beater is correctly positioned and making solid contact with the center of the kick pad; improper beater alignment can lead to missed triggers or uneven response.
Within the drum module’s settings, adjust the sensitivity and retrigger cancel specifically for the kick input; increasing retrigger cancel is often the solution for double triggering, while increasing sensitivity can help with missed strokes.
The type of beater used is also important; felt beaters can wear down mesh heads over time, and some pads recommend plastic or rubber beaters.
Inspect the kick pedal mechanism itself for any physical issues, such as a loose spring, bent rod, or worn hinge, which could affect its travel and impact on the sensor.
Issues with the hi-hat pedal often relate to its ability to correctly articulate open, closed, and splash sounds, as well as controlling foot chick sounds.
Ensure the hi-hat pedal connects to the specific hi-hat control input on the drum module, not a standard pad input, as it sends continuous control data, not just simple trigger signals.
Many modules require calibrating the hi-hat pedal to recognize its full range of motion (from fully open to fully closed); consult your module’s manual for specific calibration instructions.
If the pedal is not producing foot chick sounds when pressed and released quickly without striking the pad, check the pedal’s sensor mechanism or its connection to the module.
Problems with the hi-hat pad’s choke sensor (allowing you to mute the cymbal by grabbing its edge) would involve checking the cable connection from the pad and potentially recalibrating the hi-hat system.
List 1: Troubleshooting Kick Pedal Problems
- Verify Cable Connection to Module’s Kick Input.
- Check Beater Position and Contact with Kick Pad.
- Adjust Kick Sensitivity in Module Settings.
- Increase Kick Retrigger Cancel for Double Triggering.
- Ensure Correct Beater Type for Kick Pad.
- Inspect Pedal Mechanism for Physical Issues.
List 2: Troubleshooting Hi-Hat Pedal Problems
- Ensure Hi-Hat Pedal is Connected to Dedicated Hi-Hat Control Input.
- Calibrate the Hi-Hat Pedal in the Module’s Settings (Consult Manual).
- Check Pedal Mechanism and Sensor.
- Verify Hi-Hat Pad Cable Connection for Choke Functionality.
Connectivity and MIDI Issues
Connecting your electronic drum set to a computer or external devices like sequencers or synthesizers opens up a world of possibilities but can introduce connectivity challenges.
If you encounter problems connecting your drum module via USB or MIDI, first verify the physical cable connections; ensure the USB cable is plugged into a compatible port on both the module and your computer, and that MIDI cables are connected correctly (MIDI Out from module to MIDI In on device, and MIDI In from module to MIDI Out on device).
For USB connections, ensuring the correct drivers for your specific drum module are installed on your computer is often essential for proper communication; visit the manufacturer’s website to download the latest drivers.
Within your Digital Audio Workstation (DAW) or other music software, verify that the correct MIDI input device (your drum module) is selected and enabled.
Checking the MIDI settings on the drum module itself, such as ensuring MIDI output is enabled and configured correctly, is also necessary.
If using a USB hub, try connecting the module directly to your computer’s USB port, as some hubs can cause connectivity issues.
Latency, the delay between striking a pad and hearing the sound, is a common frustration when using e-drums with computer software.
This delay makes playing feel unnatural and can hinder timing accuracy.
The primary factor affecting latency is the audio buffer size setting in your computer’s audio preferences or within your DAW.
A smaller buffer size reduces latency but requires more processing power from your computer; a larger buffer size increases latency but is less demanding on the processor.
Experimenting with different buffer sizes to find the lowest setting your system can handle without audio dropouts or crackling is key.
Using a high-quality audio interface with dedicated, low-latency drivers significantly improves performance compared to relying on your computer’s built-in sound card.
Minimizing background processes and closing unnecessary applications on your computer frees up processing power, further reducing potential latency.
The speed and performance of your computer also play a significant role in how low you can set your buffer size; a more powerful computer can handle lower latency settings.
List 3: Addressing Connectivity and Latency
- Verify USB/MIDI Cable Connections.
- Install Correct Drivers for Your Module.
- Check MIDI Settings in Your DAW/Software.
- Confirm MIDI Settings on Your Drum Module.
- Connect Directly (Avoid USB Hubs).
- Adjust Audio Buffer Size in Software/OS.
- Consider Using a Dedicated Audio Interface.
- Close Unnecessary Computer Applications.
When to Seek Professional Help
While many common electronic drum set problems are resolvable through careful troubleshooting, some issues may require expert intervention.
If you have systematically gone through all the relevant troubleshooting steps outlined above – checking cables, adjusting module settings like sensitivity, threshold, retrigger cancel, and crosstalk, performing factory resets, and checking for firmware updates – and the problem persists, it strongly suggests a hardware failure within a pad, pedal, cable, or the drum module itself.
At this point, the most prudent course of action is to contact the manufacturer’s customer support.
Be prepared to provide them with a detailed description of the problem, including when it started, what exactly happens (e.g., “this specific pad doesn’t trigger at all,” “the module freezes after 10 minutes of playing”), and the specific troubleshooting steps you have already attempted.
Having your model number and serial number readily available will also expedite the support process.
If your kit is out of warranty or the manufacturer recommends professional repair, seek out a qualified electronic instrument repair technician.
These technicians have the specialized knowledge and tools to diagnose and repair internal hardware issues that are beyond basic user-level troubleshooting.
Attempting complex repairs yourself without the necessary expertise can void warranties and potentially cause further damage to your valuable electronic drum set.
A reputable technician can assess the damage and provide an estimate for the repair cost, allowing you to decide if repair is a cost-effective solution compared to replacing the faulty component or even upgrading your drum kit.
Investing in the “Best Electronic Drum Set” means valuing its longevity and performance, and sometimes professional repair is a necessary step in maintaining that investment.
Table 3: Problem Complexity and Recommended Action
| Problem Severity | Description | Recommended Action |
|---|---|---|
| Simple/Common | No sound (easy fix), double triggering, minor crosstalk. | User Troubleshooting (Cables, Settings, Basic Checks). |
| Moderate | Inconsistent triggering, pedal calibration issues, minor module glitches. | Detailed User Troubleshooting (In-depth Settings, Firmware, Calibration). |
| Complex/Persistent | Pad/Pedal hardware failure, module not powering on, recurring errors. | Contact Manufacturer Support, Seek Qualified Electronic Instrument Repair Technician. |
In conclusion, owning an electronic drum set provides an exceptional drumming experience, and being equipped to handle Troubleshooting Common Electronic Drum Set Problems ensures that experience remains positive.
By systematically checking power and connections, meticulously adjusting drum module settings like sensitivity, threshold, retrigger cancel, and crosstalk, addressing specific issues with drum pads, cymbals, and pedals, and understanding how to manage connectivity and latency, you can resolve the vast majority of issues that may arise.
Remember to consult your user manual for specific instructions related to your model’s settings and functions.
For problems that persist despite thorough troubleshooting, knowing when to reach out to customer support or a qualified electronic instrument repair technician is key to keeping your electronic drum set in peak condition, allowing you to focus on what truly matters: making music.
Maintaining your kit properly ensures it continues to perform as the Best Electronic Drum Set for your needs.