A reliable drum throne is the unsung hero of any drum kit, providing the crucial foundation for posture, balance, and endurance during practice and performance.
When a throne begins to wobble, sink, or show signs of wear, it can disrupt a drummer’s focus and even lead to physical discomfort or injury.
Fortunately, many of the most common drum throne ailments, from a slowly sinking seat to torn upholstery, can be resolved with some basic tools and a bit of DIY spirit, making drum throne repair a cost-effective and empowering skill for any percussionist.
This comprehensive guide will delve into the essential knowledge required to keep your drumming foundation solid.
We will explore the fundamental anatomy of a drum throne, diagnose the most frequent problems that arise, and provide detailed, step-by-step instructions for a wide range of repairs.
Furthermore, we will cover preventative maintenance to prolong the life of your equipment and offer a clear framework for deciding when a simple fix is sufficient versus when it’s time to invest in a replacement, ensuring you always have a stable and comfortable seat behind the kit.
Anatomy of a Drum Throne: Knowing Your Gear
Understanding the constituent parts of your drum throne is the first step toward a successful repair, as it allows you to accurately pinpoint the source of any instability or malfunction.
While designs vary between manufacturers, most thrones share a core set of components that work together to provide support and adjustability.
Familiarizing yourself with this anatomy will demystify the repair process and help you follow the diagnostic and repair steps outlined later in this guide.
- Seat Top (Cushion):
- This is the part you sit on, typically round or “saddle” style.
- It’s constructed from foam padding and covered in a durable material like vinyl, leather, or cloth.
- The comfort and ergonomics of your entire setup start here.
- Mounting Bracket:
- Located on the underside of the seat top, this heavy-duty metal plate is what connects the seat to the height adjustment mechanism.
- It’s a critical stress point and often features a large wing nut or bolt for securing the connection.
- Spindle/Height Adjustment Mechanism:
- This is the core of the throne’s functionality.
- The most common types are the spindle (a long, threaded rod for manual height changes) and the hydraulic/pneumatic (a gas-pressurized cylinder that allows for smooth, lever-activated adjustments).
- The type of mechanism you have will dictate the repair approach for height-related issues.
- Memory Lock:
- A crucial component for consistency, the memory lock is a hinged clamp that sits on the center post of a spindle throne.
- Once you set your preferred height, you tighten the memory lock to prevent the throne from sinking and to ensure you can quickly set it to the exact same height every time.
- Tripod Base and Feet:
- This forms the foundation of the throne.
- It consists of three legs, often double-braced for extra stability, that connect to a central tube.
- At the end of each leg is a rubber foot designed to prevent slipping and protect the floor.
- The integrity of the welds and rivets on the base is paramount for safety.
Common Drum Throne Problems and How to Diagnose Them
Effectively diagnosing a problem with your drum throne requires observing its specific symptoms and understanding the likely mechanical causes.
A sinking sensation points to a different set of issues than a side-to-side wobble, and identifying the correct cause is essential for applying the right fix.
This section breaks down the most common failures, their tell-tale signs, and the components that are most likely responsible.
| Problem | Primary Symptom(s) | Likely Causes | Affected Components |
|---|---|---|---|
| The Sinking Throne | Seat gradually loses height during use; will not stay locked in position. | Failing hydraulic cylinder (gas leak), worn or stretched height-adjustment clamp, stripped threads on the spindle, missing or loose memory lock. | Hydraulic/Pneumatic Cylinder, Height-Adjustment Clamp, Spindle, Memory Lock |
| The Wobbly Throne | Unstable side-to-side or front-to-back movement; feels unsecure. | Loose connection between seat and base, worn-out plastic or nylon bushings inside the center tube, loose rivets on the leg braces, cracked weld on the base. | Mounting Bracket, Bushings, Tripod Base Rivets/Welds |
| The Torn Upholstery | Visible rips, cracks, or tears in the seat’s surface material. | Normal wear and friction over time, accidental punctures from sharp objects (e.g., cymbal stands in transport), drying and cracking of vinyl due to age or sun exposure. | Seat Top (Cushion) |
| Stripped Hardware | Wingnuts, bolts, or T-screws spin freely without tightening the component. | Overtightening, cross-threading during assembly, fatigue and wear of low-quality metal parts. | Wingnuts, Bolts, Threaded Inserts |
Step-by-Step Repair Guides
Once you have diagnosed the issue, it’s time to proceed with the repair.
This section provides detailed, step-by-step instructions for tackling the most common drum throne problems.
Before you begin, gather some basic tools.
Essential Tools & Materials List:
- Adjustable Wrench or Socket Set
- Pliers (Standard and Needle-Nose)
- Screwdrivers (Phillips and Flathead)
- Duct Tape or Electrical Tape
- Hose Clamps (for DIY memory lock)
- Power Drill with Metal-Drilling Bits (for advanced repairs)
- Vinyl Repair Kit
- Lubricant (e.g., white lithium grease)
Fixing a Sinking Drum Throne
A sinking throne is arguably the most disruptive equipment failure a drummer can face.
The repair method depends entirely on whether your throne has a spindle or a hydraulic adjustment mechanism.
For Spindle-Style Thrones:
- The “Super-Tighten” Technique:
- This is a first-aid measure for a slightly loose height-adjustment clamp.
- First, tighten the clamp’s wingnut as much as you can by hand.
- Then, while securely holding the clamp to prevent it from turning, grip the seat cushion and turn it clockwise as if you were trying to lower it.
- This uses the leverage of the seat itself to apply extra torque to the spindle threads, often creating a tighter grip that can hold for a short period.
- This is a temporary fix and indicates the clamp is beginning to fail.
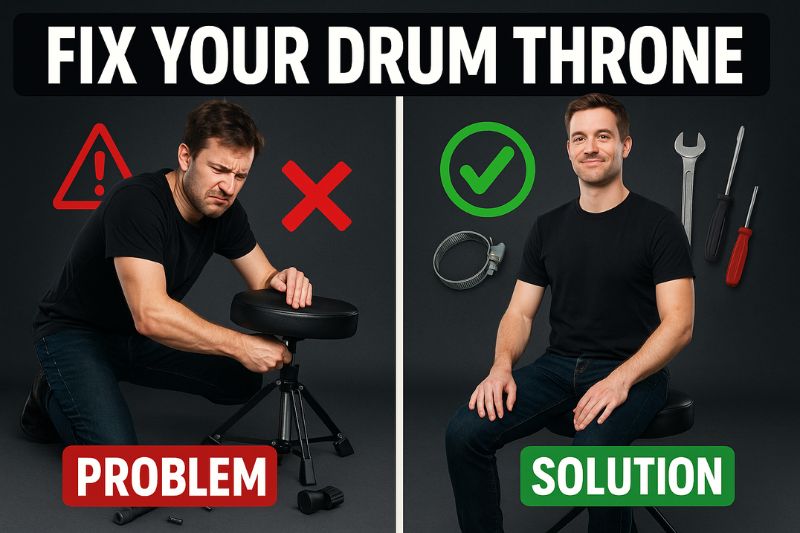
- The Hose Clamp Solution (DIY Memory Lock):
- This is the most popular and robust DIY fix for a sinking spindle throne.
- It creates a physical stop that prevents the height clamp from slipping down.
- Measure:
- Use a caliper or measuring tape to find the diameter of your throne’s center post (the inner tube).
- Purchase:
- Buy a stainless steel hose clamp from any hardware store that can accommodate that diameter.
- Set Height:
- Adjust your throne to your perfect playing height.
- Position Clamp:
- Slide the hose clamp down the center post until it is snug against the main height-adjustment clamp.
- Tighten Securely:
- Use a screwdriver or nut driver to tighten the hose clamp firmly.
- This creates a makeshift memory lock that mechanically prevents the throne from sinking.
- Measure:
- Drilling a Hole for a Pin/Bolt: This is a permanent modification that provides absolute security.
- Adjust the throne to your desired height.
- Use a permanent marker to mark a spot on the outer tube that aligns with a hole or gap in the inner tube.
- Disassemble the post and use a power drill with a metal-drilling bit to drill a hole all the way through both the outer and inner tubes at your marked spot.
- Insert a snug-fitting bolt with a nut or a clevis pin with a cotter pin through the hole. This creates a physical shear point that makes it mechanically impossible for the throne to collapse.
For Hydraulic/Pneumatic Thrones:
- Check the Activation Lever:
- Before assuming the cylinder is dead, ensure the activation lever isn’t stuck in the “open” position.
- Sometimes debris can get lodged in the mechanism, or the lever itself can be bent.
- Wiggle it and ensure it moves freely.
- Contacting the Manufacturer:
- If the throne is still under warranty, your first action should be to contact the manufacturer.
- They will often send a replacement cylinder free of charge.
- Replacing the Gas Cylinder:
- If the warranty has expired, you can often purchase a replacement cylinder from the manufacturer or a drum parts supplier.
- Removal:
- Turn the throne upside down.
- The cylinder is pressure-fit into both the seat bracket and the tripod base.
- This can be a very tight fit. You may need to use a rubber mallet to carefully tap the base and the seat bracket away from the cylinder.
- Avoid using a metal hammer, as this can damage the components.
- Installation:
- Simply place the new cylinder into the base, then place the seat bracket on top of the cylinder.
- Sit on the throne with some force to pressure-fit the new components together.
- Removal:
- If the warranty has expired, you can often purchase a replacement cylinder from the manufacturer or a drum parts supplier.
Fixing a Wobbly Drum Throne
A wobbly throne compromises your balance and can be a sign of a serious structural issue.
- Tighten All Connections:
- This is the easiest first step.
- Using your wrench, systematically check and tighten the large nut connecting the seat bracket to the spindle, the bolts holding the mounting plate to the seat cushion, and any hardware on the tripod base.
- The Duct Tape/Electrical Tape Trick:
- If the wobble comes from a loose fit between the inner and outer tubes of the base, you can use tape as a shim.
- Wrap a few layers of electrical tape or a single layer of duct tape around the inner tube where it inserts into the base.
- This adds a fraction of a millimeter to the diameter, creating a tighter, more stable fit.
- Replacing Worn Bushings:
- Many thrones have a plastic or nylon bushing inside the main tube of the base that prevents metal-on-metal contact and reduces wobble.
- Over time, this bushing can wear down or crack.
- You can often order a replacement from the manufacturer.
- Simply remove the old one (you may need to pry it out) and insert the new one.
- Addressing Loose Rivets:
- If the legs of the tripod are wobbly, the rivets holding the braces may be loose.
- For a simple fix, you can place the rivet on a hard surface (like an anvil or concrete floor) and gently tap it with a hammer to tighten it.
- For a more permanent solution, you can drill out the old rivet and replace it with a bolt, a locking washer, and a nut.
Repairing Torn Upholstery
While often a cosmetic issue, a small tear can catch on clothing and grow larger, eventually exposing the foam underneath.
- Quick Fixes:
- For a gigging emergency, a piece of black gaff tape or high-quality duct tape can cover a tear and prevent it from worsening.
- The key is to cut the tape in a circular or oval shape, as corners are more likely to peel back over time.
- Vinyl/Leather Repair Kits:
- These kits, often sold for automotive or furniture repair, provide a much cleaner and more permanent solution.
- The process typically involves:
- Cleaning the area around the tear.
- Placing a backing fabric inside the tear.
- Applying a colored repair compound that you mix to match your seat color.
- Using a textured paper and heat (from an iron) to cure the compound and mimic the grain of the material.
- Complete Reupholstering:
- If the seat is severely damaged, you can reupholster it yourself.
- This involves removing the seat from the base, prying off the old upholstery and staples, using the old material as a template to cut new fabric, and then using a staple gun to attach the new cover, ensuring it is pulled taut for a smooth finish.
Dealing with Stripped Threads
Stripped threads on a wingnut or bolt can render a key adjustment point useless.
- Using a Thread Restoring Tool:
- If the threads on a bolt or spindle are only slightly damaged, you may be able to clean them up using a thread-restoring file or a tap and die set.
- This requires some mechanical skill but can save a component from the scrap heap.
- Replacing the Hardware:
- This is often the easiest solution.
- Take the stripped bolt or wingnut to a well-stocked hardware store to find a match.
- For proprietary parts, contact the drum manufacturer or a specialized retailer like Drum Factory Direct.
| Repair Task | Difficulty | Estimated Time | Estimated Cost |
|---|---|---|---|
| DIY Hose Clamp Memory Lock | Easy | 10-15 minutes | $2 – $5 |
| Tightening Loose Hardware | Easy | 5 minutes | $0 |
| Applying Vinyl Repair Kit | Medium | 30-60 minutes | $15 – $25 |
| Replacing Hydraulic Cylinder | Medium | 20-40 minutes | $40 – $80 |
| Drilling for a Pin/Bolt | Hard | 30 minutes | $1 – $5 (for bolt) |
| Replacing Base Rivets | Hard | 45-60 minutes | $1 – $5 (for bolts) |
Preventative Maintenance: Keeping Your Throne in Top Shape
The best way to handle drum throne repair is to avoid it in the first place.
A consistent maintenance routine can dramatically extend the life of your throne and prevent sudden failures during a performance.
Preventative Maintenance Checklist:
- Before Each Session:
- Give the throne a quick wobble test.
- Check that the seat is secure and the height lock is engaged.
- Monthly Check-up:
- Go over the entire throne with a wrench and screwdriver.
- Tighten any hardware that may have loosened from vibrations.
- This is the single most effective preventative measure.
- Clean the Upholstery:
- Wipe down vinyl or leather seats with a damp cloth.
- For deeper cleaning, use a specialized vinyl cleaner to keep the material supple and prevent it from drying out and cracking.
- Lubricate the Spindle:
- If you have a spindle-style throne, periodically clean the threads with a cloth and apply a small amount of white lithium grease or similar lubricant.
- This ensures smooth adjustment and prevents the threads from binding or stripping.
- Transport with Care:
- When moving your kit, avoid piling heavy hardware on top of the throne seat.
- If possible, use a dedicated hardware bag or case to protect the throne from punctures and unnecessary stress.
When to Repair vs. When to Replace
While many issues are fixable, there comes a point where a repair is no longer safe or cost-effective.
A drummer’s throne is a critical piece of safety equipment; a catastrophic failure can lead to a serious fall and injury. Knowing when to retire an old throne is just as important as knowing how to fix it.
You should immediately replace your throne if you discover:
- A Cracked or Broken Base:
- Inspect the welds where the legs meet the center tube.
- If you see any cracks in the metal, the throne is unsafe and must be replaced. A failure here is sudden and complete.
- Bent or Deformed Legs:
- If any of the tripod legs are significantly bent, the throne’s stability is compromised and it should be replaced.
- Chronic Instability:
- If you have tried all the fixes for a wobbly throne and it remains unstable, it’s time for a new one.
- Your balance and focus are too important.
For other issues, consider the cost.
If a replacement hydraulic cylinder costs $60 but you can buy a brand new, reliable spindle throne for $80, it might be more sensible to replace it, especially if the old throne is showing other signs of wear.
A high-quality throne is a long-term investment in your comfort, health, and performance.
Conclusion
Your drum throne is far more than just a place to sit; it is the ergonomic core of your entire setup, directly impacting your technique, stamina, and long-term spinal health.
Understanding the mechanics of this essential piece of gear empowers you to perform crucial drum throne repair and maintenance, saving you from the frustration and potential danger of a mid-session failure.
By learning to diagnose common problems like a sinking seat or a distracting wobble, and by applying the straightforward, step-by-step solutions outlined in this guide, you can ensure your throne remains a stable and reliable partner in your musical journey.
Taking a proactive approach through regular maintenance and knowing the critical signs that indicate a need for replacement will not only save you money but will also provide the peace of mind that comes from having a solid, dependable foundation every time you play.