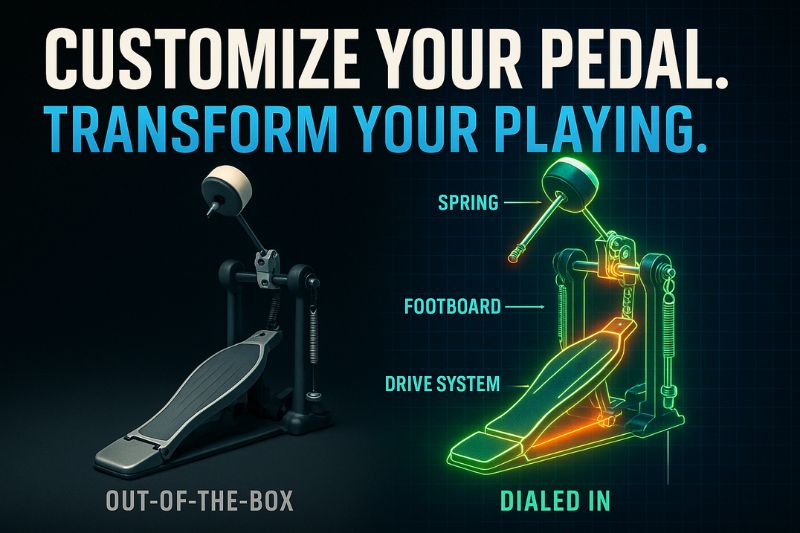
Is your bass drum pedal holding you back from achieving the speed, power, and nuanced control you envision in your playing? For many drummers, the stock pedal that comes out of the box is treated as a fixed entity, but in reality, it is merely a starting point—a blank canvas ripe for personalization.
The secret to unlocking your true potential on the kick drum lies not in endless practice with a tool that fights you, but in meticulously customizing its individual components to create a seamless extension of your own body.
By transforming your pedal from a generic factory product into a bespoke piece of high-performance hardware, you can conquer technical limitations and translate your musical ideas into powerful, articulate rhythms with unparalleled ease.
This comprehensive guide will serve as your detailed roadmap to complete pedal mastery, empowering you with the knowledge to make deliberate, impactful upgrades.
We will embark on a journey that deconstructs the bass drum pedal, examining each critical component and its profound effect on your playing experience.
We will explore the vast world of beaters, discovering how their material, weight, and shape sculpt your sound.
We will dissect the very engine of your pedal—the drive system—and compare the distinct characteristics of chain, belt, and direct drive mechanisms.
Furthermore, we will delve into the crucial role of spring tension, the ergonomic impact of footboard design, and the specific needs of double pedal setups.
By the end of this article, you will not only understand how to adjust your pedal but why each change produces a specific result, enabling you to build the dream pedal that perfectly complements your unique style.
The Heart of the Attack: Beaters
More Than Just a Stick: How Beaters Shape Your Sound and Feel
The beater is arguably the most influential component for shaping the fundamental character of your bass drum’s sound, acting as the final point of contact that transfers all your energy into the drumhead.
The material, shape, and weight of your beater are not minor details; they are primary tonal controls that dictate the attack, punch, and overall voice of your kick.
Choosing the right beater is the first and often most dramatic step in customizing your pedal, as a simple swap can take your sound from a warm, resonant boom to a sharp, cutting click.
This choice directly influences how your kick drum sits in a live mix or a studio recording, making beater selection a critical skill for any discerning drummer looking to define their signature sound.
Material Matters: From Felt to Wood and Beyond
The material composition of a beater’s playing surface directly determines the texture and timbre of the impact on the drumhead.
Felt beaters provide the quintessential warm and punchy bass drum sound, making them the most common and versatile choice for drummers across nearly all genres.
They come in varying densities, with softer felt producing a rounder, more subdued “thump” ideal for jazz or folk, while harder, denser felt offers a more pronounced, punchy attack suitable for rock and pop.
This ability to absorb some of the high-frequency impact makes felt a go-to for achieving a classic, full-bodied kick tone that is powerful yet controlled.
Plastic and nylon beaters deliver a significantly brighter, more articulate attack, emphasizing the high-end frequencies of the drum’s sound for a sharp, clicking impact.
This characteristic is highly sought after in genres like metal, punk, and electronic music, where the kick drum needs to slice through dense walls of distorted guitars and synthesizers.
The hard, non-porous surface of plastic ensures that every stroke is defined and precise, making it an excellent choice for players who prioritize clarity and projection, especially when playing intricate or rapid-fire patterns that could otherwise sound muddy.
Wood beaters offer a fascinating and sonically rich middle ground, capturing some of the warmth of felt while retaining much of the sharp attack of plastic.
This unique combination results in a natural, organic tone that is both punchy and full-bodied, with a pleasingly complex character.
Maple and other hardwoods are common choices, and they tend to bring out the shell resonance of the bass drum beautifully, making them a favorite among drummers in funk, fusion, and alternative rock who desire a sound that is both powerful and musical.
For situations demanding a softer touch, rubber beaters provide a quiet and gentle attack that minimizes volume while preserving a solid feel.
Their primary advantage is in low-volume settings, such as acoustic gigs, intimate rehearsals, or apartment practice on an electronic kit, where a standard beater might be overpowering.
The rubber surface absorbs a significant amount of the impact, resulting in a deep, muted tone with very little stick noise, allowing for dynamic control at the quietest end of the spectrum.
| Beater Material | Primary Attack Sound | Feel & Response | Best-Suited Genres |
|---|---|---|---|
| Felt (Hard/Soft) | Warm, Punchy, Rounded | Versatile, All-Purpose | Rock, Pop, Jazz, Funk, Country |
| Plastic / Nylon | Bright, Clicking, Sharp | Hard, Articulate, Fast | Metal, Punk, Electronic, Hard Rock |
| Wood | Natural, Full-Bodied, Defined | Solid, Responsive | Funk, Fusion, Alternative, Indie |
| Rubber | Muted, Deep, Soft | Soft, Quiet, Controlled | Acoustic, Practice, Low-Volume Gigs |
Shape and Weight: The Physics of Power and Speed
The physical design of a beater, encompassing its shape and weight, plays a crucial role in the pedal’s feel and the resulting sound.
Traditional rounded beaters concentrate their force on a smaller surface area upon impact, which can result in a slightly more focused and punchy tone.
In contrast, flat-faced beaters, often called “pancake” beaters, strike the head with a larger surface area simultaneously, producing a fatter, more powerful “slap” with a significant low-end presence.
This difference in contact patch fundamentally alters the way the drumhead vibrates, giving drummers another layer of tonal control to experiment with.
Weight is the critical variable in the eternal balance between power and speed.
A heavier beater, by virtue of its greater mass, will naturally strike the drum with more force, generating more volume and low-end frequencies with less effort from the player.
However, this added weight increases inertia, which can make the pedal feel slightly more sluggish and demanding for executing rapid, complex patterns.
Conversely, a lighter beater offers superior speed and control, allowing for intricate footwork and faster doubles with greater ease.
The trade-off is a reduction in natural volume, requiring more player effort to achieve the same power as a heavier counterpart.
Many modern beaters feature adjustable or interchangeable weights, offering a brilliant solution that allows a drummer to fine-tune the beater’s mass to find their perfect, personalized balance between raw power and nimble agility.
Pro-Tip: The Importance of Beater Angle Adjustment
Complementing your beater choice with the correct beater angle adjustment is essential for optimizing your pedal’s stroke and overall feel.
The beater angle determines the resting distance of the beater from the drumhead, which in turn dictates the length of its travel.
A longer stroke (beater angled further back) builds more momentum and can generate more power, but it requires more time and energy for each hit.
A shorter stroke (beater angled closer to the head) provides a quicker, more immediate response that is ideal for speed and intricate patterns.
Most modern pedals allow for independent adjustment of the beater angle and footboard height.
Take the time to experiment with this setting; a few degrees of change can dramatically alter the pedal’s feel, ensuring your chosen beater performs at its absolute best.
The Engine of Your Pedal: Drive Systems
Chain, Belt, or Direct Drive? Finding Your Perfect Connection
The drive system is the transmission of your bass drum pedal, the crucial link that converts the downward motion of your foot into the forward swing of the beater.
The type of drive system—be it chain, belt, or direct drive—is the single most defining factor of a pedal’s feel, response, and performance characteristics. Each system offers a unique playing experience, with distinct advantages and disadvantages that cater to different techniques and musical styles.
Understanding these differences is paramount to selecting a pedal that feels less like a machine and more like a natural, responsive extension of your foot.
- Chain Drive (Single and Double)
- Pros:
- Highly durable, powerful, and versatile.
- The double-chain design, in particular, offers exceptional stability and efficient power transfer, making it the industry standard.
- Cons:
- Can have a very slight feeling of “lag” compared to direct drive.
- Can produce minor mechanical noise over time.
- Pros:
- Belt Drive
- Pros:
- Exceptionally smooth, silent, and lightweight feel.
- The subtle flex of the belt can feel more fluid and organic to some players.
- Cons:
- Belts can stretch or fray over very long periods of heavy use (though modern Kevlar-reinforced belts are incredibly durable).
- May feel slightly less “connected” than a direct drive.
- Pros:
- Direct Drive
- Pros:
- Instantaneous, 1:1 response with zero lag or latency.
- Offers unparalleled precision, control, and speed, making it the top choice for highly technical playing.
- Cons:
- The unforgiving, direct connection can feel less “natural” or “swinging” to some players and may reveal inconsistencies in one’s technique.
- Pros:
A single-chain drive offers a lighter, more nimble feel and is often found on more affordable, entry-level pedals.
While perfectly functional, the single point of connection can introduce a small amount of side-to-side wobble under heavy playing.
The double-chain drive has become the modern standard for its superior stability and robustness.
By using two parallel chains, it ensures a straight, powerful pull with no lateral movement, providing a solid and reliable feel that has made it the workhorse for rock, metal, and pop drummers worldwide.
A belt drive system, typically crafted from durable materials like nylon or Kevlar, is prized for its exceptionally smooth and silent operation.
The feel of a belt is often described as more fluid or “springy” than a chain, offering a subtle give and take that many drummers find to be very natural and comfortable.
This light, floating sensation can reduce foot fatigue and is favored by players in jazz, funk, and studio settings where a nuanced and quiet mechanism is highly valued.
Direct drive represents the pinnacle of mechanical efficiency, linking the footboard directly to the beater assembly with a solid piece of metal.
This creates a perfect, one-to-one transfer of motion, eliminating the microscopic lag inherent in chain and belt systems.
The result is an incredibly responsive, precise, and fast pedal that feels directly connected to your foot.
This instantaneous response has made direct drive pedals the weapon of choice for metal drummers and other technical players who require absolute accuracy for executing blisteringly fast and complex kick patterns.
The Secret Ingredient: Interchangeable Cams
The cam is the component that the chain or belt wraps around, and its shape is a hidden secret to altering a pedal’s feel. A perfectly round cam provides a consistent, linear response throughout the entire stroke—the resistance you feel at the beginning is the same as the feeling just before impact.
This creates a smooth and predictable action that offers maximum control.
An offset or eccentric cam, however, is shaped more like an oval.
This ingenious design creates a non-linear response; the pedal feels lighter and easier to push at the start of the stroke, then accelerates or “whips” the beater into the head with increased velocity at the very end. This can give the player a feeling of increased power and speed without extra effort.
Many high-end pedals feature interchangeable cams, allowing a drummer to switch between a linear and an aggressive feel in minutes.
Feel and Response: Springs and Tension
Dialing in Your Pedal’s Resistance
Adjusting your pedal’s spring tension is the most direct and impactful way to control its return speed and the overall resistance you feel under your foot. The spring acts as the counterbalance to your stroke, responsible for pulling the beater back to its resting position after it strikes the head.
The tension of this spring is not a “set it and forget it” feature; it is a dynamic setting that should be tailored to your specific playing style, technique, and desired feel.
Finding your personal sweet spot for spring tension is a foundational step in making a pedal truly your own.
A higher spring tension will cause the beater to rebound from the head much more quickly and will make the footboard feel heavier and more resistant on the downstroke.
This setup is often preferred by drummers who play fast, intricate patterns (especially heel-up), as the rapid rebound essentially “resets” the pedal for the next stroke, helping the footboard keep up with the player’s foot.
Conversely, a lower spring tension results in a slower, more leisurely rebound and a much lighter, softer feel underfoot.
This is often favored by players who “bury the beater” or who use more ankle motion, as it allows for a more expressive and less fatiguing playing experience in less frantic musical contexts.
The World of Aftermarket Springs
While the stock spring on most quality pedals is perfectly adequate, the world of aftermarket drum parts offers specialized springs designed to provide an enhanced feel and performance.
These high-performance springs often promise a more consistent and fluid resistance throughout the entire stroke, eliminating the feeling of the spring “stacking up” or becoming disproportionately tight at maximum extension.
Some are designed to be lighter, while others offer a heavier-duty feel, allowing drummers to push their pedal’s feel beyond the limits of the stock component.
For players seeking the ultimate in smooth, predictable action, an aftermarket spring can be a small but surprisingly effective drum pedal upgrade.
Pro-Tip: A Step-by-Step Guide to Adjusting Spring Tension
Learning how to properly adjust your pedal’s spring tension is a fundamental skill.
Here is a simple, universal guide:
- Locate the Spring Assembly:
- Look at the side of your pedal’s frame.
- You will see the spring connected to the cam assembly at the top and an adjustment mechanism at the bottom.
- Identify the Adjustment Nuts:
- At the bottom of the spring, there will typically be two nuts on a threaded rod.
- The bottom nut is a locking nut, and the top nut is the tension adjustment nut.
- Loosen the Locking Nut:
- Using your fingers or a drum key, turn the bottom locking nut clockwise (downward) to loosen it and give yourself room to work.
- Adjust the Tension Nut:
- To increase tension (for a faster, heavier feel), turn the top adjustment nut counter-clockwise (upward). This will stretch the spring.
- To decrease tension (for a slower, lighter feel), turn the top adjustment nut clockwise (downward). This will compress the spring.
- Test and Refine:
- Make small adjustments at a time—a half-turn or a full turn—and then sit at your kit and play.
- The feel is entirely subjective, so trust your foot.
- Tighten the Locking Nut:
- Once you’ve found a tension that feels perfect, turn the bottom locking nut counter-clockwise (upward) until it is snug against the adjustment nut.
- This prevents your settings from vibrating loose while you play.
Your Foot’s Home: The Footboard
Longboard vs. Shortboard and Why It Matters
The footboard is your primary interface with the pedal, and its design has a significant impact on your technique, comfort, and playing style.
The fundamental division in footboard design is between the traditional shortboard and the modern longboard.
A shortboard, also known as a heel-plate design, features a separate, hinged heel piece that the rest of the footboard connects to.
This has been the standard for decades and is perfectly suited for traditional heel-down playing or heel-toe techniques where the heel remains a primary anchor point.
A longboard, by contrast, is a single, continuous piece of metal from the toe all the way to the heel hinge.
This design, which eliminates the separate heel plate, has exploded in popularity, especially among metal drummers and players who utilize the “foot-slide” technique for rapid-fire doubles and triples.
The extended, smooth surface provides a more consistent feel regardless of where the foot is placed, allowing for greater freedom of movement and facilitating techniques that are difficult or impossible on a shortboard.
The choice between them is entirely dependent on the player’s preferred foot technique.
| Footboard Style | Primary Feel & Design | Best For (Techniques) | Common Music Genres |
|---|---|---|---|
| Shortboard | Traditional, Hinged Heel-Plate | Heel-Up, Heel-Down, Heel-Toe | Rock, Pop, Jazz, Funk, Country |
| Longboard | Modern, Single-Piece Surface | Foot-Slide, Ankle-Control | Metal, Hardcore, Progressive Rock |
Fine-Tuning Your Comfort: Footboard Height and Angle
Beyond the longboard versus shortboard debate, the ability to adjust the footboard’s height and angle is a critical ergonomic feature for achieving maximum comfort and leverage.
Adjusting the footboard height, a feature available on most mid-range to high-end pedals, allows you to change the resting angle of your foot.
Some players prefer a higher, more aggressive angle that promotes power, while others favor a lower, more relaxed angle for better ankle control.
This adjustment, made independently of the beater angle, ensures that you can set up the pedal to match the natural resting position of your foot, reducing strain and improving the efficiency of your motion.
Experimenting with these settings can lead to a “eureka” moment where the pedal suddenly feels perfectly tailored to your body’s mechanics.
Double Pedal Customization
Syncing Up Your Feet: The Critical Role of the Driveshaft
For the double bass drummer, the driveshaft (or linkage) that connects the primary pedal to the slave pedal is the most important component for ensuring a consistent and responsive feel between both feet.
A low-quality or worn-out stock driveshaft can introduce lag, play, and rotational slop, causing the slave pedal to feel noticeably slower and less powerful than the main pedal.
This inconsistency can be incredibly frustrating and can severely hinder the development of clean, even double bass patterns.
This is where aftermarket driveshafts have become one of the most popular and impactful drum pedal upgrades.
These precision-engineered linkages are typically built from higher-grade materials with much tighter tolerances and superior universal joints (U-joints).
The result is a near-zero-latency connection that transfers the motion of the slave footboard to the beater with the same immediacy and accuracy as the primary pedal.
Upgrading to a high-performance driveshaft can be a night-and-day difference, making your slave pedal feel just as powerful and responsive as your main, finally allowing you to achieve true symmetry between your feet.
The Quest for Symmetry: Matching Beaters and Springs
To achieve a truly consistent feel across a double pedal setup, it is absolutely essential that the components on both the main and slave pedals are perfectly matched.
This means using identical beaters, set to the exact same height and angle.
Even a slight difference in beater weight or length can make one foot feel different from the other.
More importantly, the spring tension on both pedals must be dialed in to be identical.
Use the step-by-step guide from earlier to adjust each spring, constantly testing both pedals with your hands and feet until the resistance and rebound feel exactly the same.
This meticulous attention to symmetry is the key to building a double pedal that feels like a single, unified instrument under your feet.
Other Upgrades and Accessories
While beaters and drive systems represent major overhauls, a host of smaller aftermarket drum parts and accessories can provide significant improvements to your pedal’s performance and stability.
High-performance bearings can replace the stock bearings in your pedal’s moving parts (like the spring rocker or heel hinge), reducing friction and creating an even smoother, more effortless action.
An upgraded hoop clamp can offer a more secure grip on your bass drum hoop, preventing the pedal from sliding forward during intense playing, with many designs being easier and faster to attach.
For players who crave a consistent foot placement, a toe stop can be added to the footboard, providing a physical barrier that ensures your foot returns to the exact same spot for every stroke.
Even the base plate of a pedal can be considered; some pedals offer wider or heavier plates for enhanced stability on carpeted surfaces.
Conclusion: Building Your Dream Pedal
We have journeyed through every critical component of the bass drum pedal, from the sound-shaping beater to the responsive drive system, the resistant spring, and the ergonomic footboard.
It is clear that a pedal is not a monolithic tool but a modular system of interconnected parts, each offering a unique opportunity for customization.
The path to your perfect pedal is not about buying the most expensive model on the market, but about understanding how these components work together and having the courage to experiment.
There is no single “best” setup, only the setup that is best for you.
Your ideal pedal will be a reflection of your body, your technique, and your musical voice.
So, embrace the process of tinkering.
Swap out that beater, adjust that spring tension, and feel the difference for yourself.
By taking an active role in customizing your hardware, you are not just upgrading a piece of gear; you are investing in your own playing, removing physical barriers, and paving the way for new levels of creativity and expression.
Now go forth, and build the pedal of your dreams.
To continue your journey, you might be interested in our articles on “The Top 5 Best Bass Drum Pedals for Beginners” or “Practice Techniques to Develop Blazing Fast Bass Drum Speed.”