Proper cleaning and maintenance of pedals is the single most effective way for a drummer to guarantee consistent, reliable, and nuanced performance from their most-used piece of hardware.
The bass drum pedal is the heart of a drummer’s connection to their kit, translating every subtle foot movement into a powerful kick; yet, it is often the most neglected component.
Over time, an accumulation of dust, grime, and worn-out lubricant can transform a high-performance machine into a sluggish, noisy, and unpredictable liability.
This comprehensive guide will meticulously walk you through every facet of essential drum pedal maintenance.
We will explore the fundamental reasons why this upkeep is non-negotiable, detail the exact tools and supplies you’ll need for the job, and provide a granular, step-by-step process for a complete deep clean.
Furthermore, this article will equip you with the knowledge to troubleshoot common issues like squeaks and lag, establish a practical routine for ongoing care, and ultimately empower you to keep your pedal in pristine, factory-fresh condition for years to come.
Why Bother with Drum Pedal Maintenance?
Consistent drum pedal maintenance is crucial because it directly impacts your performance, extends the hardware’s lifespan, ensures silent operation, and provides unmatched reliability.
Your bass drum pedal is a precision instrument, and just like a guitar needs new strings or a snare drum needs tuning, your pedal requires regular attention to function at its peak potential.
Neglecting this critical aspect of drum hardware care can lead to a host of problems that can hinder your playing, whether you’re practicing in your basement, recording in a studio, or performing on stage.
Improved Performance:
A clean and properly lubricated pedal offers a demonstrably smoother, faster, and more responsive action, allowing for greater control over dynamics and complex patterns.
Friction is the enemy of speed and fluidity; dirt, dust, and dried-up grease create resistance in the pedal’s moving parts, such as the bearings, chain, and hinge.
This resistance forces your foot and leg muscles to work harder, which can lead to fatigue and a loss of precision.
When you perform a thorough cleaning and apply fresh lubricant, you restore the near-frictionless movement the pedal was designed to have.
This translates to effortless playing, where the pedal feels like a natural extension of your foot, accurately capturing every nuance from soft, feathered notes to powerful, driving kicks.
Increased Lifespan:
Diligent care significantly prevents the premature wear and tear of critical components, ultimately saving you the considerable expense of repairs or a full replacement.
The moving parts of a drum pedal, especially the bearings and chain pins, are under constant stress.
When abrasive particles like dust and grit work their way into these mechanisms, they act like sandpaper, slowly grinding away at the metal.
This accelerates wear, leading to issues like bearing failure or a stretched, weakened chain.
Regular cleaning removes these harmful abrasives, while proper lubrication provides a protective barrier that minimizes metal-on-metal friction.
By investing a small amount of time in maintenance, you protect your significant investment in a quality piece of hardware, ensuring it serves you faithfully for countless sessions.
Silent Operation:
Eliminating squeaks, clicks, and other extraneous noises is paramount for professional recording sessions and amplified live performances.
There is nothing more frustrating than capturing the perfect drum take, only to discover in playback that a persistent squeak from the bass drum pedal has bled into the microphones.
These noises are almost always a sign of a problem—a cry for help from a part that is either dry, dirty, or loose.
A well-maintained pedal is a silent one.
By keeping all joints, springs, and bearings clean and lubricated, you ensure that the only sound produced is the intentional, thunderous boom of your bass drum.
Reliability:
A meticulously maintained pedal provides the peace of mind that it will not fail you at a critical moment, such as during a high-stakes gig or an important audition.
Hardware failure is a musician’s nightmare.
A broken spring, a seized bearing, or a snapped chain can bring a performance to an abrupt and embarrassing halt.
These catastrophic failures rarely happen without warning; they are typically the end result of prolonged neglect.
Regular inspections, which are an inherent part of any good maintenance routine, allow you to spot potential problems—like a fraying spring or a wobbly beater hub—long before they become show-stopping emergencies.
This proactive approach to drum hardware care ensures your gear is always ready for the demands of any musical situation.
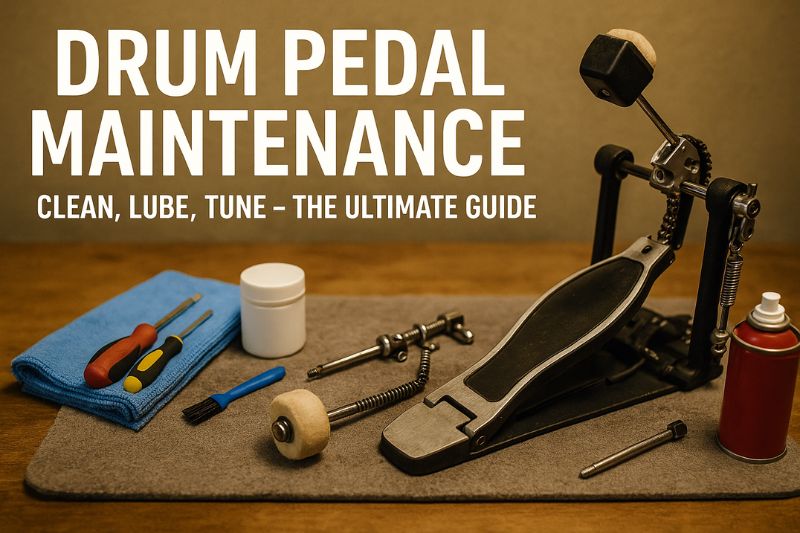
Getting Started: Tools and Supplies
Assembling the right collection of tools and supplies is the first step toward effective pedal maintenance, ensuring you can clean, lubricate, and adjust your hardware correctly and safely.
You don’t need a professional workshop, but having a few specific items on hand will make the process infinitely easier and more effective.
Most of these items are inexpensive and readily available at hardware stores or online.
Preparing your toolkit in advance prevents you from having to pause your work to find a missing item and encourages a more thorough and organized approach to the task.
Essential Toolkit Checklist
Here is a list of recommended items to have ready before you begin the cleaning and maintenance process.
Having these organized in a dedicated kit can make your routine maintenance tasks much more efficient.
- Microfiber Cloths:
- Essential for wiping down all surfaces, trapping dust and grime without leaving lint behind.
- Have at least two on hand—one for initial cleaning and one for final polishing.
- Old Toothbrushes or Small Brushes:
- Perfect for scrubbing hard-to-reach areas, cleaning the links of a drive chain, and dislodging stubborn dirt from crevices.
- Mild Degreaser (e.g., Dish Soap):
- When mixed with a small amount of water, this is excellent for cleaning the non-mechanical parts of your pedal, like the footboard and frame, cutting through grime without damaging the finish.
- Q-tips or Cotton Swabs:
- Invaluable for precision cleaning inside tight spots and for applying small, controlled amounts of lubricant to bearings and hinge pins.
- Drum Key:
- An absolutely non-negotiable tool for any drummer, required for adjusting most of the bolts on your pedal, including the beater holder and hoop clamp.
- Screwdrivers (Phillips and Flathead):
- Many pedals use standard screws, particularly on the heel plate or bottom plate.
- Having a multi-bit screwdriver is a convenient option.
- Pliers (Optional):
- Needle-nose pliers can be helpful for handling small parts like spring clips or cotter pins, though they are not always necessary.
- A Clean, Organized Workspace:
- Laying down an old towel or mat provides a clean, soft surface to work on.
- It protects both your pedal from scratches and your floor from grease and cleaners, and it prevents small screws from rolling away.
The Right (and Wrong) Lubricants
Choosing the correct lubricant is arguably the most critical decision in the maintenance process.
The wrong choice can attract more dirt or even damage your pedal’s components.
| Lubricant Type | Primary Use Case | Pros | Cons & Cautions |
|---|---|---|---|
| White Lithium Grease | Bearings, Hinge, High-Friction Areas | Excellent longevity; water-resistant; stays in place; provides thick, durable protection. | Can be messy to apply; may become stiff in very cold temperatures. |
| 3-in-1 Oil / Light Machine Oil | Flushing old lubricant; Light-duty pivot points | Penetrates well to clean out old gunk; easy to apply; good for quieting minor squeaks. | Thinner, so it requires more frequent reapplication; can drip and attract dust if over-applied. |
| Specialty Pedal Lubricants | All moving parts (as per manufacturer) | Formulated specifically for drum hardware; often includes precision applicators (e.g., Pearl Ninja Oil). | Can be more expensive; may not be readily available locally. |
| Silicone Spray Lubricant | Springs, External moving parts | Dries quickly; leaves a slick, non-sticky film that doesn’t attract dust. | Not as durable for high-pressure points like bearings; less protective than grease. |
| WD-40 (Standard Formula) | NOT a Lubricant! Use for cleaning/rust removal ONLY. | Excellent for water displacement and breaking up rust and old, gummy grease. | It is a solvent, not a long-term lubricant. It will strip away protective grease and then evaporate, leaving the part unprotected and attracting dirt.
Never leave it on as a final lubricant. |
The most common mistake drummers make is using standard WD-40 as a cure-all for squeaks.
While it may quiet a squeak temporarily, it does so by dissolving the dried-up grease that was causing the noise.
Once the WD-40 evaporates, the part is left completely dry and unprotected, leading to accelerated wear and an even worse squeak in the near future.
The best practice is to use a penetrating oil like 3-in-1 to clean out a joint, wipe it thoroughly, and then apply a proper, long-lasting lubricant like white lithium grease.
The Deep Clean: A Step-by-Step Guide
Performing a deep clean at least once a year is the best way to reset your pedal’s performance and address any underlying issues.
This process involves fully disassembling the pedal, cleaning each part individually, lubricating correctly, and then reassembling it.
While it may seem daunting, a methodical approach makes it manageable for any drummer.
Step 1: Disassembly
A thorough cleaning requires taking the pedal apart to access all the hidden surfaces where grime accumulates.
Before you start, find a well-lit area and lay down a towel.
It’s highly recommended to take photos with your smartphone at each stage of disassembly.
These pictures will serve as an invaluable guide during reassembly, removing any guesswork about where a specific screw or washer belongs.
- Remove the Beater:
- Use your drum key to loosen the bolt holding the beater shaft and slide it out.
- Detach the Spring:
- Unhook the spring from the rocker cam and the lower post.
- This will release all tension from the pedal mechanism, making it safer to work on.
- Inspect the spring for any signs of stretching or damage.
- Disconnect the Drive:
- For a chain-drive pedal, you’ll need to remove the master link to detach the chain from the cam and the footboard sprocket.
- For direct-drive pedals, you’ll unscrew the linkage from the cam and the footboard.
- For belt-drive pedals, unhook the belt.
- Separate the Footboard:
- Most pedals have a hinge connecting the footboard to the heel plate.
- Look for screws on the underside or a pin that can be removed to separate the two pieces.
- This is a critical area that collects a lot of dirt.
- Remove the Rocker Hub and Bearings:
- This is the most complex part.
- The main axle is held in place by two posts, each containing a bearing.
- There will be set screws on the posts or the hub itself that need to be loosened with a drum key or Allen wrench.
- Carefully slide the axle out, paying close attention to the order of any washers or spacers.
- Place all small parts in a magnetic tray or a small container to avoid losing them.
Step 2: Cleaning the Components
With the pedal fully disassembled, you can now give each component the attention it deserves.
- Frame and Footboard:
- For general dust and dirt, a dry microfiber cloth will suffice.
- For more stubborn grime, especially on the footboard’s grip surface, use a toothbrush with a solution of warm water and a few drops of mild dish soap.
- Scrub the surfaces thoroughly, then rinse with a damp cloth and dry immediately and completely to prevent any chance of rust.
- Chain/Direct Drive:
- Submerge the chain in a small container of degreaser or mineral spirits for a few minutes, then use a toothbrush to scrub between every link.
- This will remove the old, gunk-filled lubricant.
- For a direct drive linkage, simply wipe it down thoroughly.
- After cleaning, ensure the chain is bone dry before moving on to lubrication.
- A can of compressed air can be very effective for this.
- Bearings:
- This is a delicate operation.
- Never submerge bearings in water or degreaser. This will ruin them.
- The goal is simply to clean the exterior casing.
- Wipe the outside of the bearing with a clean, dry cloth.
- If you see old, hardened grease around the seal, you can carefully use a Q-tip with a tiny amount of rubbing alcohol to clean it off, but do not let the alcohol seep into the bearing itself.
- Small Parts:
- Wipe down all the screws, bolts, washers, and springs.
- Use a toothbrush to clean the threads on the screws to ensure they tighten smoothly.
- This is also a good time to inspect the threads for any stripping or damage.
Step 3: The Art of Lubrication
Proper lubrication is about precision, not volume.
Over-lubricating is just as bad as under-lubricating, as excess lubricant will squeeze out and attract a fresh layer of dust and dirt.
- Where to Lubricate:
- Bearings:
- This is the most important area.
- Apply a very small dab of white lithium grease directly onto the seal of the bearing.
- Manually rotate the bearing with your fingers to help work the grease inside.
- You should feel a noticeable smoothness.
- Hinge of the Footboard:
- Apply a thin layer of white lithium grease to the hinge pin and the inside of the hinge barrel before reassembling the footboard and heel plate.
- Spring Assembly Contact Points:
- Put a small drop of light machine oil or silicone spray where the spring hooks onto the pedal and at the pivot point of the spring rocker.
- A tiny piece of foam inserted inside the spring can also help dampen any ringing noise.
- Chain or Direct Drive Linkage:
- For chains, work a single drop of light oil (bicycle chain lube works great) into each pin of the chain.
- Wipe off any and all excess oil from the surface of the chain with a clean cloth.
- The lubrication needs to be in the pivot points, not on the chain.
- For direct drive U-joints, a drop of oil in each is sufficient.
- Bearings:
- How to Lubricate:
- Apply Sparingly:
- A little goes a long way.
- Use a toothpick or a Q-tip to apply grease precisely where it’s needed.
- Wipe Away Excess:
- After applying lubricant and moving the part to work it in, use a clean cloth to wipe away any lubricant that has squeezed out.
- The goal is to leave a clean, dry exterior.
- The “Flush and Fill” Method:
- If you encounter a particularly sticky bearing or hinge, you can first apply a few drops of a penetrating oil like 3-in-1.
- Work the part back and forth to break up and flush out the old, hardened grease.
- Wipe it completely clean, and then apply a fresh dab of white lithium grease.
- This ensures you aren’t just putting new lubricant on top of old grime.
- Apply Sparingly:
Step 4: Reassembly and Adjustment
With every part clean and properly lubricated, it’s time to put your pedal back together.
This is where your reference photos become your best friend.
- Work in Reverse:
- Follow your disassembly steps in the opposite order.
- Start by re-installing the main axle and bearings into the support posts.
- Ensure all washers and spacers are in their correct positions.
- Check for Smoothness:
- At each stage, check the movement of the parts.
- The axle should spin freely within the bearings with no grit or resistance.
- The footboard hinge should pivot smoothly.
- Tighten Securely:
- As you reassemble, tighten all screws and bolts securely, but be careful not to over-tighten and strip the threads.
- Everything should be snug and free of any wobble.
- Basic Adjustments:
- Once the pedal is fully reassembled, you will need to perform a basic setup.
- This includes reattaching the spring and setting the tension to your preference, and positioning the beater at your desired height and angle.
- This is a crucial final step in the process of bass drum pedal adjustment.
Troubleshooting Common Pedal Problems
Even with regular maintenance, you may occasionally encounter issues.
Knowing how to diagnose and fix these common problems is a key part of comprehensive drum hardware care.
How to Fix a Squeaky Drum Pedal
A squeak is your pedal’s way of telling you that two parts are rubbing together without sufficient lubrication.
The first challenge is to pinpoint the exact source of the noise.
Squeak-Hunting Checklist:
- Isolate the Spring:
- First, unhook the spring entirely and operate the pedal with your hand.
- If the squeak is gone, the problem is in the spring assembly.
- If the squeak remains, the spring is not the culprit.
- Check the Hinge:
- With the spring still detached, hold the pedal and slowly move the footboard up and down.
- Listen closely to the hinge connecting the footboard and the heel plate.
- This is a very common source of squeaks.
- Inspect the Bearings:
- Slowly rotate the main axle.
- A dry or failing bearing will often produce a high-pitched squeak or a grinding noise.
- Examine the Drive:
- Check the connection points of your chain or direct drive linkage.
- The U-joints on a double pedal’s linkage shaft are also a frequent source of noise.
Once you’ve identified the source, the solution is almost always targeted lubrication.
Apply the appropriate lubricant (light oil for springs, white lithium grease for hinges and bearings) directly to the problem area, work the part back and forth, and wipe away the excess.
Dealing with Sluggishness or Lag
A pedal that feels slow, heavy, or “laggy” is a clear sign of excessive friction in the system.
This is most often caused by dirt and old, gummy lubricant that has built up inside the bearings.
The solution is to perform the “flush and fill” method described earlier.
Use a penetrating oil to dissolve and clean out the old gunk from the bearings, wipe them clean, and then re-apply a small amount of fresh white lithium grease.
In some cases, especially with older or heavily used pedals, the bearings themselves may be worn out and need to be replaced.
Chain Noise and Rattles
Unwanted noise from the drive chain or rattles in the pedal assembly are usually caused by loose parts.
First, check that the master link on the chain is securely fastened.
Then, go over the entire pedal and check every single nut and bolt with your drum key and screwdriver.
Pay special attention to the screws that hold the footboard to the hinge and the set screws that hold the rocker cam and beater hub to the axle.
A tiny bit of looseness can create a surprising amount of rattle when you’re playing.
A light oiling of the chain’s pivot points can also reduce metallic noise.
Routine Maintenance Schedule
Consistency is key to keeping your pedal in peak condition.
You don’t need to perform a full disassembly every week, but a regular schedule of care will prevent major problems from developing.
| Frequency | Task | Purpose |
|---|---|---|
| After Every Session | Quick wipe-down with a dry microfiber cloth. | Removes surface dust and sweat before it can work its way into moving parts. |
| Every 3-6 Months | Perform a regular cleaning.
Wipe down all components, check all screws for tightness, and spot-lubricate any noisy or stiff parts. |
Proactive care to address minor issues. Keeps the pedal feeling smooth and prevents grime buildup. |
| Once a Year | Conduct a full deep clean as outlined in this guide: complete disassembly, thorough cleaning of all parts, and fresh lubrication. | A complete reset of the pedal’s performance.
Allows for detailed inspection of all components for wear and tear. |
Conclusion
The cleaning and maintenance of pedals is not a chore to be dreaded, but rather an essential ritual for any serious drummer.
It is an investment of time that pays huge dividends in performance, reliability, and the longevity of your gear.
By understanding the mechanics of your pedal, using the correct tools and lubricants, and adhering to a regular maintenance schedule, you take full control over your instrument.
You ensure that your pedal will always be a silent, responsive, and trustworthy partner in your musical journey, ready to translate your every intention into the powerful heartbeat of the music.
Taking pride in your drum hardware care is a hallmark of a professional, and a well-maintained pedal is the foundation of a solid groove.