Effective cleaning and maintenance of a drum practice pad, a cornerstone of any drummer’s developmental regimen, does not necessitate the purchase of expensive, specialized products; rather, a highly effective and safe cleaning and maintenance kit for a practice pad can be assembled from simple, readily available household items.
The most vital information a drummer must understand is that the longevity and performance of their pad are intrinsically linked to its material composition—be it gum rubber, silicone, or mesh—and that applying the correct cleaning techniques for that specific material is paramount.
Neglecting this fundamental aspect of gear care can lead to a premature degradation of the playing surface, resulting in an inconsistent rebound, the development of poor technique, and ultimately, the need for a costly replacement.
Proper care, therefore, is not merely about aesthetics but is a crucial investment in your primary tool for musical growth and skill refinement.
This comprehensive guide will provide you with the essential knowledge required to preserve your drum practice pad for years of productive use, ensuring it remains a reliable and responsive practice tool.
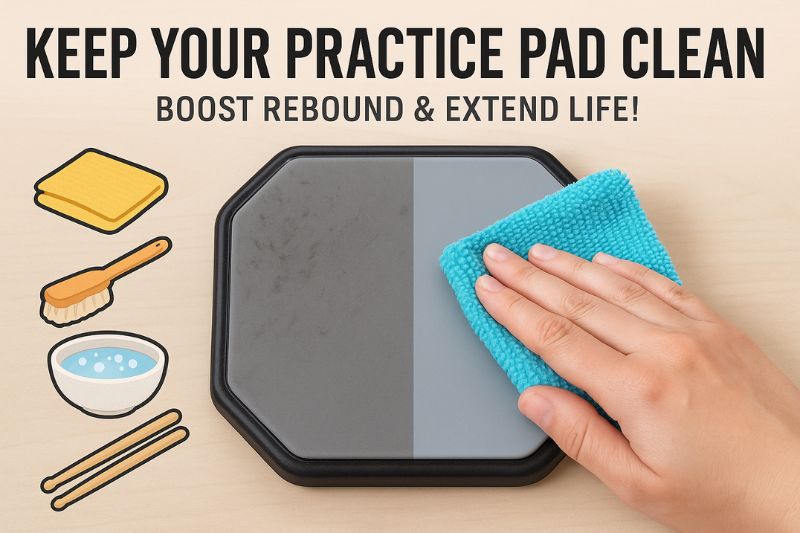
We will begin by exploring the critical reasons why consistent cleaning and maintenance are indispensable for preserving the pad’s feel and functionality.
Subsequently, the article will deconstruct the different materials used in modern practice pads, as the material dictates the entire care process.
You will learn how to create your own inexpensive and potent DIY practice pad cleaning kit, followed by meticulous, step-by-step instructions on how to clean your drum practice pad based on its specific surface type.
Furthermore, we will delve into indispensable long-term drum practice pad maintenance tips and strategies to prevent wear and tear before it begins.
Finally, this guide will equip you with the knowledge to recognize the definitive signs that your trusted pad has reached the end of its functional life and is ready for retirement, ensuring you are always practicing on a surface that supports, rather than hinders, your progress.
Why Clean and Maintain Your Practice Pad?
Preserving the integrity of the playing surface is the foremost reason for adopting a regular cleaning schedule for your practice pad.
The surfaces of most pads, particularly those made from gum rubber or silicone, are susceptible to gradual chemical degradation from the buildup of dirt, natural oils from your hands, and microscopic debris from your drumsticks.
This accumulation creates an insidious film that, over time, can cause the polymers in the material to harden, become brittle, or, conversely, turn soft and gummy.
This process, known as oxidative aging, is accelerated by exposure to environmental factors and the very residue left behind after each practice session.
Diligent cleaning removes these harmful agents, effectively halting this chemical breakdown and significantly extending the functional lifespan of the playing surface, ensuring it retains its intended feel and responsiveness.
Maintaining a realistic and consistent rebound is absolutely essential for the development of precise muscle memory, and a clean pad is a prerequisite for achieving this.
The physics of a drumstick’s rebound is a delicate transfer of kinetic energy; a clean, smooth surface allows for this transfer to be predictable and uniform with every stroke.
When a pad becomes coated in a layer of grime, this film acts as a dampening agent, absorbing a minute but critical amount of energy from each impact.
This results in a sluggish, inconsistent, and unpredictable response that can subtly but surely corrupt your technique, forcing you to compensate with improper wrist or finger movements.
By keeping the surface pristine, you ensure that the rebound you feel is the true rebound of the pad, allowing you to cultivate a technique that is both precise and directly translatable to an acoustic drum kit.
Preventing physical damage to the pad is another crucial benefit of routine maintenance.
While they may seem insignificant, the tiny wood shavings from drumsticks, combined with ambient dust and grit, form a fine abrasive paste on the pad’s surface.
With every stroke, you are essentially grinding this abrasive mixture into the pad, creating micro-scratches and fostering uneven wear.
Over thousands of repetitions, these microscopic abrasions accumulate, leading to a dulling of the surface, the formation of noticeable pits or divots, and a tangible loss of consistent feel across the playing area.
A simple wipe-down removes this abrasive threat, safeguarding the surface from the cumulative damage that can permanently alter its character and performance.
Finally, establishing a routine of cleaning your practice pad contributes to better personal hygiene and a healthier practice environment.
Your practice pad can become a veritable petri dish for bacteria, allergens, and dust mites, especially if it is used frequently or by multiple people.
The combination of sweat, skin oils, and dust creates an inviting habitat for microorganisms.
Regularly cleaning and disinfecting the surface not only eliminates these potential health hazards but also fosters a more pleasant and professional practice space.
This aspect of care is particularly important for instructors, students, or anyone practicing in a shared environment, as it demonstrates respect for the instrument and for fellow musicians.
Understanding Your Practice Pad: Materials Matter
The specific cleaning method you should employ is fundamentally dictated by the material composition of your practice pad’s playing surface.
Different materials, such as gum rubber, silicone, and mesh, possess unique physical and chemical properties, making them vulnerable to different types of damage and requiring distinct approaches to care.
Using an inappropriate cleaning agent or technique can cause irreversible harm, such as making a rubber surface sticky, tearing a silicone pad, or damaging the electronics beneath a mesh head.
Therefore, correctly identifying your pad’s material is the critical first step in developing a safe and effective maintenance protocol, ensuring you enhance its longevity rather than shorten it.
Gum rubber is arguably the most traditional and prevalent material used for practice pad surfaces, celebrated by drummers for its authentic feel and rebound that closely simulates the response of a real drum.
This material provides a satisfying balance of resistance and bounce, making it an ideal surface for developing stick control, speed, and endurance.
However, its organic polymer-based nature makes it vulnerable to environmental factors; prolonged exposure to UV radiation from direct sunlight and ozone in the air can cause the rubber to dry out, become brittle, and eventually crack.
It is also susceptible to degradation from harsh, petroleum-based chemical cleaners, which can break down its molecular structure and leave it with a permanently sticky or gummy texture.
Silicone represents a more modern alternative to gum rubber, offering a playing experience that is typically quieter and often softer, with a slightly faster and plusher rebound.
Its synthetic composition grants it superior resistance to environmental factors like temperature fluctuations and UV exposure, making it a highly durable and low-maintenance option in many respects.
You could leave a silicone pad in a hot car with less risk of damage compared to a gum rubber pad.
The primary vulnerability of silicone, however, is its lower tear strength.
While resilient to impact, it is more susceptible to being punctured, pitted, or cut by drumsticks that are splintered, frayed, or have sharp nylon tips, which can gouge the soft surface and create permanent dead spots.
Mesh, a material consisting of a woven fabric tensioned over a frame, is most commonly associated with electronic drum kits but is also used in high-end, tunable acoustic practice pads.
Its defining characteristic is the ability to adjust its tension with a drum key, allowing the player to replicate the feel of anything from a tightly cranked marching snare to a loose, spongy tom-tom.
The primary maintenance concern for mesh is that the head itself is a consumable component designed for periodic replacement.
The woven fibers are prone to stretching over time, necessitating regular re-tensioning, and can be frayed or torn by friction from stick tips, especially if those sticks are not perfectly smooth.
Cleaning must be done with care to avoid driving dirt into the weave or damaging any underlying electronic triggers.
Coated or laminated surfaces are specialized options designed to mimic the extremely hard, high-tension feel of marching snare drums or drum corps equipment.
These surfaces might be made from materials like carbon fiber, aramid fiber, or a hard plastic laminate applied over a rubber base.
They offer a very articulate and often louder practice experience with minimal give, which is ideal for building the specific type of chops required for marching percussion.
Their hardness makes them very durable against stick impact, but the laminate can be susceptible to chipping if the pad is dropped, and harsh abrasive cleaners can scratch and permanently dull the specialized playing surface.
Table 1: Comparative Analysis of Practice Pad Surface Materials
| Material | Common Feel & Rebound | Primary Vulnerabilities | Best For |
|---|---|---|---|
| Gum Rubber | Authentic, balanced rebound similar to a real drum.
Medium volume. |
UV light, ozone, petroleum-based chemicals, heat. Can dry out and crack or become sticky. |
All-purpose practice, developing traditional drum set technique. |
| Silicone | Quiet, soft, and often faster rebound.
Low volume. |
Tearing and pitting from damaged or sharp drumstick tips. | Quiet practice, apartment living, speed-focused workouts. |
| Mesh | Tunable rebound, from very tight to very loose.
Lowest volume. |
Stretching over time, fraying or tearing from friction.
The head is a consumable. |
Electronic drummers, replicating various drum tensions, silent practice. |
| Laminated | Very hard, articulate, and unforgiving rebound.
High volume. |
Scratching from abrasive cleaners, chipping if dropped. | Marching percussionists, developing high-tension snare technique. |
DIY Cleaning and Maintenance “Kits”: What You’ll Need
Assembling a proper DIY practice pad cleaning kit requires only a few inexpensive and common household items, each chosen for its effectiveness and safety across various pad materials.
The core principle is to use gentle, non-destructive tools and solutions to remove grime without harming the delicate playing surface.
This curated collection of items will empower you to handle everything from routine dusting to tackling stubborn stick marks, ensuring you have the right tool for every maintenance task without ever having to purchase a costly, single-purpose “kit.”
Your universal toolkit, suitable for the basic cleaning of any pad type, forms the foundation of your maintenance arsenal.
These items are non-abrasive and designed for effective particle removal.
List 1: The Universal Cleaning Toolkit
- Microfiber Cloths (Minimum of Two):
- These are superior to cotton rags or paper towels because their ultra-fine, split fibers are designed to grab and trap dust and dirt particles rather than just pushing them around.
- Their high absorbency also makes them perfect for applying and removing cleaning solutions without leaving behind lint.
- You will need one for cleaning and a second, completely dry one for drying and buffing.
- Soft-Bristled Brush:
- A small, soft-bristled brush, such as a clean paintbrush or a soft-bristled toothbrush, is invaluable for gently dislodging debris from textured surfaces, logos, or the crevices around the rim of the pad.
- Its bristles can get into tight spaces where a cloth cannot, without scratching or abrading the surface.
The liquid components of your kit are responsible for breaking down oils and grime that a dry cloth cannot remove.
- Mild, pH-Neutral Dish Soap and Warm Water:
- This is the safest and most effective cleaning solution for the vast majority of practice pads.
- A mild, pH-neutral soap (check the label) is crucial because it cleans effectively without containing the harsh degreasers or acidic compounds found in other cleaners that can degrade the polymers in rubber and silicone.
- A few drops mixed into a bowl of warm water are all that is needed.
- Isopropyl Alcohol (70% Concentration):
- For more stubborn marks, such as adhesive residue from tape or deeply ingrained stick marks, isopropyl alcohol acts as a potent solvent.
- It should be used sparingly, applied to a cloth or cotton swab rather than directly to the pad, as excessive use can dry out some materials.
- A 70% concentration is ideal as it evaporates slightly slower than higher concentrations, allowing more time to work on the stain.
Finally, a few pieces of specialized gear can be considered “upgrades” to your kit, offering enhanced protection and maintenance capabilities for specific pad types.
- Vacuum with Brush Attachment:
- This is an essential tool for anyone with a mesh-head pad.
- It allows you to lift dust and debris out of the fine weave of the mesh without the risk of pushing it further in or damaging the delicate surface, which can happen when using a cloth.
- Aerospace Protectant (e.g., 303 Protectant):
- This is a water-based, UV-blocking treatment that acts like sunscreen for your rubber or vinyl practice pad.
- It provides a microscopic layer of protection against UV radiation and ozone, which are the primary culprits behind the drying, cracking, and fading of rubber surfaces.
- Regular application can dramatically extend the life of a gum rubber pad.
- Drum Key:
- This is a non-negotiable tool for owners of tunable mesh pads.
- It is used to adjust the tension rods around the perimeter of the pad, allowing you to not only fine-tune the feel but also to ensure the head is evenly tensioned, which prevents warping and promotes a consistent response across the entire surface.
How to Clean Your Practice Pad: A Step-by-Step Guide
The execution of a proper cleaning regimen requires a methodical, material-specific approach to ensure you are effectively removing dirt without causing inadvertent damage.
This section provides detailed, step-by-step instructions for the most common types of practice pads, breaking down the process into simple, manageable actions.
By following these guides, you can confidently restore your pad’s condition and performance.
Cleaning Rubber and Silicone Practice Pads
This method is ideal for the vast majority of pads on the market, including popular models from brands like RealFeel, Evans, and Vic Firth.
- Perform an Initial Dry Wipe:
- Begin the process by taking a clean, dry microfiber cloth and thoroughly wiping down the entire surface of the pad.
- Use gentle, overlapping strokes to lift and remove any loose dust, stick shavings, and other surface-level debris.
- This initial step is crucial as it prevents you from turning loose grit into an abrasive slurry when you introduce a liquid cleaning solution in the next step.
- Execute a Gentle Wash:
- Prepare your cleaning solution by mixing a few drops of mild, pH-neutral dish soap into a small bowl of warm water.
- Submerge a different clean microfiber cloth in the solution and then wring it out until it is merely damp, not dripping wet.
- Gently wipe the entire playing surface using a circular motion, applying light, even pressure.
- This action will break down and lift the oils and embedded grime that the dry wipe left behind.
- Rinse Away the Residue:
- To remove any lingering soap film, take a third clean microfiber cloth and dampen it with plain warm water.
- As before, wring it out thoroughly.
- Carefully wipe down the entire surface again to remove any soap residue, which, if left behind, could leave the pad feeling slightly sticky and attract more dirt over time.
- Dry the Surface Completely:
- This is a critically important final step.
- Use a completely dry, clean microfiber cloth to thoroughly dry the pad’s surface.
- Any moisture left behind can potentially seep into the seam between the rubber and the base, or simply leave water spots.
- Ensure the pad is bone-dry to the touch before you consider storing it or using it again.
- Tackle Stubborn Marks with Precision:
- For persistent stick marks, scuffs, or adhesive residue that the gentle wash could not remove, turn to your isopropyl alcohol.
- Lightly dampen a cotton swab or a small corner of a microfiber cloth with the alcohol—do not saturate it.
- Gently rub only the affected area in a small, circular motion.
- The alcohol will act as a solvent to break down the mark.
- Immediately after the mark is gone, follow up with a cloth dampened with plain water to remove any alcohol residue, and then dry the spot thoroughly.
- It is always wise to test the alcohol on a small, inconspicuous area of the pad first to ensure it does not cause any discoloration.
Cleaning Mesh Practice Pads
This method is designed for the woven fabric heads found on electronic drum pads and tunable acoustic practice pads.
- Vacuum the Surface:
- The first and most important step for cleaning a mesh head is to use a vacuum cleaner with a soft brush attachment.
- Gently pass the brush over the entire surface of the mesh.
- The suction will lift dust, dander, and stick debris out from the fine weave of the material without forcing it deeper into the fabric or potentially damaging any sensitive electronic triggers that may lie beneath.
- Spot Clean with Minimal Moisture:
- For any visible spots or stains, use the same mild soap and warm water solution described previously.
- However, the key here is to use an absolute minimum amount of liquid.
- Lightly dampen a corner of a microfiber cloth, wring it out as much as humanly possible, and then gently dab or blot the stained area.
- Do not scrub, as this can fray the mesh fibers.
- The goal is to lift the stain without soaking the head.
- Pat the Area Dry:
- Immediately after spot cleaning, take a clean, dry microfiber cloth and gently pat the dampened area to absorb as much moisture as possible.
- Allow the pad to air dry completely before playing on it again to ensure no moisture remains that could affect the head’s tension or any underlying electronics.
- Perform a Tension Check:
- Since you are already focused on maintenance, this is the perfect time to check the head’s tension.
- Gently tap the pad near each tension rod.
- Use a drum key to make small, incremental adjustments in a star-shaped or crisscross pattern to ensure the tension is even across the entire head.
- This not only maintains a consistent feel but also prolongs the life of the mesh head by preventing uneven stretching.
Table 2: Practice Pad Cleaning Quick Reference
| Pad Type | Routine Cleaning (Weekly) | Deep Cleaning / Stain Removal | Key Precaution |
|---|---|---|---|
| Rubber/Silicone | Wipe with a dry microfiber cloth. | Damp cloth with mild soap/water solution.
Use isopropyl alcohol sparingly on a swab for tough marks. |
Ensure the pad is 100% dry before storage. Avoid harsh chemicals and excessive moisture. |
| Mesh | Vacuum with a soft brush attachment. | Dab spots with a minimally damp cloth with mild soap/water. | Never saturate the head with liquid. Check and adjust tension regularly. |
| Laminated | Wipe with a dry microfiber cloth. | Damp cloth with mild soap/water solution. | Avoid abrasive cleaners or pads that can scratch the hard surface. |
Long-Term Maintenance and Care Tips
Proactive, long-term care is the secret to maximizing the lifespan of your practice pad and involves creating habits that prevent damage before it occurs.
By controlling the pad’s environment, monitoring the condition of your sticks, and avoiding harmful substances, you can fend off the most common causes of premature wear and tear.
These preventative strategies are just as important as your active cleaning routine.
Implementing proper storage habits is the single most effective way to protect your pad from environmental degradation.
You should always store your practice pad in a cool, dry place, and crucially, out of direct sunlight.
The ultraviolet radiation in sunlight is a primary catalyst for the chemical breakdown of rubber and some plastics, leading to fading, brittleness, and cracking.
Similarly, avoiding extreme temperatures is vital; leaving a pad in a hot car trunk or a freezing garage can cause the base materials to warp and the playing surface to expand or contract, potentially causing the adhesive to fail and the rubber to delaminate from its base.
A simple cloth bag or case can also protect it from dust and accidental scuffs during storage.
The condition of your drumsticks has a direct and significant impact on the health of your practice pad’s surface.
It is essential to regularly inspect your sticks for any signs of splintering, chipping, or fraying, especially around the tip.
A damaged stick tip acts like a tiny blade, capable of gouging, pitting, or tearing the surface of a rubber or silicone pad with every stroke.
Many drummers adopt the best practice of dedicating a specific pair of sticks exclusively for practice pad use.
This prevents the transfer of dirt, grime, and tiny metal shavings from cymbals onto the pad’s surface and ensures the sticks used on the pad remain in pristine, smooth condition.
List 2: Stick Health Best Practices for Pad Longevity
- Inspect Before You Play:
- Before every practice session, run your fingers along the shaft and tip of your sticks to check for any splinters or rough spots.
- Sand Down Imperfections:
- If you find a minor rough spot, a quick, light sanding with fine-grit sandpaper can smooth it out and make the stick safe for your pad again.
- Retire Damaged Sticks:
- If a stick has a significant chip or splinter, especially near the tip, retire it from pad use immediately.
- The cost of a new pair of sticks is far less than the cost of a new practice pad.
- Dedicate a “Pad Pair”:
- Keep one pair of sticks that you use only on your practice pad to ensure they remain smooth and clean.
You must be vigilant in avoiding the use of any harsh chemicals on your practice pad, as they can cause rapid and irreversible damage.
Never use abrasive cleaners (like Comet or Ajax), window cleaners containing ammonia, bleach, acetone, or any petroleum-based solvents (like WD-40 or Goo Gone).
These substances can act as powerful solvents that break down the chemical bonds in the rubber or silicone, leading to a melted, sticky, or discolored surface.
Always adhere to the recommended cleaning solution of mild, pH-neutral soap and water for all but the most stubborn, localized stains.
Finally, integrating regular dusting into your routine is a simple, high-impact habit.
Even when not in use, a practice pad will accumulate airborne dust.
This dust, as previously mentioned, can become an abrasive agent during practice.
Taking just thirty seconds to wipe the pad down with a dry microfiber cloth before and after each use prevents this buildup and significantly reduces the need for more intensive wet cleaning sessions.
This small investment of time pays huge dividends in preserving the pad’s surface over the long haul.
When to Replace Your Practice Pad
Recognizing the point when a practice pad is no longer a viable tool for improvement is a crucial aspect of a drummer’s journey.
A worn-out pad can do more harm than good, ingraining bad habits and providing a frustrating playing experience.
When you observe deep grooves, pits, or divots on the playing surface that audibly and physically affect your stick’s rebound, it is a clear sign that the pad is compromised.
These “dead spots” create an inconsistent playing field, making it impossible to develop a reliable and even stroke, and no amount of cleaning can repair this type of physical damage.
Another definitive sign that your pad needs to be replaced is when the playing surface develops a persistently sticky or gummy texture that cannot be remedied by a thorough cleaning.
This condition indicates that the material itself, typically gum rubber, has undergone an irreversible chemical breakdown due to age, environmental exposure, or contact with a harmful substance.
The surface will grab the stick tip, completely altering the rebound and feel, rendering the pad essentially unplayable for any serious technical work.
You should also look for signs of significant structural damage to the pad’s base or rim.
Cracks in the wooden or plastic base, a rim that has detached from the playing surface, or a pad that no longer sits flat and stable on a surface are all indicators that it’s time for a replacement.
A structurally unsound pad can be unstable and wobbly during practice, which is not only distracting but can also lead to the development of an unbalanced playing posture.
Ultimately, the most important indicator is a noticeable and permanent loss of the pad’s original rebound and feel.
If you find that you have to work significantly harder to execute strokes that once felt effortless, or if the pad feels mushy and dead and no longer provides the articulate feedback necessary for nuanced practice, its time has come.
A practice pad is a tool for refinement, and once it ceases to fulfill that purpose due to wear, investing in a new one is an investment in your own continued progress as a musician.
Conclusion
In summary, the most effective cleaning and maintenance kit for a practice pad is not a pre-packaged product but a simple, curated collection of household items, headlined by microfiber cloths and mild soap.
The central lesson is that diligent and material-specific care is the undisputed key to a pad’s longevity.
By understanding whether your pad is made of rubber, silicone, or mesh, and applying the appropriate cleaning techniques, you can easily prevent the vast majority of wear and tear.
Remember that preventative strategies, such as proper storage and using well-maintained sticks, are just as critical as the cleaning process itself.
Ultimately, a well-maintained practice pad is far more than just a piece of rubber on a block of wood; it is an essential, long-term investment in your drumming education and musical journey.
A clean and responsive surface provides the consistent feedback necessary to build precise muscle memory, refine your technique, and grow as a musician.
By following the guidance in this article, you can ensure your pad remains a faithful and effective practice companion for many years.
We encourage you to share your own successful practice pad cleaning tips or maintenance questions in the comments below!
Pro Tip: No matter how well you clean your pad, using a high-quality model makes all the difference. Browse our updated list of the Best Drum Practice Pads to find your next favorite.