Capturing a professional-quality kick drum sound is the cornerstone of a powerful and compelling rhythm track, and it all begins with the meticulous process of recording the drum pedal’s interaction with the drum itself.
A weak, noisy, or undefined kick can leave a mix feeling hollow and lacking impact, whereas a well-recorded kick provides the foundational heartbeat that drives the entire song forward.
This comprehensive guide delves into every facet of recording drum pedals, transforming what can often be a source of frustration into an opportunity for sonic excellence.
We will explore the critical pre-recording preparations, from essential pedal maintenance that eradicates unwanted noise to the art of tuning your bass drum for optimal resonance.
Subsequently, we will navigate the nuances of microphone selection and placement, revealing professional techniques that capture both the deep percussive thump and the articulate attack of the beater.
Furthermore, this article will equip you with advanced strategies for noise reduction and bleed elimination, followed by a detailed walkthrough of essential mixing techniques—including EQ, compression, and blending—to sculpt your raw recording into a polished, studio-quality kick drum sound that punches through the mix.
The Foundation: Pre-Recording Checklist
Before You Hit Record: Tuning and Maintenance
Properly preparing your equipment before the recording session begins is the most crucial step toward achieving a clean and powerful kick drum sound.
This foundational stage involves not just the drum itself but, critically, the pedal mechanism, as its performance directly translates into the final audio capture.
Overlooking this preparatory phase often results in a cascade of issues down the line, such as frustrating squeaks, inconsistent dynamics, and a generally lackluster tone that even the most sophisticated mixing tools cannot fully remedy.
By dedicating time to tuning the drum and performing thorough pedal maintenance, you establish a pristine sonic starting point, making the subsequent steps of microphone placement and mixing significantly more effective and straightforward.
The tuning of your kick drum profoundly influences its fundamental pitch, sustain, and overall character in a recording.
To begin, you should aim for a low, resonant tone without excessive overtones or flabbiness.
Start by seating both the batter (the side you hit) and resonant (the front) heads properly, ensuring they are tensioned evenly around the drum’s circumference.
A common technique is to detune both heads completely and then bring them up to tension finger-tight, adding quarter-turns with a drum key in a star pattern to maintain evenness.
The batter head’s tuning will primarily dictate the feel and attack, with a lower tuning providing more “give” and a fatter sound, while a higher tension yields more rebound and a punchier, more articulate note.
The resonant head shapes the sustain and pitch; a tighter resonant head will produce a shorter, more focused sound with a higher pitch, which can be desirable for genres like funk or metal, whereas a looser resonant head will deliver a longer, booming sustain often favored in rock and pop.
Meticulous pedal maintenance is a non-negotiable aspect of preparing to record, as it directly addresses the most common source of unwanted noise and inconsistency.
The primary offender is often pedal squeak, a high-frequency noise that can be maddeningly difficult to remove in a mix.
To combat this, a thorough lubrication of all moving parts is essential.
Pedal Maintenance Essentials
| Component | Action Required | Recommended Lubricant | Why It’s Important |
|---|---|---|---|
| Spring Assembly | Apply lubricant to the points where the spring connects to the rocker hub and the post. | White Lithium Grease or Silicone-based Lubricant | This is the most common source of squeaks.
The constant stretching and contracting of the spring creates friction. |
| Heel Plate Hinge | Clean the hinge of any debris and apply a small amount of lubricant. | 3-in-1 Oil or Light Machine Oil | A smooth hinge action ensures the footboard moves freely and silently, preventing creaks during play. |
| Chain or Strap | Inspect for wear and apply a dry lubricant if it’s a chain drive. | Dry Teflon Lubricant | Prevents the metallic clatter from chain links and ensures a smooth, consistent pull on the beater cam. |
| Bearings | Apply a drop of high-quality bearing oil to the bearings on the main axle. | High-Speed Bearing Oil | Reduces friction for a faster, smoother pedal response and eliminates potential grinding noises. |
Beyond lubrication, you must inspect and tighten all screws and bolts on the pedal assembly. Vibrations during performance can cause components to loosen over time, leading to rattles and a generally unstable feel.
Pay close attention to the connection points of the footboard, the beater holder, and the clamp that attaches the pedal to the bass drum hoop.
The choice of beater is another critical decision that dramatically shapes the resulting kick drum tone.
Different materials interact with the drumhead in unique ways, each offering a distinct sonic signature.
- Felt Beaters:
- The most common type, felt beaters provide a classic, well-rounded sound.
- They offer a warm, punchy low-end with a softened attack, making them versatile for a wide range of musical styles from rock to jazz.
- Plastic Beaters:
- These deliver a much sharper, more aggressive attack.
- The hard surface emphasizes the initial transient, creating a “clicky” sound that is highly sought after in metal, punk, and electronic music for its ability to cut through dense mixes.
- Wood Beaters:
- Occupying a sonic space between felt and plastic, wood beaters offer a bright, articulate attack that is more defined than felt but less harsh than plastic.
- They produce a natural, organic click that works well in acoustic and rock contexts.
- Rubber Beaters:
- Similar to plastic but with slightly less high-end “slap,” rubber beaters provide a focused, punchy sound with a solid attack, making them a good all-around choice for many genres.
Finally, adjusting the spring tension is a vital part of tailoring the pedal’s response to the drummer’s playing style, which in turn affects the recorded performance.
A higher spring tension results in a faster, more powerful beater return, allowing for quicker successive strokes and a harder impact, which can enhance the drum’s attack.
Conversely, a lower spring tension provides a looser, more “buttery” feel, which some drummers prefer for greater dynamic control and a less fatiguing playing experience.
The key is to find a balance that feels comfortable for the performer while delivering the desired velocity and consistency for the recording.
Experimenting with these settings before hitting record ensures that the performance itself is optimized, capturing the best possible take at the source.
Microphone Selection and Placement
Mics & Positioning for the Perfect Kick Sound
Selecting the right microphone and positioning it with intent are the artistic and technical pillars of capturing a stellar kick drum recording.
The microphone acts as the ear of the recording, and its specific characteristics—such as its frequency response and ability to handle high sound pressure levels (SPL)—will fundamentally define the raw tone you capture.
Equally important is its placement relative to the drum, as even a centimeter’s difference in position can dramatically alter the balance between the low-end “thump,” the midrange “body,” and the high-end “click” of the beater.
Mastering these two interconnected variables is the key to translating the acoustic energy of the kick drum into a powerful and well-defined track in your digital audio workstation (DAW).
The overwhelming choice for recording kick drums, especially for modern music genres, is a large-diaphragm dynamic microphone.
These microphones are specifically engineered to handle the extremely high sound pressure levels generated by a kick drum without distorting, and their frequency responses are often pre-shaped to flatter the instrument’s sonic profile.
They typically feature a boost in the low frequencies to capture the drum’s fundamental “oomph” and another boost in the upper-mids to accentuate the beater’s attack, providing instant punch and definition.
Industry-Standard Kick Drum Microphones
| Microphone Model | Primary Sonic Character | Common Applications | Key Features |
|---|---|---|---|
| AKG D112 MkII | “Egg-shaped” mic known for its pronounced low-end boom and a clear, present attack around 4kHz. | Rock, Pop, Metal | Handles very high SPL, robust construction, classic industry standard. |
| Shure Beta 52A | Delivers a very deep, scooped sound with a prominent sub-bass presence and a sharp, clicky attack. | Hard Rock, Metal, Funk | Supercardioid pattern for excellent isolation, tailored frequency response for kick drums. |
| Audix D6 | Famous for its “pre-EQ’d,” mix-ready sound with a deep, tight low-end and a very aggressive, punchy attack. | Modern Rock, Metal, Pop-Punk | Lightweight, easy to position inside a drum, requires less processing in the mix. |
| Sennheiser e 602-II | Provides a warm, full-bodied low-end with a less aggressive, more rounded attack than its competitors. | Classic Rock, Funk, R&B | Cardioid pattern, lightweight, offers a more natural, less hyped sound. |
While a dynamic mic is essential for capturing the core weight of the kick, introducing a secondary microphone—often a small-diaphragm condenser—can be a game-changer for achieving ultimate clarity and definition.
Condenser microphones are more sensitive and offer a more detailed and extended high-frequency response compared to their dynamic counterparts.
When placed carefully, a condenser can be used to specifically capture the crisp “snap” of the beater hitting the drumhead.
This signal can then be blended with the main dynamic microphone’s signal during the mixing stage, allowing for precise control over the kick drum’s attack.
This technique is invaluable in genres where the kick needs to cut through a dense wall of guitars and cymbals.
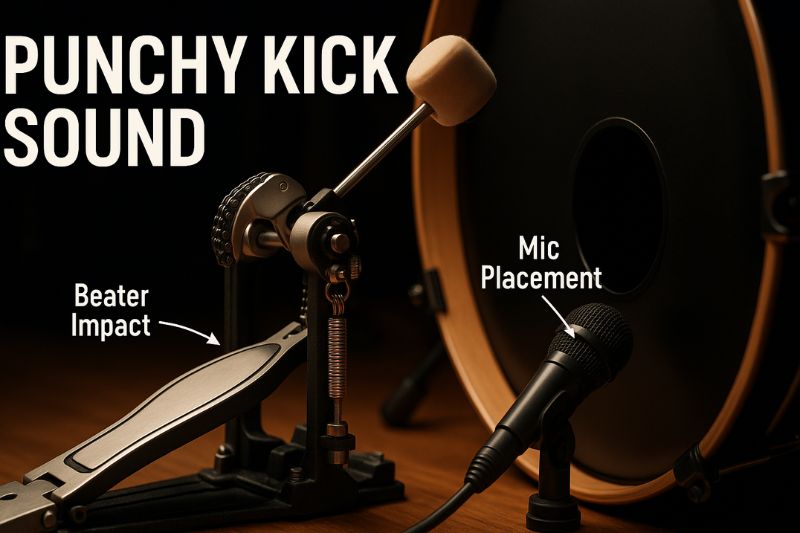
Microphone placement is where the art of kick drum recording truly comes alive, as different positions yield vastly different sonic results.
- Inside the Kick Drum (Close to the Beater):
- This is the go-to technique for most modern rock, pop, and metal production.
- Placing the microphone inside the drum, just a few inches away from the point where the beater strikes the head, results in a very direct, focused, and punchy sound.
- This position maximizes the attack (“click”) and minimizes the resonant “boom” of the drum shell and the influence of the room’s acoustics.
- It’s the quickest way to get a tight, controlled kick sound that will sit well in a busy arrangement.
- Inside the Kick Drum (Further from the Beater):
- By moving the internal microphone further away from the beater and closer to the resonant head, you begin to capture more of the drum’s shell resonance and low-end bloom.
- This position offers a more balanced sound than the extreme close-mic position, blending the beater’s attack with the drum’s natural tone for a sound that is both punchy and full-bodied.
- Outside the Kick Drum (At the Port Hole):
- Placing a microphone just outside the port hole of the resonant head is a classic technique for capturing a massive, resonant kick sound.
- This position picks up the puff of air exiting the drum, which translates to a significant sub-bass presence, along with the full-bodied tone of the drum shell.
- The attack will be softer and less defined compared to internal miking, making this an excellent choice for a more vintage or “boomy” rock sound.
- The Two-Mic Technique:
- For the ultimate in tonal flexibility, combining an internal and an external microphone is the professional standard.
- A dynamic microphone (like a Beta 52A or D6) is placed inside the drum to capture the punch and attack, while a second microphone—often a large-diaphragm condenser or a sub-kick microphone—is placed outside to capture the sub-bass and resonant body.
- These two signals are recorded to separate tracks and can be blended to taste during the mix.
- This method allows you to dial in the perfect balance of “click” and “boom” to suit any song.
When implementing these techniques, it’s crucial to pay attention to the phase relationship between the microphones if you are using more than one.
An out-of-phase relationship can cause frequency cancellations, particularly in the low end, resulting in a thin and weak sound.
Use your DAW’s phase-invert switch on one of the channels while listening to both to see which setting provides the fullest, most powerful low-end response.
Dealing with Unwanted Noise
How to Eliminate Pedal Noise and Bleed
Effectively eliminating unwanted noise and bleed is a critical process that separates amateur recordings from professional ones, ensuring your kick drum track is clean, focused, and impactful.
Unwanted noise can manifest as mechanical sounds from the pedal itself or, more commonly, as “bleed” or “spill” from other instruments in the drum kit, such as the snare drum and cymbals, being picked up by the kick drum microphone.
These extraneous sounds can muddy the kick’s clarity, reduce its punch, and complicate the mixing process by introducing phase issues and making it difficult to process the kick drum in isolation.
By employing strategic isolation techniques and advanced noise reduction tools, you can achieve a pristine kick drum track that serves as a solid foundation for your mix.
The first line of defense against bleed is physical isolation of the kick drum.
The goal is to create a barrier that minimizes the amount of sound from the rest of the kit reaching the kick microphone.
A highly effective and common studio technique is to create a “kick drum tunnel.” This is typically done by draping one or more heavy blankets over the top of the kick drum, extending them out in front of the resonant head to form a tunnel.
The kick microphone is then placed inside this tunnel.
This simple setup helps to absorb and block high-frequency sounds, particularly cymbal wash, from reaching the microphone.
For even greater isolation, you can place pillows or other soft, absorbent materials inside the kick drum itself, which helps to dampen the shell’s resonance and shorten the sustain, resulting in a tighter, more controlled sound.
This internal dampening is a staple of modern rock and pop production.
Once the track is recorded, you can employ more advanced noise reduction techniques within your DAW to further clean up the signal.
A noise gate is an indispensable tool for this purpose.
A noise gate is a dynamic processor that automatically mutes the audio signal when it falls below a certain volume level, known as the “threshold.”
Using a Noise Gate on a Kick Drum: A Step-by-Step Guide
- Insert the Gate:
- Place a noise gate plugin on your kick drum track in your DAW.
- Set the Threshold:
- Start with the threshold at its lowest setting and slowly raise it while the track is playing.
- You want to set the threshold just above the level of the bleed (the snare and cymbals) but below the level of the quietest kick drum hit you want to keep.
- The gate will now “close” (mute the signal) during the pauses between kick hits, eliminating the bleed.
- Adjust the Attack:
- The attack control determines how quickly the gate opens when the signal exceeds the threshold.
- For a kick drum, you want a very fast attack time (typically under 1ms) to ensure that the initial transient (the “click”) of the drum hit is not cut off.
- Set the Release:
- The release control dictates how long it takes for the gate to close after the signal falls below the threshold.
- A release time that is too short can cause an unnatural, “chattering” sound.
- A release that is too long will not effectively remove the bleed before the next hit.
- Adjust the release time so that it smoothly fades out the tail end of the kick drum’s natural decay without cutting it off abruptly.
- Use the Hold Control:
- The hold control determines the minimum amount of time the gate will stay open after the signal has been triggered.
- A short hold time (e.g., 20-50ms) can help prevent the gate from chattering or closing prematurely on the natural decay of the kick drum.
- Fine-tune with Range (or Floor):
- The range (or floor) control sets how much the signal is attenuated when the gate is closed.
- Instead of muting the signal completely, you can set the range to a lower value (e.g., -20dB) to simply reduce the level of the bleed, which can often sound more natural than complete silence.
For the most precise and transparent results, manually editing the kick drum track in your DAW is the ultimate solution. This involves visually identifying the kick drum hits on the waveform and manually cutting out the sections of audio between them.
While more time-consuming than using a gate, this method gives you complete control and avoids any potential artifacts that a gate might introduce.
You can create clean fades at the beginning and end of each region to ensure there are no audible clicks or pops.
This meticulous approach guarantees that your final kick drum track contains nothing but the kick drum itself, providing a perfectly clean slate for the mixing process.
The Mixing Process
Mixing Your Kick Drum Pedal for Maximum Impact
The mixing process is where you sculpt the raw, recorded kick drum track, transforming it from a simple percussive element into a powerful, polished, and foundational force within your song.
This stage involves the strategic application of tools like equalization (EQ) and compression to shape the tone, control the dynamics, and ensure the kick drum not only sounds great on its own but also interacts cohesively with the other elements in the mix, particularly the bass guitar.
A well-mixed kick drum should possess a potent combination of low-end weight, midrange punch, and high-end definition, allowing it to be felt as much as it is heard, without overwhelming the track or becoming lost in a dense arrangement.
Equalization is arguably the most critical tool for shaping the tonal character of your kick drum.
With a parametric EQ, you can surgically boost or cut specific frequencies to accentuate desirable qualities and remove problematic ones.
- Cutting Mids for Clarity:
- The first and often most important EQ move is to address the “boxiness” or “muddiness” that can plague kick drum recordings.
- This undesirable resonance typically lives in the lower midrange, anywhere from 300 Hz to 500 Hz.
- Applying a subtractive EQ curve in this range—often a moderately wide cut of 3-6 dB—can instantly clean up the sound, removing the cardboard-like tone and creating space for other instruments, like the bass and snare, to occupy.
- Boosting Lows for Weight:
- To add the foundational “thump” and “thud” that gives a kick drum its power, you will want to apply a boost in the low frequencies.
- The fundamental pitch of most kick drums resides between 60 Hz and 80 Hz.
- A gentle, wide boost in this area will enhance the feeling of weight and impact.
- Be cautious not to overdo it, as an excessive boost can result in a boomy, uncontrolled sound that consumes the mix’s headroom.
- It’s also wise to apply a high-pass filter (or low-cut filter) below 30-40 Hz to remove any useless sub-sonic rumble, which cleans up the low-end and saves valuable energy.
- Boosting Highs for Attack:
- To ensure the kick drum cuts through the mix and is clearly audible even on smaller speakers, you need to accentuate its attack or “click.” This is found in the upper-mid to high frequencies, typically between 2 kHz and 5 kHz.
- A boost in this range will bring out the sound of the beater striking the head, adding definition and presence.
- The specific frequency to boost will depend on the beater type and the desired sound; a boost around 4-5 kHz will yield a sharper, more modern “click,” while a boost around 2-3 kHz will provide more of a “thwack.”
Compression is the key to controlling the dynamics of the kick drum, adding punch, and ensuring every hit is consistent and impactful.
A kick drum naturally has a very wide dynamic range, from the initial sharp transient to the decaying tail.
Compression reduces this range, making the overall level more consistent and adding perceived power.
Starting Point Compressor Settings for a Punchy Kick
| Parameter | Setting | Purpose |
|---|---|---|
| Ratio | 4:1 | A good starting point for noticeable but not overly aggressive compression. It means for every 4dB the signal goes over the threshold, the output will only increase by 1dB. |
| Attack | Medium to Slow (10-30ms) | A slower attack allows the initial, hard transient of the kick drum to pass through uncompressed, which is crucial for preserving its punch.
A fast attack would squash this transient and soften the hit. |
| Release | Fast to Medium (50-150ms) | The release should be timed to the tempo of the song.
You want the compressor to stop working just before the next kick drum hit. If the release is too long, the kick will sound “pumpy” and lose its power. |
| Threshold | Adjust to achieve 3-6dB of gain reduction on the loudest hits. | The threshold determines at what level the compressor starts working.
Setting it to achieve 3-6dB of gain reduction provides effective dynamic control without sounding over-compressed. |
| Makeup Gain | Adjust to match the level of the uncompressed signal. | Since compression reduces the overall level, the makeup gain is used to bring the volume of the compressed signal back up, resulting in a track that is more consistent and perceived as louder. |
If you have employed the two-mic technique, the final step is to blend these sources to create the perfect composite sound.
Start by setting a good level for your primary internal microphone, which provides the core punch and attack.
Then, slowly bring up the fader for the external microphone.
Listen carefully as you do this; the external mic will add low-end weight, sub-bass, and a sense of space.
The goal is to find the “sweet spot” where the two microphones complement each other, creating a sound that is bigger and more three-dimensional than either microphone could achieve on its own.
Remember to check the phase relationship between the two tracks, as flipping the phase on one might result in a much fuller and more powerful combined sound.
Conclusion
In conclusion, the art of recording drum pedals is a multifaceted discipline that extends far beyond simply placing a microphone in front of a kick drum.
It is a process rooted in meticulous preparation, thoughtful technical execution, and creative sonic sculpting.
By diligently performing pedal maintenance to eliminate squeaks and rattles, carefully tuning the drum for its optimal voice, and selecting the appropriate beater, you lay an unshakeable foundation for a professional sound.
This is followed by the critical choices in microphone selection and the nuanced art of placement, which together define the raw character of your recording.
By embracing techniques from close-miking for punch to two-mic setups for ultimate flexibility, you gain control over the kick’s every sonic facet.
Finally, through the judicious use of isolation, noise gating, EQ, and compression in the mixing stage, you can polish that raw recording into a powerful, punchy, and pristine kick drum track that provides the rhythmic heartbeat your music deserves.
Mastering these steps ensures that the kick drum, born from the simple motion of a pedal, stands as a formidable and impactful element in your final production.
We encourage you to experiment with these techniques, listen critically, and find the unique combination of methods that works best for your sound.
Feel free to share your own experiences and ask any questions in the comments below.
FAQ
Q: How do I stop my bass drum pedal from squeaking when I record?
A: To stop a bass drum pedal from squeaking, you must apply a proper lubricant to all its moving parts, especially the spring assembly and heel plate hinge.
Use a white lithium-based grease or a silicone lubricant for long-lasting results.
It is crucial to avoid using WD-40, as it is a solvent, not a true lubricant, and can attract dust and grime over time, potentially worsening the problem.
Q: What is the best microphone for recording a kick drum?
A: The best microphone for recording a kick drum is typically a large-diaphragm dynamic microphone designed to handle high SPL and tailored for low-frequency instruments.
The most common industry-standard choices are the Shure Beta 52A (for a deep, scooped sound), the AKG D112 MkII (for a classic rock boom), and the Audix D6 (for a modern, mix-ready punch).
Q: Where should I place a microphone to record a kick drum?
A: The placement of a microphone for recording a kick drum depends on the desired sound.
For a modern, punchy, and articulate sound with lots of attack, place the microphone inside the drum, positioned a few inches from the beater.
For a more resonant, boomy, and natural tone, place the microphone just outside the port hole on the resonant (front) head.