Electronic drumming offers a gateway to a universe of sonic possibilities, providing the immense benefits of silent practice, effortless recording, and access to countless drum kit sounds in a single, compact setup.
The most vital information for any prospective buyer is that the pre-owned market holds the key to unlocking this world without the substantial financial outlay required for brand-new equipment.
Navigating this market, however, demands a discerning eye and a methodical approach; a successful purchase hinges on a thorough understanding of what separates a fantastic deal from a future headache, involving careful inspection of physical components, rigorous functional testing of electronic triggers, and diligent research into specific models and sellers.
This comprehensive guide serves as your roadmap to confidently acquiring a used electronic drum pad or kit that meets your performance needs and budgetary constraints.
We will embark on a detailed exploration of the distinct advantages that make used gear an attractive option, providing you with a compelling rationale for this purchasing strategy.
The core of our discussion will be an exhaustive checklist, meticulously broken down into the critical areas of physical inspection, functional testing, and background research, ensuring no detail is overlooked.
Furthermore, we will identify the most reliable platforms for finding quality second-hand deals, illuminate the unambiguous red flags that signal you should walk away from a potential purchase, and equip you with the knowledge to make an informed, secure, and ultimately rewarding investment in your musical journey.
The Undeniable Advantages of Buying Used
Opting for previously owned electronic drum equipment presents several compelling benefits that extend far beyond the initial price tag.
The primary advantage of buying used is the significant cost savings, which allows musicians to acquire high-quality gear for a mere fraction of its retail price.
New electronic drum kits, especially those from reputable brands like Roland, Yamaha, or Alesis, represent a considerable investment.
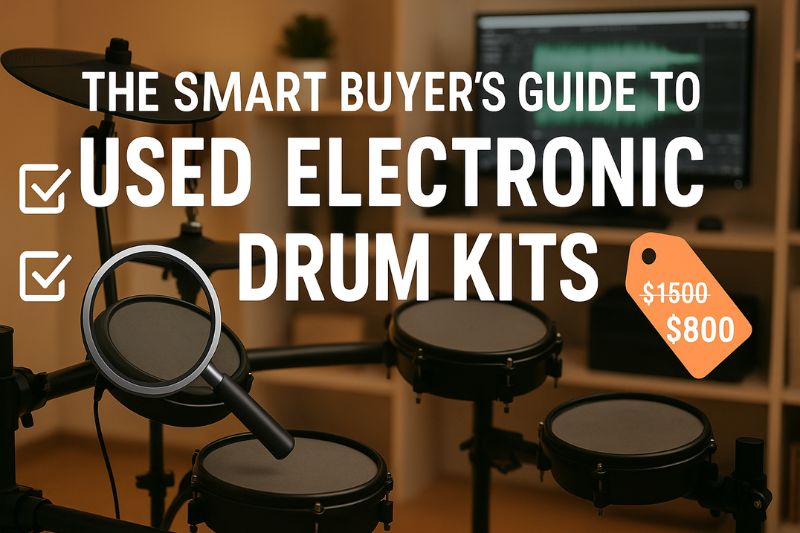
A mid-tier kit can easily cost over $1,500, while professional-grade setups can soar to many thousands.
On the used market, it is entirely feasible to find that same $1,500 kit, gently used for a year or two, for $800 to $1,000.
This dramatic price reduction fundamentally changes the accessibility of the instrument, lowering the barrier to entry for beginners and enabling seasoned drummers to expand their existing setups in a financially sustainable manner.
Another powerful advantage is the ability to access higher-end models that would otherwise be financially out of reach.
The electronic drum market features distinct tiers of quality, where more expensive models offer tangible improvements in feel, responsiveness, and features.
Instead of purchasing a brand-new entry-level kit with basic rubber pads and a limited sound module, the same budget on the used market could secure a professional-grade kit from a few years prior.
This leap in quality means gaining access to superior components like multi-zone mesh heads that better replicate the feel of acoustic drums, more sophisticated drum modules (the “brain”) with vast and editable sound libraries, and advanced triggering technology that captures every nuance of your performance, from soft ghost notes to powerful rimshots.
This strategic move allows you to play on gear that is more expressive, durable, and inspiring.
Finally, choosing to buy used electronic drum pads is an inherently sustainable and environmentally conscious choice.
The manufacturing of electronics involves a significant consumption of resources and energy.
By purchasing a used item, you are extending the life cycle of that product, preventing it from prematurely ending up in a landfill and reducing the overall demand for new manufacturing.
This act of recycling high-value goods contributes to a circular economy within the music community.
It ensures that perfectly functional and high-quality instruments continue to be used for their intended purpose, passing from one musician’s hands to the next and creating music for many more years to come.
The Ultimate Checklist: A Systematic Guide to Inspection
This checklist is the most crucial part of your purchasing journey.
A systematic approach to evaluating used electronic drum gear is what separates a savvy buyer from one who inherits someone else’s problems.
We have structured this process into three distinct but equally important phases: a thorough physical inspection, a non-negotiable functional test, and the essential background research on the equipment and seller.
The Physical Inspection
Before you ever plug anything in, a detailed visual and tactile examination will reveal the history and care of the equipment.
Cosmetic scuffs are often acceptable, but structural damage is a serious concern.
Pad Surface (Rubber & Mesh)
The playing surface of a drum pad is its most critical point of interaction, and its condition directly impacts both feel and function.
For pads with rubber surfaces, you must inspect for any signs of drying out, such as cracking or hardening, which can lead to poor rebound and eventual splitting.
Look for deep gouges or dents from aggressive playing, as these can create dead spots where the internal trigger fails to register a hit.
Minor stick marks and scuffs are purely cosmetic and should not be a cause for concern.
For the increasingly popular mesh heads, your primary check is for consistent tension and integrity.
A sagging mesh head will feel sluggish and unresponsive, while an overly tightened one can feel hard and may have compromised the trigger foam underneath.
Look for any significant tears or fraying, especially around the rim.
Gently press on the center of the mesh head; it should have a firm but yielding give, similar to a real drumhead.
Rebound and Feel
The rebound of the pad dictates how naturally your sticks bounce off the surface, which is fundamental to executing rolls and other techniques.
Tap each pad lightly with your finger and then with a drumstick.
The rebound should feel lively and consistent across the entire surface.
A pad that feels “dead” or has a mushy response may have a worn-out trigger cone or foam underneath the surface, which can be a complicated repair.
This tactile feedback is a key indicator of the pad’s internal health.
Table 1: Comparison of Common Pad Surface Materials
| Feature | Rubber Pads | Mesh Heads |
|---|---|---|
| Feel & Realism | Firmer, less give.
Often found on entry-level kits. Can feel like a practice pad. |
Softer, tunable tension. Widely considered to better replicate the feel and rebound of an acoustic drumhead. |
| Acoustic Noise | Higher-pitched, louder “thwack” sound when struck. | Significantly quieter, producing a low-volume “tap.” Ideal for apartment living and silent practice. |
| Triggering | Typically single-zone, though some higher-end models have two zones (head/rim). | Often feature multiple zones (head/rim) and offer more nuanced triggering due to head tension affecting the sensor. |
| Durability | Very durable and resistant to wear, but can harden or crack over long periods. | Durable material, but can be punctured by sharp objects or wear out over time.
They are, however, replaceable. |
| Maintenance | Low maintenance; simply wipe clean. | Requires occasional tension adjustments with a drum key to maintain desired feel.
Can be replaced if worn. |
Casing & Frame
The structural integrity of the pad’s housing and the drum rack is paramount for stability and longevity.
Carefully inspect the plastic or metal casing of each drum and cymbal pad, paying close attention to the areas around mounting points and input jacks.
Hairline cracks in these stress-bearing areas can easily worsen over time, leading to a pad that can no longer be securely mounted.
For the drum rack itself, examine every tube for significant dents that could impede the movement of clamps.
Check every single clamp, L-rod, and wingnut.
Attempt to tighten and loosen them.
Hardware with stripped threads is a major red flag, as replacing proprietary clamps and mounts from manufacturers like Roland or Yamaha can be surprisingly expensive and difficult.
Ensure that all components fit together snugly and hold their position firmly.
Cables & Connections
The electronic signal’s journey from the pad to the module is only as strong as its weakest link.
A close inspection of all connection points is essential.
Look directly into the 1/4″ input/output jacks on each pad and on the module itself.
Check for any signs of corrosion (green or white buildup), and see if the jacks feel loose or have been pushed into the casing.
A loose jack can cause intermittent signal loss, crackling sounds, and will eventually fail.
If a wiring harness or individual cables are included, scrutinize them thoroughly.
Bend the cable gently near the connector plugs, as this is the most common point of failure.
Look for frayed shielding, exposed wires, or clumsy repairs made with electrical tape.
While a single bad cable is cheap to replace, a full wiring harness can be costly, and damaged jacks on the module can be a deal-breaking repair.
The Functional Test (The Crucial Step)
This is the most important part of the evaluation and should never be skipped. A kit that looks pristine but functions poorly is worthless.
If a seller is unwilling to let you connect and test the equipment, you should immediately walk away from the deal.
Triggering Accuracy & Sensitivity
The core function of an electronic drum is to convert a physical strike into a digital signal accurately.
To test this, you must connect and play.
- Dead Spots: Methodically hit every square inch of each pad and cymbal. Start from the center and spiral your way out to the very edge. Every single hit should produce a sound. Any area that fails to produce a sound is a “dead spot,” indicating a failed or disconnected sensor within the pad.
- Velocity Response: Test the pad’s dynamic range. Play a series of single strokes, starting as softly as you possibly can and gradually increasing to your loudest comfortable volume. A well-functioning pad and module will translate this into a smooth and realistic increase in volume and may even switch to a different, more aggressive sample at high velocities. If the volume jumps erratically or only triggers at medium-to-loud volumes, it has poor sensitivity, which will make expressive playing impossible.
- Crosstalk: This is the phenomenon where striking one pad accidentally triggers the sound of an adjacent one. To test for this, hit one pad (for example, the snare) with a firm, sharp stroke while listening carefully for sounds from other pads (like the adjacent toms). While a small amount of crosstalk can often be mitigated by adjusting settings within the drum module, excessive crosstalk that cannot be dialed out may indicate a problem with the pad’s internal components or a poorly designed rack system.
Multi-Zone Functionality
Many modern electronic drum pads, particularly snares and cymbals, are “multi-zone,” meaning they can produce different sounds when struck in different areas.
- Snare: Test the center of the head for the main snare sound, then play a rimshot (hitting the head and rim simultaneously), and then a stick-on-rim “click” sound. Ensure all distinct sounds are produced reliably.
- Cymbals: A three-zone ride cymbal should produce a “ping” sound on the main surface (the bow), a “crash” sound on the edge, and a distinct “bell” sound when you strike the bell area with the shoulder of your stick. Test each of these zones individually. A failure in any zone diminishes the value and playability of the component significantly.
Table 2: Functional Test Quick-Reference Checklist
| Test Item | Procedure | Pass Condition | Fail Condition |
|---|---|---|---|
| Dead Spot Test | Hit every area of the pad/cymbal surface. | Every hit produces a sound. | Any area fails to produce a sound. |
| Velocity Test | Play strokes from very soft to very loud. | Volume increases smoothly and realistically. | Volume jumps, or soft hits don’t register. |
| Crosstalk Test | Hit one pad firmly and listen for others. | Only the struck pad produces sound. | Adjacent pads are audibly triggered. |
| Multi-Zone Test | Strike each designated zone (head, rim, bell, edge). | Each zone produces its correct, distinct sound. | Any zone fails to trigger or triggers the wrong sound. |
| Button/Knob Test | Press every button and turn every knob on the module. | All controls respond instantly and accurately. | Buttons stick, or knobs cause values to jump. |
| Sound Load Test | Scroll through at least 10-15 different kits on the module. | All kits load quickly and are playable. | Kits fail to load, or sounds are distorted/missing. |
Module/Brain Functionality
The drum module is the central nervous system of the kit, and its health is paramount.
Begin by examining the screen.
Power on the module and check for a bright, clear display.
Look for dead pixels (black dots that never light up) or a backlight that is excessively dim, as this can make the module difficult to use in low-light situations.
Next, perform a tactile check of all physical controls.
Press every single button to ensure it clicks or responds without sticking.
Turn every knob and move every fader through its entire range of motion.
The values on the screen should change smoothly.
A “jumpy” knob that causes values to skip around indicates a dirty or failing potentiometer, which can be frustrating during use.
Finally, perform a quick sound test by scrolling through at least 10 to 15 different pre-set drum kits.
This confirms that the internal memory and processors are functioning correctly and that all the core sounds load as expected.
Research & Seller Honesty
Your inspection and testing should be complemented by diligent research.
What you learn before you even see the gear is just as important as what you observe in person.
Know the Model
Before you even contact the seller, you must identify the exact model numbers of the pads, cymbals, and especially the drum module.
Once you have this information, use it to search online forums.
Websites like vdrums.com or the r/edrums subreddit are invaluable resources.
Here is a list of effective research queries:
"[Model Name] common problems""[Model Name] vs [Alternative Model]""[Pad Model] compatibility with [Your Module Name]""[Model Name] crosstalk issues"
This research will arm you with knowledge about any known quirks, common failure points, or design flaws specific to that model.
It will also give you an idea of the original retail price and the current market value, ensuring you don’t overpay.
Ask the Right Questions
Your interaction with the seller can reveal a great deal about the equipment’s history.
A transparent seller will have no problem answering specific questions.
Here is a list of essential questions to ask:
- “Why are you selling the kit?” Legitimate reasons include upgrading, no longer having space, or losing interest. Vague answers might be a red flag.
- “How was it used?” There is a world of difference between a kit used for quiet home practice in a spare bedroom and one that has been gigged heavily in smoky bars and transported frequently. The latter will have significantly more wear and tear.
- “Have there ever been any issues with it, and have any repairs been made?” An honest seller will disclose minor issues or repairs. A flat denial, especially on older gear, can sometimes be suspicious.
- “Are you the original owner?” Knowing the ownership history can provide context on its usage and care over the years.
Confirm Compatibility
This is absolutely crucial if you are not buying a complete, factory-matched kit. Not all electronic drum components are universally compatible.
For instance, while many Roland pads might work with an Alesis module, certain features like multi-zone triggering may not function correctly. Yamaha pads often use a different wiring scheme than Roland or Alesis.
Before purchasing individual pads to add to your existing setup, you must perform specific research to confirm that they will be fully functional with your current drum module.
A quick search for "[Your Module] compatibility with [Pad to Buy]" can save you from a major purchasing error.
Where to Find the Best Used Deals
Finding a great deal on used electronic drums requires knowing where to look.
Different platforms offer varying levels of buyer protection, price ranges, and inventory.
- Online Marketplaces: Websites like Reverb.com are specifically tailored for musicians and often provide excellent buyer protection policies, which can add a layer of security to your purchase. eBay offers a massive selection but requires careful vetting of seller ratings and descriptions. Facebook Marketplace and Craigslist are excellent for local deals, which gives you the crucial advantage of being able to inspect and test the gear in person before any money changes hands.
- Local Music Stores: Do not overlook your local, independent music shops. Many of them take in used gear on trade or sell it on consignment. The major advantage here is that the store’s staff has likely already inspected, tested, and cleaned the equipment, providing a level of quality assurance you won’t get from a private seller.
- Community Forums and Groups: Online communities centered around drumming can be a goldmine. The classifieds sections of forums like
vdrums.comor dedicated Facebook groups for buying and selling gear often have knowledgeable sellers who have taken good care of their equipment.
Red Flags: When to Immediately Walk Away
Knowing when to say “no” is just as important as knowing what to look for.
Here are the definitive red flags that should cause you to cease negotiations and walk away from a deal.
A List of Serious Deal-Breakers:
- The seller is unwilling to let you test the equipment. This is the biggest red flag of all. There is no legitimate reason for a seller to refuse a functional test unless they know there is a problem.
- The price is “too good to be true.” A top-of-the-line Roland TD-50 kit listed for $500 is not a lucky find; it is almost certainly a scam or stolen property.
- The listing is vague or uses stock photos. A serious seller will provide detailed descriptions and multiple, clear photos of the actual item for sale. Vague listings suggest laziness or an attempt to hide something.
- The seller cannot answer basic questions about the gear’s history. If they are evasive about how it was used or why they are selling it, be highly suspicious.
- There are visible signs of abuse or improper storage. Equipment covered in grime, showing signs of corrosion, or smelling of mildew from being stored in a damp basement has likely been neglected in other ways, and internal electronic components may be compromised.
Conclusion: Your Path to a Great Kit
In summary, the journey to acquiring a high-quality used electronic drum kit is one of careful and methodical evaluation.
The most important advice to carry with you is the three-part mantra: Inspect, Test, and Research. A thorough physical inspection will reveal the gear’s history and structural health.
A hands-on functional test will confirm that every electronic component is working as intended.
Diligent online research will arm you with the knowledge to identify fair market value and avoid models with known flaws.
By embracing this process, you transform yourself from a hopeful buyer into an informed consumer.
Do not be intimidated by the process; instead, view it as an empowered step toward a fantastic musical investment.
The pre-owned market is filled with incredible instruments waiting for a new home.
By being patient, asking the right questions, and following the comprehensive checks outlined in this guide, you are exceptionally well-positioned to find a reliable, expressive, and inspiring electronic drum setup.
You will not only save a significant amount of money but will also acquire an instrument that can serve your creative ambitions for many years to come.
Have a successful tip for buying used electronic drums, or a story to share about a great find? Share your experience in the comments below to help fellow drummers!