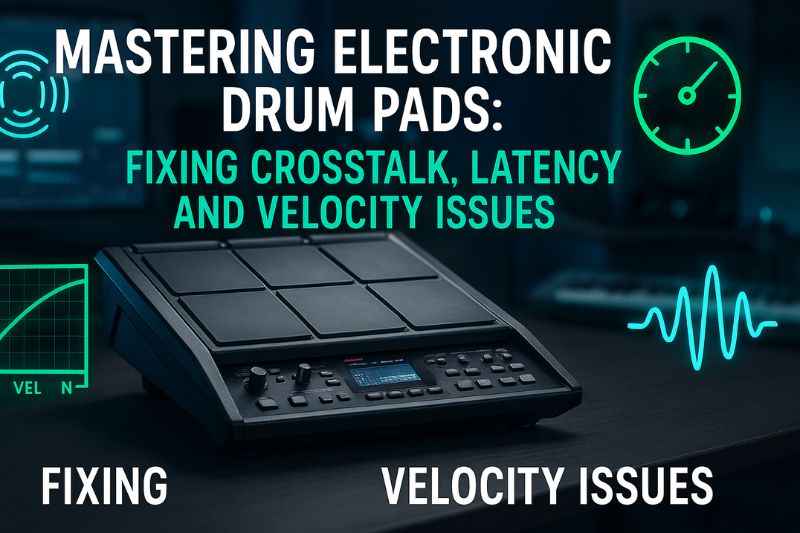
Electronic drum pads represent a monumental leap in percussion technology, offering musicians unparalleled versatility, the convenience of near-silent practice, and a direct gateway into the world of digital music production.
These compact, powerful instruments can emulate anything from a classic acoustic kit to a full orchestral percussion section or futuristic electronic textures, all from a single, portable unit.
The sheer excitement of unboxing a new drum pad, however, can swiftly diminish and morph into profound frustration when the instrument doesn’t behave as expected.
Instead of a seamless creative experience, you might encounter phantom notes, a jarring delay between your strike and the resulting sound, or a dynamic response that feels completely alien to your playing style.
These technical hurdles are common, yet they are not insurmountable obstacles; rather, they are solvable puzzles waiting for the right approach.
This definitive guide is designed to empower you with that approach, systematically deconstructing the most prevalent technical challenges—from the pervasive issue of crosstalk and performance-killing latency to the nuanced art of velocity calibration and the complexities of software integration.
We will delve into each problem, diagnose its root causes, and provide clear, actionable, step-by-step solutions that will transform your electronic drum pad from a source of vexation into a truly expressive and reliable musical partner.
This article will navigate through a carefully structured progression of topics, beginning with the most foundational and frequently encountered physical issues before advancing to more sophisticated software-based adjustments.
First, we will establish a solid base by tackling crosstalk, explaining why hitting one pad can erroneously trigger another and how a combination of proper mechanical isolation and intelligent module settings can eliminate it.
From there, we will confront latency, the perceptible and highly disruptive delay that can disconnect a drummer from their performance, and pinpoint how to achieve a near-instantaneous response.
Next, we will explore the critical domain of dynamics and sensitivity, demonstrating how to fine-tune your pad’s velocity curves to perfectly match your unique playing force and style, ensuring every ghost note and powerful accent is captured with precision.
Finally, we will demystify the process of software integration, providing a clear roadmap for connecting your pads to Digital Audio Workstations (DAWs) and Virtual Studio Technology (VST) instruments, resolving common MIDI mapping conflicts along the way.
By addressing these core areas, this guide will provide you with the comprehensive knowledge and confidence required to not only fix problems but also to proactively optimize your instrument for the best possible playing experience.
The Foundation: Understanding and Preventing Crosstalk
Crosstalk is arguably the most common and disorienting issue new electronic drummers face, manifesting as the unintended triggering of a sound on one pad when a different, often adjacent, pad is struck.
This phenomenon occurs because the physical impact of your drumstick creates vibrations that don’t just stay on the target pad; they propagate through the shared frame or stand of the electronic drum pad unit, much like ripples spreading in a pond.
If these residual vibrations are strong enough when they reach a neighboring pad’s sensor, the drum module (the “brain”) misinterprets them as a deliberate hit, resulting in an unwanted “ghost” note that can clutter your rhythm and undermine your performance.
The severity of crosstalk depends on a variety of factors, including the intensity of your playing, the construction of the pad unit itself, and, most critically, the physical stability of the surface it rests upon.
Successfully eradicating crosstalk requires a dual-pronged strategy that addresses both the physical source of the vibrations and the digital interpretation of them within the drum module.
The first and most crucial line of defense is mechanical isolation, which is centered on minimizing the transfer of vibrational energy.
The most effective way to achieve this is to ensure your drum pad unit is mounted on an exceptionally stable and sturdy stand; a wobbly or lightweight stand will amplify vibrations and is the primary culprit behind most crosstalk problems.
Furthermore, creating adequate physical separation between individual pads, if your unit allows for it, can prevent direct transmission of impact energy.
For multi-pad units with a single chassis, a highly effective do-it-yourself (DIY) solution involves creating a dampening layer.
Placing a dense material like neoprene, sorbothane, or even a simple piece of thick foam or rubber between the drum pad unit and the stand’s mounting plate can absorb a significant amount of the vibrational force before it has a chance to travel and trigger other sensors.
The second part of the solution lies within the settings of your drum module, which offers a suite of powerful digital tools to intelligently filter out unwanted triggers.
Adjusting these parameters allows you to teach the module to distinguish between a deliberate, primary hit and the faint, secondary vibrations that cause crosstalk.
The three key settings to master are Sensitivity, Threshold, and the dedicated Crosstalk Cancel function.
- Sensitivity: This setting determines how responsive a pad is to being hit. To combat crosstalk, you can try slightly lowering the sensitivity of the pads that are being falsely triggered. This makes them less reactive to the residual vibrations coming from the pad you are actually playing.
- Threshold: This parameter sets the minimum amount of force required for the module to register a hit and produce a sound. By increasing the threshold on adjacent pads, you are essentially telling the module to ignore any incoming signal that falls below a certain velocity level, effectively filtering out the weak, unintended vibrations of crosstalk.
- X-Talk Cancel (Crosstalk Cancel): This is a specialized function designed specifically for this problem. When activated, it intelligently analyzes incoming trigger signals. If it detects a strong, primary hit on one pad followed almost instantaneously by a much weaker signal from an adjacent pad, it correctly identifies the second signal as crosstalk and cancels it, preventing the unwanted sound from being produced. This is often the most effective digital tool for the job.
By systematically working through these mechanical and digital solutions, you can effectively eliminate crosstalk and ensure that your playing is registered with clarity and precision.
| Module Setting | Function | How to Use for Crosstalk | Caution |
|---|---|---|---|
| Sensitivity | Controls the pad’s overall responsiveness to hits. | Slightly decrease on the pads that are being falsely triggered. | Lowering it too much may require you to hit the pad harder than desired. |
| Threshold | Sets the minimum velocity needed to trigger a sound. | Slightly increase on adjacent pads to ignore faint vibrations. | Setting it too high may cause soft, intentional hits (ghost notes) to be missed. |
| X-Talk Cancel | Intelligently identifies and negates crosstalk signals. | Increase the value for the pad being struck until the adjacent trigger stops. | Overly aggressive settings can sometimes cause missed notes during fast rolls between pads. |
Eliminating Latency: The Delay Between Hit and Sound
Latency in the context of electronic percussion is the perceptible, and often maddening, delay between the moment you strike a pad and the moment you actually hear the corresponding sound through your headphones or speakers.
This delay is a critical issue because drumming is an act of precision timing; even a few milliseconds of latency can create a profound sense of disconnection between your physical actions and the auditory feedback you receive.
This disconnect can disrupt your rhythm, make it difficult to play “in the pocket,” and ultimately undermine the feel and groove of your performance, making the instrument feel sluggish and unresponsive.
The acceptable threshold for latency is subjective, but most musicians will begin to notice it above 10-12 milliseconds, and anything higher can become virtually unplayable for serious rhythmic work.
The causes of latency can be traced to several points in the signal chain, but the most significant culprit is almost always the external audio connection.
While the convenience of wireless technology is tempting, using Bluetooth headphones or speakers for monitoring your playing is the single biggest and most common mistake that introduces unacceptable levels of delay.
The very nature of Bluetooth audio compression and transmission protocols involves a significant time lag that, while often negligible for casual music listening, is disastrous for real-time music creation.
The unequivocal solution is to always use a traditional wired connection.
Plugging a good pair of wired headphones or running a cable from the line-out jack to an amplifier or PA system ensures the audio signal travels at the speed of electricity, reducing this part of the latency chain to virtually zero.
While some internal module latency will always exist as the “brain” processes the hit, it is typically minimal (often 3-5ms) on modern devices and is optimized for the built-in sounds.
Therefore, for the absolute lowest latency possible, relying on the module’s internal sounds monitored through a wired connection is the gold standard.
When you begin integrating your electronic drum pad with a computer to trigger sounds from a Digital Audio Workstation (DAW) or a VST instrument like Superior Drummer or Addictive Drums, a new set of latency variables comes into play.
In this environment, latency is primarily governed by your audio interface’s drivers and the buffer size setting within your DAW.
To achieve the best performance on a Windows-based system, it is imperative to use a dedicated ASIO (Audio Stream Input/Output) driver.
ASIO drivers are designed for high-fidelity, low-latency audio performance by bypassing the standard Windows audio architecture and allowing the DAW to communicate directly with the audio interface hardware.
On macOS, the built-in Core Audio framework serves a similar purpose and is generally very efficient.
The buffer size is a crucial setting within your DAW’s preferences that dictates how much audio data the computer processes in each chunk.
A lower buffer size results in lower latency because the computer processes the audio more frequently and in smaller batches.
However, this demands more processing power from your computer’s CPU.
Conversely, a higher buffer size reduces the strain on the CPU but increases latency.
Your goal is to find the sweet spot: the lowest possible buffer size setting that your computer can handle without introducing audio artifacts like clicks, pops, or dropouts.
A good starting point is often 128 samples, from which you can experiment by lowering it to 64 or even 32 samples to see how your system responds.
Mastering this setting is the key to achieving a responsive, real-time feel when using your pads to control software instruments.
| Connection Type | Typical Latency Range | Best Use Case | Verdict for Drumming |
|---|---|---|---|
| Wired Headphones | 1-3 ms | Real-time monitoring, practice, recording | Excellent / Essential |
| Bluetooth Headphones | 40 – 200+ ms | Casual music listening, phone calls | Unacceptable / Avoid at all costs |
| Wired Line Out to Amp/PA | 1-5 ms | Live performance, rehearsal | Excellent / Essential |
Taming Dynamics: Fixing Velocity and Sensitivity Issues
The problem of inaccurate dynamic response occurs when the electronic drum pad fails to faithfully translate the nuances of your playing force into appropriate sound volume and timbre.
This can manifest in several frustrating ways: delicate “ghost notes” intended to be subtle might sound jarringly loud, while powerful, accented hits might lack the punch and impact you expect.
This disconnect between your physical input and the sonic output can make the instrument feel stiff, unmusical, and robotic, stripping away the expressive potential that is fundamental to percussion.
The core of the issue lies in the mismatch between your personal playing style and how the drum module is calibrated to interpret incoming velocity data—the measurement of how hard you strike the pad.
Every drummer has a unique touch, and a one-size-fits-all setting rarely provides a satisfying and expressive experience.
The solution to this dynamic conundrum lies deep within the module’s settings, primarily through the adjustment of Pad Sensitivity and, most importantly, the selection of an appropriate Velocity Curve.
While Pad Sensitivity provides a broad, overall adjustment to how responsive a pad is, the Velocity Curve offers a far more nuanced and powerful way to sculpt the relationship between hit strength and output volume.
A velocity curve is essentially a graph that maps your input velocity (how hard you hit) to an output velocity (how loud the sound is).
Drum modules typically offer several different curve types, each designed to cater to a different style of playing.
Experimenting with these curves is the key to unlocking a personalized and expressive response from your pads.
Here are the most common velocity curves and how to choose the right one for you:
- Linear: This is the default, straight-line response. The output volume is directly proportional to the force of your hit. A 50% strength hit results in 50% volume. This is a good starting point for all players to gauge their natural dynamics before making adjustments.
- Exponential (Exp): This curve requires you to hit the pad progressively harder to reach the maximum volume. The volume increases slowly at first and then ramps up quickly at higher velocities. This is an ideal choice for heavy hitters who want more control over their lower and mid-range dynamics without constantly peaking the volume on every other stroke. It allows you to play hard without the sound becoming overwhelmingly loud too easily.
- Logarithmic (Log): This curve is the inverse of the exponential one. It ramps up to maximum volume very quickly with relatively little force. This curve is perfect for players with a lighter touch or for genres that require a consistently loud and impactful sound without a great deal of physical exertion. It helps bring out the full volume range of the sound samples even with softer playing.
- Fixed: This setting removes all dynamic response. Every single hit, regardless of how soft or hard, will trigger the sound at the exact same, pre-determined volume. While this eliminates all nuance, it can be useful for certain electronic music styles (like classic house or techno) that require a machine-like, consistent velocity for kick and snare patterns.
To properly calibrate your settings, select a single pad (like the snare) and play a simple pattern that includes very soft notes, medium strokes, and loud accents.
Cycle through the different velocity curves while playing this pattern.
Pay close attention to how each curve affects the dynamic range.
The right curve will be the one that feels the most natural and allows you to effortlessly produce the full spectrum of volume from the quietest whisper to the loudest crack, perfectly mirroring the physical effort you put in.
Software Integration: Connecting to DAWs and VSTs
The challenge of software integration arises when you attempt to use your electronic drum pad as a MIDI controller to trigger sounds within a Digital Audio Workstation (DAW) like Ableton Live, Logic Pro, FL Studio, or a dedicated virtual drum instrument (VST) such as Superior Drummer or Toontrack’s EZdrummer.
While this process unlocks a universe of high-quality sounds and production capabilities, it can be fraught with technical hurdles.
The most common frustrations include the DAW not recognizing the drum pad at all, or the even more confusing issue of hitting a pad and triggering a completely unexpected sound—for instance, striking your snare pad and hearing a cymbal or a tom.
These problems stem from misconfigurations in the communication chain between the hardware (your pad), the software (your DAW), and the virtual instrument (the VST).
Successfully connecting and configuring your setup involves a methodical, step-by-step process.
The first step is the physical connection, which is almost universally achieved via a USB cable that transmits MIDI (Musical Instrument Digital Interface) data from your drum pad to your computer.
Once connected, you may need to install a specific driver from the manufacturer’s website to ensure your computer can properly communicate with the device, though many modern pads are “class-compliant” and work out of the box.
Next, you must perform the initial DAW Configuration.
This involves navigating to your DAW’s preferences or settings menu and locating the MIDI or controller section.
Here, you must ensure that your electronic drum pad is recognized and enabled as a MIDI input device.
Once the DAW can “see” your pad, you need to create a new MIDI track (or an instrument track) and “arm” it for recording.
Arming the track tells the DAW to listen for incoming MIDI signals from your controller and route them to the VST instrument loaded on that track.
The final and often most perplexing step is correcting MIDI Note Mapping.
The issue of hitting one pad and hearing the wrong sound is a direct result of a mapping mismatch.
Every pad on your controller is assigned to transmit a specific MIDI note number (e.g., C1, D#2).
Likewise, every sound within your VST instrument is assigned to be triggered by a specific MIDI note number.
A mismatch occurs when, for example, your snare pad sends out note number 40, but the snare sound in your VST is waiting for note number 38.
The solution is to remap these assignments so they align.
Here is a universal, step-by-step guide to setting up and troubleshooting your software integration:
- Connect and Power On: Connect your drum pad to the computer via USB before you launch your DAW. Ensure it is powered on.
- Install Drivers: If required, install the latest driver from the manufacturer’s website.
- Configure DAW Input:
- Open your DAW and go to
Preferences > MIDI Settings(or similar). - Find your drum pad in the list of MIDI Input Devices and make sure its corresponding checkbox is ticked to enable it.
- Open your DAW and go to
- Create and Arm Track:
- Create a new MIDI or Instrument Track.
- Load your desired drum VST plugin onto this track.
- Find the “Arm Recording” or “Record Enable” button on the track (often a red circle) and click it.
- Test and Remap MIDI Notes:
- Hit the pads on your controller. If you hear the correct sounds, you’re all set!
- If the sounds are incorrect, find the “Settings” or “Mapping” page within your VST plugin’s interface.
- Look for a feature called “MIDI Learn” or a visual keyboard/pad layout.
- Select the sound you want to map (e.g., click on the snare drum image in the VST).
- Activate the MIDI Learn function.
- Strike the physical pad on your controller that you want to use for that sound.
- The VST will automatically assign that sound to the incoming MIDI note from your pad.
- Repeat this process for all your pads until they trigger the correct sounds. Save the mapping as a new preset.
Conclusion
The journey into electronic drumming is one filled with immense creative potential, but it is not without its technical landscape of potential pitfalls.
As we have explored, issues ranging from the distracting phantom triggers of crosstalk and the rhythm-breaking delays of latency to the unmusical response of poorly calibrated dynamics and the confusing labyrinth of software integration can stand as formidable barriers to a fluid and enjoyable playing experience.
However, the key takeaway is that none of these problems are without a logical and attainable solution.
By understanding the underlying causes—be they physical vibrations, digital processing delays, or MIDI data mismatches—you gain the power to systematically diagnose and resolve them.
The solutions are found not in frustration, but in the methodical adjustment of your setup and the informed tweaking of settings within your drum module and software.
Embracing this knowledge transforms your relationship with your instrument.
The electronic drum pad ceases to be a mysterious and temperamental piece of technology and becomes what it was always meant to be: an extension of your body, a transparent medium for your rhythmic expression.
The process of dialing in your crosstalk cancellation, minimizing your buffer size, sculpting the perfect velocity curve, and mapping your MIDI notes correctly is an investment that pays dividends in every practice session, recording, and performance.
We encourage you to approach your instrument with patience and a spirit of experimentation.
Dive into your module’s settings, test the limits of your software, and don’t be afraid to make adjustments.
By taking command of the technical aspects of your electronic drum pad, you unlock its full artistic potential and pave the way for a more expressive and seamless musical journey.