Integrating electronic drum pads with Virtual Studio Technology (VSTs) represents the single most profound evolution in digital percussion, transforming a functional practice tool into an endlessly versatile and expressive musical instrument.
This powerful synergy unshackles the modern drummer from the sonic confines of built-in sound modules, opening a gateway to vast libraries of professionally recorded acoustic kits, iconic vintage drum machines, and futuristic electronic textures.
The electronic pad, in this context, transcends its role as a mere sound source to become a sophisticated MIDI controller, capturing the nuance and dynamics of a performance and translating it into data that can trigger any sound imaginable within a Digital Audio Workstation (DAW).
This process fundamentally redefines the creative possibilities for producers, performers, and hobbyists alike, offering unparalleled control over the tone, texture, and character of their drum tracks.
This article provides a comprehensive and methodical roadmap for any drummer seeking to harness the formidable power of VST integration.
We will begin by demystifying the core components, establishing a clear understanding of what electronic drum pads and VSTs are and how they function independently before they are combined.
Following this foundational knowledge, the guide will walk you through a detailed, step-by-step process for connecting your hardware to your software, from the physical cabling to the critical task of MIDI mapping within your DAW.
Understanding how to connect your gear is only half the battle; therefore, we will then explore the compelling reasons why this setup is so advantageous, delving into the vast improvements in sound quality, sonic variety, and expressive realism.
To make these concepts tangible, we will spotlight popular and effective hardware and software choices, comparing top-tier electronic drum pads and industry-standard drum VSTs.
Finally, because no technological endeavor is without its potential obstacles, we will equip you with practical troubleshooting strategies for common challenges like performance-killing latency and confusing MIDI configurations, ensuring a smooth and rewarding creative experience.
The Dynamic Duo: Understanding Electronic Drum Pads and VSTs
What is an Electronic Drum Pad?
An electronic drum pad is fundamentally a highly specialized MIDI controller designed to interpret the physical act of drumming into digital information.
At the heart of each pad lies a piezoelectric transducer, a sensor that registers the vibration and impact of a drumstick strike, converting this physical energy into an electrical signal.
This signal is then processed by the unit’s internal brain, or module, which determines two key pieces of MIDI data: the note (which pad was hit) and the velocity (how hard it was hit).
This information is then transmitted from the pad’s MIDI output, ready to be interpreted by an external sound source.
The pads themselves are engineered to provide a satisfying tactile response, with materials ranging from dense, responsive rubber to tension-adjustable mesh heads that more closely mimic the feel and rebound of an acoustic drumhead, directly influencing the playability and feel for the performing drummer.
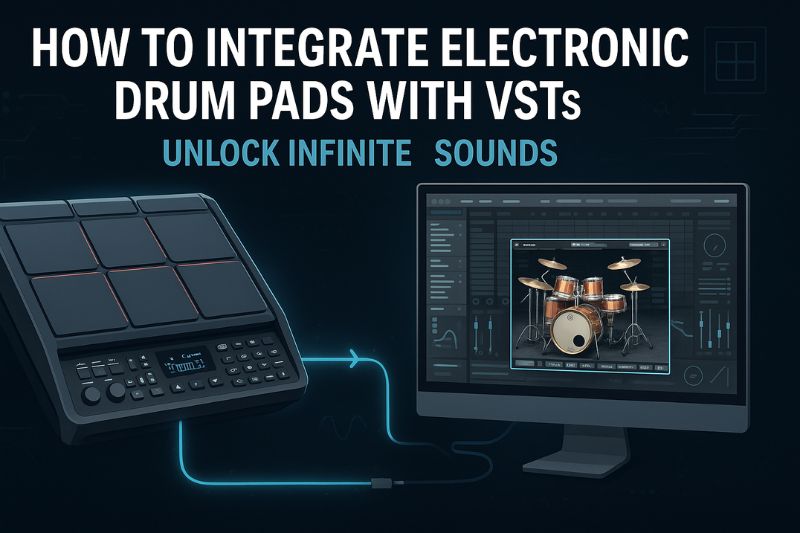
The connectivity of the drum pad is the critical element that facilitates its role as a controller for external software like VSTs.
Modern electronic drum pads almost universally feature a USB MIDI port, which offers the most straightforward connection method by sending MIDI data directly to a computer over a standard USB cable, often drawing power from the same connection.
For legacy compatibility or integration into more complex studio setups, many pads also retain the traditional 5-pin MIDI DIN connectors.
These standard MIDI ports allow the pad to connect to a dedicated audio interface or other MIDI-enabled hardware, providing a robust and time-tested method of communication.
Understanding that the drum pad is not just a source of sound but a sophisticated data-generating device is the conceptual key to unlocking its full potential with VSTs.
What is a VST (Virtual Studio Technology)?
A Virtual Studio Technology (VST) is a software-based plugin that integrates seamlessly into a host application, most commonly a Digital Audio Workstation (DAW), to provide a vast range of audio processing or sound generation capabilities.
Think of VSTs as applications for your music production software; they don’t run on their own but are “plugged in” to the DAW environment to expand its functionality.
This technology has become the global standard for music production, allowing creators to build a virtual studio customized to their specific needs without the immense cost and physical space required for hardware equivalents.
The VST format is incredibly versatile and is broadly categorized into two primary types that serve distinct purposes within the production workflow.
For the purpose of integrating with electronic drums, the most crucial category is the VST Instrument (VSTi).
A VSTi is effectively a software-based musical instrument, containing a sound engine and often an immense library of audio samples that can be triggered by MIDI data from a controller like an electronic drum pad.
These are not just simple recordings; premier drum VSTis, such as Toontrack’s Superior Drummer 3 or XLN Audio’s Addictive Drums 2, feature deeply multi-sampled instruments.
This means that every drum and cymbal has been meticulously recorded at dozens of different velocity layers, with multiple microphone positions, and with numerous unique samples for each velocity (a technique called “round-robin sampling”) to avoid the machine-gun effect of a single sample being repeated.
The other category, VST effects (VSTfx), includes plugins like reverb, compression, equalization (EQ), and delay, which are used to process and shape the audio generated by VSTis or recorded from external sources.
The How-To: A Step-by-Step Guide to Integration
Successfully linking your electronic drum pad to a VST requires a methodical approach, but the process is logical and can be broken down into a series of manageable steps.
This section serves as your practical guide to establishing a stable and responsive connection, transforming your physical hardware into the expressive front-end for your powerful new software sounds.
Essential Gear
Before beginning the connection process, it is vital to ensure you have all the necessary components. A missing cable or incompatible software can halt progress before it even begins.
Assembling these items beforehand will streamline the setup and allow for a more efficient workflow.
- An Electronic Drum Pad: The unit must have a MIDI output, either via a USB port or a traditional 5-pin MIDI OUT port.
- A Computer: The machine must meet or exceed the minimum system requirements for both your chosen DAW and the drum VST you intend to use. Modern VSTs can be resource-intensive.
- Cabling: You will need either a standard A-to-B USB cable or a dedicated MIDI interface with two 5-pin MIDI cables.
- An Audio Interface (Highly Recommended): While not strictly mandatory, a dedicated audio interface is the professional solution for managing audio input and output, and it is crucial for achieving low-latency performance.
- Digital Audio Workstation (DAW): This is the software hub for your virtual studio. Popular choices include Ableton Live, Logic Pro X (Mac only), FL Studio, Reaper, and Cubase.
- A Drum VST Plugin: The software instrument that will generate your drum sounds.
- Headphones or Studio Monitors: You will need a high-quality audio output source to accurately hear the sounds you are triggering.
The Connection and Setup Process
With your gear assembled, follow these steps in sequence to configure your system.
- Establish the Physical Connection: Choose one of the two primary methods.
- USB MIDI: The simplest route. Connect a USB cable from the USB MIDI port on your drum pad directly to an available USB port on your computer. Your computer should automatically recognize it as a generic MIDI device.
- 5-Pin MIDI via Audio Interface: Connect a 5-pin MIDI cable from the MIDI OUT port on your drum pad to the MIDI IN port on your audio interface. Then, connect the audio interface to your computer, typically via USB or Thunderbolt. This method is preferred for its stability and low-latency potential.
- Configure Your DAW and Drivers:
- Launch your DAW. Navigate to the Preferences, Settings, or Options menu.
- Go to the Audio tab. Select your audio interface as the primary Audio Input and Output Device. On Windows, it is critical to select the ASIO driver for your interface to ensure the best performance.
- Go to the MIDI tab. Ensure that your electronic drum pad or MIDI interface is recognized and enabled as a MIDI input device.
- Create and Arm a Track:
- In your DAW’s main window, create a new track. The specific terminology varies, but you will typically choose “Instrument Track” or “Software Instrument Track.” If those options aren’t available, create a “MIDI Track.”
- This action creates a new channel strip in your DAW’s mixer.
- Load Your Drum VST:
- On the Instrument Track you just created, find the slot for plugins or instruments.
- Open your DAW’s plugin browser and navigate to your installed VST Instruments.
- Select your chosen drum VST (e.g., “Superior Drummer 3”) and load it onto the track. The VST’s graphical user interface (GUI) should now appear on your screen.
- Perform MIDI Mapping:
- This is the most crucial step for playability. You must ensure that hitting a specific pad on your controller triggers the correct corresponding drum in the VST.
- Strike your snare drum pad. Observe which drum piece is triggered in the VST’s interface. If it triggers a tom or a cymbal, your map is incorrect.
- Most VSTs have a “Settings” or “Mapping” page. Look for a preset that matches your drum pad’s brand and model (e.g., “Alesis Strike,” “Roland TD-series”). Loading this preset often resolves most mapping issues instantly.
- If no preset exists, use the “MIDI Learn” function. Click on the drum you want to map in the VST (e.g., the virtual snare), activate MIDI Learn, and then strike the corresponding physical pad. The VST will automatically assign that pad to the selected sound. Repeat for all pads.
- Fine-Tune for Expressiveness:
- Play a simple groove. If the softest hits don’t register or the loudest hits feel weak, you need to adjust the velocity curve. This setting, found in either the VST or the drum pad’s module, dictates the relationship between how hard you hit and the output volume. Experiment with linear, exponential, and logarithmic curves to find what best suits your playing style.
- Adjust sensitivity and crosstalk settings on your drum pad’s module as needed to prevent accidental triggering of adjacent pads.
The Payoff: Why Integrate Your Drum Pads with VSTs?
The primary motivation for integrating electronic drum pads with VSTs is the monumental leap in sound quality.
The onboard sound modules of most drum pads, while convenient, operate with significant constraints on memory (ROM size) and processing power, often resulting in sounds that are heavily compressed, lack dynamic range, and feel sterile.
In stark contrast, professional drum VSTs are built upon vast, multi-gigabyte sound libraries where every drum and cymbal has been captured in world-class recording studios using an array of high-end microphones and preamps.
This meticulous recording process preserves the full dynamic range, natural decay, and subtle tonal complexities of the source instruments, providing a level of realism and sonic depth that internal modules simply cannot replicate.
This integration unlocks a virtually infinite sonic palette, freeing you from the limited kit selections of a single hardware unit.
A drummer with a VST-powered setup can instantly switch from a vintage 1960s jazz kit with brushed snares to a thunderous modern metal kit with deeply-tuned toms, and then to a classic 808 drum machine for an electronic track, all without changing their physical setup.
The VST market is rich with expansion packs (like Toontrack’s EZXs or Addictive Drums’ ADpaks) that cater to every conceivable genre, from orchestral percussion and world instruments to experimental sound design.
This versatility makes the setup invaluable for producers who need to adapt to different musical styles, and it provides an endless source of inspiration for songwriters and performers looking to explore new sonic territories.
Beyond the sheer number of sounds, this setup offers the ultimate in customization and control, effectively placing a virtual drum technician and recording engineer at your fingertips.
Within the VST’s interface, you have the power to build your dream drum kit from scratch, mixing and matching snares, kicks, and cymbals from different manufacturers and eras.
You can alter the tuning and pitch of each drum, swap out heads, and even adjust the amount of sympathetic snare buzz.
Advanced VSTs like Superior Drummer 3 allow you to control the mix of different microphones—close mics, overheads, and room mics—and even drag and drop your drums into different virtual rooms to change the ambience.
This granular level of control empowers you to sculpt a drum sound that is perfectly tailored to your track, a feat that would otherwise require a professional studio and an extensive microphone collection.
Finally, the combination of a tactile electronic drum pad and a sophisticated VST dramatically enhances the realism and expressiveness of a performance.
This heightened realism is achieved through advanced sampling techniques that go far beyond what a hardware module can manage.
“Round-robin” sampling, for instance, utilizes multiple unique samples for the same velocity level, so that consecutive hits on a snare drum or hi-hat never sound identical and robotic.
Furthermore, VSTs provide a wealth of “articulations”—different playing techniques for each instrument.
For a snare, this could include a standard center hit, a rimshot, a cross-stick, a ghost note, and a flam.
For cymbals, it might include hits on the bow, the bell, and the edge, as well as swells and chokes.
The ability to trigger these varied articulations from the drum pad creates a deeply nuanced and humanized performance that is virtually indistinguishable from a well-recorded acoustic kit.
Gear Spotlight: Popular Electronic Drum Pads and VSTs
Navigating the market for hardware and software can be daunting.
Below is a curated selection of popular and highly-regarded electronic drum pads and VSTs, known for their reliability, feature sets, and excellent performance in an integrated setup.
Top Electronic Drum Pads for VST Integration
These pads are celebrated for their robust build quality, responsive playing surfaces, and solid MIDI implementation, making them ideal candidates to serve as the front-end for your VST library.
| Model | Pads | Connectivity | Key Features | Best For |
|---|---|---|---|---|
| Roland SPD-SX PRO | 9 Velocity-Sensitive | USB MIDI, 5-Pin MIDI, 4x Trigger In | Onboard sampling, 32GB internal memory, customizable pad LEDs, dedicated app | Live performance, triggering loops & samples |
| Alesis Strike MultiPad | 9 Velocity-Sensitive | USB MIDI, 5-Pin MIDI, 2x Trigger In | Onboard sampling & looping, 32GB internal memory, large color screen | Studio production & live use, a strong SPD-SX alternative |
| Yamaha DTX-Multi 12 | 12 Velocity-Sensitive | USB MIDI, 5-Pin MIDI, 5x Trigger In | Multiple playing modes (stick, hand, finger), 1,200+ onboard sounds | Percussionists needing diverse sounds & playing styles |
| Akai Professional MPD226 | 16 Velocity-Sensitive | USB MIDI, 5-Pin MIDI | Classic MPC-style pads, 4 faders, 4 knobs, transport controls | Producers & beatmakers needing tactile control over their DAW |
The Roland SPD-SX PRO is widely considered the industry standard for professional live drummers.
Its rock-solid stability, intuitive workflow for managing backing tracks and click tracks, and customizable LEDs make it a fixture on stages worldwide.
For studio producers, the Alesis Strike MultiPad offers a compelling alternative with a more modern interface, a larger screen, and extensive onboard sampling and looping capabilities that can spark creativity.
Percussionists who need to cover a wide range of sounds, from congas to marimbas, often gravitate towards the Yamaha DTX-Multi 12 for its large number of pads and its unique ability to be played effectively with hands and fingers in addition to sticks.
Finally, for the producer or beatmaker who is primarily programming drums rather than performing them live, the Akai MPD226 provides the legendary feel of MPC pads along with assignable faders and knobs for controlling the mixer and effects within their DAW.
Must-Have Drum VSTs
These software instruments are the powerhouses that will generate your sounds.
They represent the pinnacle of digital drum technology, each with its own unique strengths and workflow.
| VST Name | Core Feature | Sound Library Size | Best For |
|---|---|---|---|
| Toontrack Superior Drummer 3 | Unrivaled Detail & Control | ~230 GB | Professional producers needing granular control over every aspect of the drum sound. |
| XLN Audio Addictive Drums 2 | Speed & Character | ~4-6 GB per ADpak | Musicians wanting great-sounding, mix-ready kits right out of the box with an intuitive workflow. |
| Steven Slate Drums 5.5 (SSD5.5) | Punchy, Mix-Ready Sounds | ~15 GB | Rock and metal producers looking for aggressive, polished drum tones that cut through a dense mix. |
| Native Instruments Battery 4 | Electronic & Hybrid Kits | ~12 GB | Electronic music producers and sound designers who need a powerful sampler for building custom kits. |
Toontrack’s Superior Drummer 3 is the undisputed king of detail.
Its massive sound library, recorded by legendary engineer George Massenburg, provides raw, unprocessed sounds that can be sculpted in any way imaginable using its comprehensive internal mixer and suite of effects.
It is a tool for those who want to build a drum sound from the ground up.
In contrast, XLN Audio’s Addictive Drums 2 focuses on inspiration and speed.
It provides beautifully processed, “mix-ready” kits that sound fantastic immediately, allowing users to quickly find a professional sound and start creating.
Its intuitive interface and curated presets make it a favorite among songwriters and producers on a deadline.
Steven Slate Drums 5.5 has carved out a niche in the rock and metal communities for its punchy, aggressive, and highly processed samples that capture the sound of modern heavy music perfectly.
Finally, Native Instruments Battery 4 is a creative powerhouse for electronic music.
It functions less like a virtual acoustic kit and more like a deeply powerful drum sampler, with a vast library of electronic sounds and an intuitive drag-and-drop interface for creating unique and complex hybrid kits.
Overcoming Hurdles: Common Challenges and Solutions
While the integration process is powerful, it can present a few technical hurdles.
Understanding these common issues and their solutions is key to maintaining a fluid and frustration-free creative workflow.
Latency (The Performance Killer)
The most common and disruptive issue you may encounter is latency, which is the audible delay between the moment you strike a pad and the moment you hear the corresponding sound from your computer.
Even a small amount of latency (over 10-12 milliseconds) can make playing feel disconnected and unnatural, completely destroying the rhythmic feel of a performance.
This delay is caused by the time it takes for your computer’s CPU to process the incoming MIDI signal, load the appropriate audio sample from the VST, and send it out through your speakers or headphones.
- Solution 1: Use a Dedicated Audio Interface with ASIO Drivers. This is the single most effective way to combat latency. A dedicated interface has specialized hardware and software drivers (like ASIO on Windows or Core Audio on Mac) designed for high-speed audio processing, which is far more efficient than your computer’s built-in sound card.
- Solution 2: Adjust the Buffer Size. In your DAW’s audio preferences, you will find a “Buffer Size” setting, measured in samples. A lower buffer size (e.g., 128 or 64 samples) results in lower latency but places a higher load on your CPU. A higher buffer size (e.g., 512 or 1024 samples) reduces the risk of audio crackles and pops but increases latency. For recording and performing, set the buffer size as low as your computer can handle without introducing audio artifacts.
- Solution 3: Increase the Sample Rate. Changing the sample rate from 44.1kHz to 48kHz or 96kHz can also slightly reduce latency, though it increases the size of your project files.
- Solution 4: Optimize Your Computer. Close all other applications, web browsers, and background processes to dedicate as much CPU power as possible to your DAW. Freezing or flattening other tracks in your session can also significantly reduce the processing load.
MIDI Mapping Mayhem
Another frequent frustration is incorrect MIDI mapping, where hitting your snare pad triggers a tom sound, or your crash cymbal triggers a cowbell.
This happens because there isn’t a single, universally adopted standard for which MIDI note number corresponds to which drum piece.
While the General MIDI (GM) standard exists, not all hardware and software adhere to it strictly.
This mismatch between the MIDI notes your pad is sending and the notes your VST is expecting to receive for each drum is the root of the problem.
The solution lies entirely within your VST’s mapping settings.
As mentioned in the setup guide, the first and easiest step is to search for a mapping preset designed for your specific brand of electronic drums.
If one is not available, you must manually create a map using the VST’s MIDI Learn function.
While this may seem tedious initially, you only need to do it once.
After you have correctly mapped all your pads, save the configuration as a custom preset within your VST.
This way, you can instantly recall your perfect mapping setup every time you start a new project, eliminating the issue permanently.
Velocity Curve Woes
If you find that your playing dynamics are not being accurately represented—perhaps your ghost notes are silent, or you have to hit the pads with excessive force to get a loud sound—the issue is likely a mismatch in the velocity curve.
This setting translates the physical force of your strike (velocity) into a MIDI velocity value (from 0 to 127).
An improper curve can make the instrument feel unresponsive and difficult to play expressively.
Most VSTs and drum pad modules offer several velocity curve options.
A “linear” curve provides a direct 1:1 response.
An “exponential” or “logarithmic” curve will make the sound get louder more quickly or more gradually, respectively.
There is no single “correct” curve; the ideal choice depends on your personal playing style.
The solution is to experiment with the different curves available in your VST’s settings until you find one that provides a natural and responsive feel that accurately reflects your dynamic range from the softest taps to the most powerful strikes.
Conclusion: Your Sound, Your Rules
The journey from a standalone electronic drum pad to a fully integrated VST-powered percussion rig is a transformative one.
It elevates a simple piece of hardware into a limitless instrument, bounded only by your imagination and the vast expanse of available software.
By understanding the core principles of MIDI, familiarizing yourself with the DAW environment, and methodically following the steps for connection and configuration, you can unlock a level of sonic quality, variety, and expressive control previously reserved for those with access to professional recording studios.
The ability to craft a drum sound with surgical precision, to summon any kit from any era, and to capture a performance with all its human nuance is no longer a distant dream but an accessible reality.
This guide has provided the map, but the exploration is now yours to command.
The true joy of this technology lies in experimentation—in blending an acoustic kick with an electronic snare, in layering orchestral timpani with a hip-hop clap, in designing a drum kit that has never existed before.
Embrace the learning process, be patient with the technical hurdles, and immerse yourself in the creative possibilities.
By integrating your electronic drum pads with VSTs, you are not just upgrading your gear; you are fundamentally upgrading your ability to express yourself through rhythm.
The sonic world is at your fingertips.
Go forth and create.