The landscape of modern music production has undergone a dramatic transformation, with technology playing an increasingly pivotal role in shaping how artists create and capture their sound.
At the heart of this evolution lies the accessibility and versatility of digital instruments.
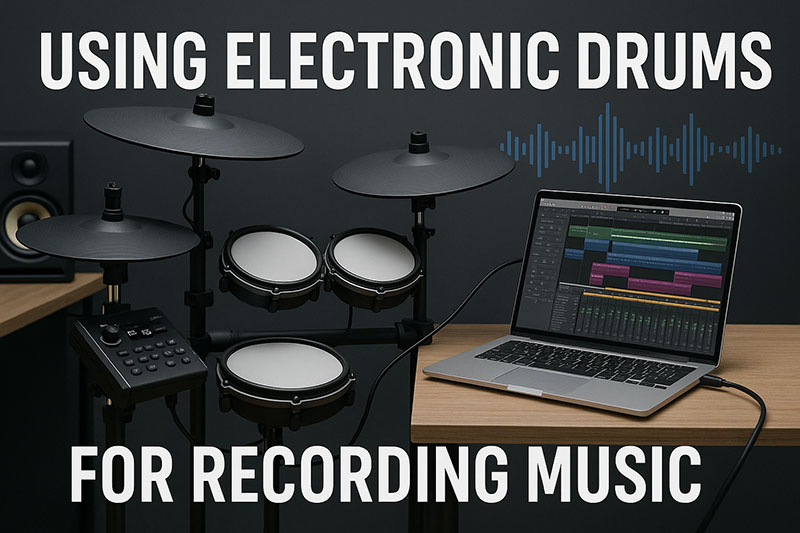
Among these, electronic drums have emerged as an indispensable tool for countless musicians and producers seeking a practical, flexible, and powerful solution for laying down drum tracks.
Gone are the days when recording high-quality drums necessitated expensive studios, extensive microphone setups, and acoustic treatment; today, a quality electronic drum set connected to a computer can unlock a world of rhythmic possibilities, making professional-sounding drum recordings achievable in virtually any environment, especially a home studio.
This comprehensive guide delves into the multifaceted world of using electronic drums for recording music.
We will explore the compelling advantages that make electronic drums a preferred choice for many recording scenarios.
Furthermore, we will demystify the various connectivity options, such as MIDI drums recording and audio recording electronic drums, detailing how to integrate your kit seamlessly with your digital audio workstation (DAW).
We will also walk through the practical steps of the e-drum recording process, from initial setup to editing and mixing, address common challenges like latency, and highlight the crucial features to look for when selecting the best electronic drum set for recording.
Understanding these elements is key to harnessing the full potential of electronic drums in your music production workflow.
Why Opt for Electronic Drums When Recording Music?
Electronic drums offer significant advantages for recording compared to traditional acoustic kits, chief among them being unparalleled noise reduction.
Unlike acoustic drums, which produce substantial volume that can be disruptive to neighbors or family and requires dedicated soundproofed spaces for recording, electronic drums generate minimal acoustic noise.
The sound comes from headphones or studio monitors, allowing musicians to practice and record at any time of day or night without causing disturbance.
This quiet operation is a game-changer for artists working in apartments, residential areas, or any location where noise complaints are a concern.
Noise reduction PROVIDES freedom for recording schedules.
Another compelling reason to choose electronic drums for recording is their immense versatility of sounds.
An electronic drum module, often referred to as the “brain” of the kit, comes pre-loaded with a vast library of drum kits and individual percussion sounds, ranging from classic acoustic drum samples captured in world-class studios to cutting-edge electronic and synthesized sounds.
This means a single electronic kit can instantly transform from a vintage jazz setup to a heavy rock beast, or even a hip-hop beat machine, all at the touch of a button.
The versatility of sounds ALLOWS exploration of genres.
Producers can experiment with different drum tones to find the perfect fit for their track without the need for multiple physical drum kits or lengthy microphone adjustments.
Do electronic drums provide consistent and controllable dynamics for recording? Absolutely; electronic drums excel in providing consistent performance and dynamics, crucial for achieving polished recordings.
Each pad and cymbal is equipped with sensors (triggers) that accurately detect the force and velocity of each strike.
This velocity data is then translated by the drum module into corresponding sound levels and even different samples (layering), ensuring that softer hits are quiet and harder hits are loud, just like an acoustic drum.
This inherent consistency simplifies the recording process, resulting in tracks with predictable dynamics that are easier to mix.
Consistent performance ENSURES reliable input data.
Is setting up electronic drums for recording simpler than acoustic drums? Without a doubt, electronic drums offer a significantly simplified recording setup compared to their acoustic counterparts.
Recording acoustic drums is a complex and often costly endeavor involving multiple microphones (sometimes ten or more), microphone stands, cables, preamps, and the challenging task of positioning microphones to minimize bleed between drums and cymbals while capturing a balanced sound.
With electronic drums, the setup is drastically reduced; you typically only need one or two cables (MIDI or audio) to connect the drum module directly to your audio interface or computer.
Simplified setup REDUCES technical hurdles.
This direct connection eliminates the need for microphones and acoustic treatment, saving time, money, and effort.
Furthermore, electronic drums offer unparalleled editing flexibility, particularly when utilizing MIDI connectivity.
When you record MIDI data from an electronic kit, you are not recording audio waveforms, but rather performance information – which pad was hit, how hard (velocity), and exactly when.
This MIDI data can be easily edited in your DAW: you can correct timing errors by quantizing notes, change the velocity of individual hits, delete unwanted notes, or even completely change the drum sounds assigned to each pad after the performance has been recorded.
Editing flexibility EMPOWERS creative control.
This level of post-performance manipulation is incredibly powerful for fine-tuning drum tracks to perfection.
Finally, are electronic drums more convenient in terms of size and portability for recording? Yes, their design inherently makes them more portable and space-saving.
Composed of pads mounted on a frame, electronic kits are generally more compact than a full acoustic drum set, making them ideal for smaller recording spaces or home studios.
Many models can be easily disassembled and transported, making them convenient for musicians who need to take their recording setup to different locations.
Portability FACILITATES recording in various locations.
Understanding Connectivity Options for Recording
Connecting your electronic drum set to your recording setup involves understanding the different types of signals they can transmit and how these signals interact with your computer and recording software.
The primary methods are MIDI, Audio, and sometimes a combination via USB.
Choosing the right connection method depends on your recording goals and the capabilities of your equipment.
MIDI (Musical Instrument Digital Interface) is a fundamental concept in modern music technology, and it’s one of the most powerful ways to use electronic drums for recording.
MIDI does not transmit sound itself, but rather digital messages about musical events.
In the context of electronic drums, these messages include information such as which pad was struck, how hard it was hit (velocity), when it was hit (timing), and when a cymbal was choked.
MIDI data IS performance information.
Connecting via MIDI cables (the traditional 5-pin DIN connectors) requires a MIDI interface connected to your computer.
Many modern audio interfaces include MIDI input ports.
Alternatively, most contemporary electronic drum modules feature a USB port that can transmit MIDI data directly to your computer, simplifying the connection process significantly – often requiring just a single USB cable.
When you record MIDI from your e-drums into a DAW, the performance is captured as editable data on a MIDI track.
This data can then be used to trigger sounds from virtual drum instruments (VSTs or plugins) running within your DAW.
This approach means you can completely change the drum sounds after recording the performance, offering immense flexibility during mixing and arrangement.
Audio Output is the most straightforward way to record the actual sounds generated by your electronic drum module.
The module processes the trigger signals from the pads and plays back the assigned drum sounds.
These sounds are then sent out of the module’s audio outputs, typically standard ¼-inch jack sockets.
You connect these outputs to the inputs of your audio interface, which then converts the analog audio signal into digital data that your computer can record onto an audio track in your DAW.
Audio cables TRANSMIT sound signals.
Most drum modules have a stereo main output (Left and Right), allowing you to record the entire kit as a stereo track.
Some higher-end modules also feature multiple individual audio outputs.
This is a significant advantage for recording, as it allows you to send each drum or cymbal (or groups of them) to separate tracks in your DAW.
Recording individual outputs PROVIDES mixing flexibility.
This “multitracking” approach gives you granular control over the mix of each drum element, allowing you to process the kick, snare, hi-hats, and toms independently with effects like EQ, compression, and reverb, just as you would with acoustic drum recordings.
Recording directly from the module’s audio outputs is useful when you are happy with the sounds provided by the module and want to capture them directly without relying on virtual instruments.
USB Audio/MIDI connectivity offers a convenient hybrid solution found on many modern electronic drum sets.
A single USB cable connected between the drum module and your computer can often transmit both MIDI data and multiple channels of digital audio simultaneously.
USB connection SIMPLIFIES wiring.
This streamlines the setup considerably, allowing you to record both the MIDI performance and the individual audio outputs from the module over one connection.
This provides the best of both worlds: the flexibility of MIDI editing and triggering virtual instruments, combined with the ability to capture the module’s sounds for either use as is or for layering and blending with virtual drum samples.
Ensure your drum module and DAW support multi-channel USB audio for this approach.
To clarify the main connectivity methods, here’s a simple table:
| Connectivity Type | Signal Transmitted | Requires (on Computer side) | Primary Benefit for Recording |
|---|---|---|---|
| MIDI (5-pin) | Performance Data | MIDI Interface | Ultimate editing flexibility, triggering VSTs |
| MIDI (USB) | Performance Data | USB Port | Simplified connection, triggering VSTs |
| Audio (Line Out) | Sound Waves | Audio Interface (Line Inputs) | Capture module’s built-in sounds directly |
| USB Audio/MIDI | Performance Data & Sound Waves | USB Port, compatible DAW | Simplified connection, capture audio + MIDI flexibility |
The Electronic Drum Recording Process
Successfully recording your electronic drums involves a series of steps, from physically connecting your kit to configuring your software and capturing your performance.
While simpler than recording acoustic drums, it still requires attention to detail to ensure a clean and usable recording.
Setting up your gear is the crucial first step in the recording process.
You need to connect your electronic drum set to your computer.
If you’re using MIDI drums recording via 5-pin MIDI, you’ll connect the MIDI OUT of your drum module to the MIDI IN of your audio interface or dedicated MIDI interface, which is then connected to your computer (usually via USB or Thunderbolt).
If using USB MIDI, simply connect the USB port on your module to a USB port on your computer.
For audio recording electronic drums directly from the module, connect the audio outputs of the module (main stereo outputs or individual outs) to the line inputs of your audio interface.
The audio interface then connects to your computer.
In addition to your drum kit and the necessary cables/interface, you will need a computer running a DAW (Digital Audio Workstation), and good quality headphones or studio monitors for monitoring your performance.
Required equipment INCLUDES DAW and interface.
Configuring your DAW is essential to receive and record the signals from your electronic drum set.
Once your kit is connected, open your DAW software (e.g., Pro Tools, Ableton Live, Logic Pro, Cubase, Reaper).
You’ll need to create new tracks to record your drums.
If you are recording MIDI drums recording to trigger virtual instruments, create one or more MIDI tracks.
Configure the input of the MIDI track(s) to receive MIDI data from your electronic drum module.
If you are recording audio recording electronic drums directly from the module, create one or more audio tracks.
Configure the input of the audio track(s) to receive audio signal from the corresponding inputs on your audio interface where your drum module is connected.
It’s vital to ensure your DAW’s audio settings are configured correctly with your audio interface as the input/output device and that the buffer size is set as low as possible to minimize latency.
DAW configuration PREPARES for recording.
Recording your performance is where you lay down your drum track.
Before hitting record, make sure your monitoring is set up correctly.
You should be listening back to the sound of the drums (either from the module or triggering a virtual instrument in your DAW) through your headphones or monitors, ideally with minimal latency.
Most DAWs offer a metronome or click track, which is highly recommended to play along with to ensure your performance is in time with the rest of your music.
Arm the track(s) you configured for recording and hit the record button.
Play your drum part as you normally would, focusing on timing, dynamics, and feel.
Don’t worry too much about minor mistakes at this stage, especially if recording MIDI, as they can often be fixed later.
Recording performance CAPTURES musical expression.
Editing and mixing your electronic drum tracks allows you to refine your performance and shape the final sound.
This is where the flexibility of electronic drums truly shines.
If you recorded MIDI drums recording:
- You can easily edit the MIDI notes on the piano roll or drum editor view within your DAW.
- Quantize notes to correct timing imperfections, aligning them perfectly with the grid or groove.
- Adjust the velocity of individual notes to fine-tune dynamics and make ghost notes softer or accents harder.
- Move, copy, or delete notes.
- Crucially, you can change the virtual drum instrument or the specific drum sound assigned to any pad after recording the performance, allowing for extensive sonic experimentation without re-recording.Editing MIDI PROVIDES post-performance control.
If you recorded audio recording electronic drums:
- Editing is more like traditional audio editing.
You can cut, copy, paste, and move audio regions. - You can apply audio effects directly to the recorded tracks.
- Mixing involves setting the levels of each drum track (or the stereo track) relative to the other instruments in your song.
- Use EQ (Equalization) to shape the tone of each drum, boosting desirable frequencies and cutting undesirable ones.
- Apply compression to control the dynamic range, making the drums sound more consistent and powerful.
- Add effects like reverb and delay to create space and depth.
- Pan drums in the stereo field to create a realistic or desired drum kit image.
Mixing audio SHAPES the final sound.
If you used individual audio outputs or USB audio, mixing is similar to mixing multi-tracked acoustic drums, giving you detailed control over each element.
If you recorded stereo audio, your mixing options are more limited to the overall stereo track.
Here is a list of essential steps in the e-drum recording process:
- Connect your electronic drum kit to your audio interface/computer using appropriate cables (MIDI, Audio, USB).
- Launch your DAW and create new tracks (MIDI for virtual instruments, Audio for module sounds).
- Configure track inputs to receive signal from your drum module/interface.
- Set up monitoring to hear your drums with minimal latency.
- Use a click track for accurate timing.
- Arm tracks and record your drum performance.
- Edit the recorded data (MIDI or Audio) to correct errors or refine performance.
- Mix the drum tracks, applying EQ, compression, and other effects as needed to fit the song.
Overcoming Potential Challenges
While using electronic drums for recording music offers many advantages, it’s not without potential hurdles.
Understanding and addressing these challenges is key to a smooth and effective recording workflow.
What is perhaps the most common issue encountered when recording electronic drums? Latency is frequently the biggest challenge.
Latency refers to the delay between hitting a drum pad and hearing the corresponding sound from your computer or audio interface.
High latency can make it incredibly difficult to play in time, disrupting your performance and making recording frustrating.
Latency CREATES delay.
Solutions for minimizing latency primarily involve optimizing your audio interface and DAW settings.
Ensure you have the latest drivers installed for your audio interface.
Within your DAW’s audio preferences, find the buffer size setting.
The buffer size determines the amount of audio data your computer processes at a time; a smaller buffer size reduces latency but requires more processing power from your computer, potentially leading to clicks, pops, or dropouts if your system isn’t fast enough.
Conversely, a larger buffer size increases latency but is less demanding on your CPU.
The goal is to find the lowest buffer size that your system can handle without audio artifacts.
Monitoring directly through your audio interface or drum module (if they have a low-latency monitoring path) rather than through the DAW can also help.
Minimizing latency IMPROVES playability.
Are there issues with electronic drums not accurately capturing every hit? Yes, triggering issues can sometimes occur, such as double triggering (a single hit registers as two or more notes) or missed hits.
This can be caused by incorrect pad sensitivity settings on the drum module, crosstalk between pads (vibration from one pad triggering an adjacent one), or even the type of drumstick being used.
Triggering issues AFFECT performance accuracy.
Solutions for triggering issues involve adjusting the settings on your electronic drum module.
Most modules have parameters for adjusting sensitivity (how hard you need to hit the pad to trigger a sound), threshold (the minimum velocity required to trigger), and retrigger cancel (to prevent double triggering).
Experimenting with these settings for each pad is crucial to dial in the responsiveness to match your playing style.
Ensuring your drum rack is stable and pads are securely mounted can also help reduce crosstalk.
Some drummers find that certain stick types or techniques work better with electronic pads than others.
Adjusting sensitivity IMPROVES triggering accuracy.
Could ambient noise or pad sounds interfere with the recording, even with electronic drums? While significantly quieter than acoustic kits, electronic pads themselves still produce a physical sound when struck, and cymbals can also make some noise.
If you are using microphones in your recording setup (e.g., for capturing the sound of acoustic cymbals blended with electronic drum sounds, or for recording room ambiance), these microphones can pick up the sound of the pads being hit (pad noise bleed).
Pad noise bleed CAN be captured by microphones.
Solutions depend on your recording approach.
If you are primarily using MIDI drums recording to trigger virtual instruments, the sound of the pads hitting is irrelevant to the final recorded track, as the sound comes entirely from the VST.
If you are recording audio directly from the module’s outputs, the module’s output is a clean signal without pad noise.
However, if you are using microphones, techniques include using noise gates on the mic tracks (configured to open only when the desired sound, like a cymbal, is played) or strategically positioning microphones to minimize pickup of pad sounds.
Often, for a purely electronic drum recording, microphones are simply not necessary, eliminating this issue entirely.
Finally, does using electronic drums mean you are limited to the sounds in the module? Not at all, but finding the right sounds can sometimes feel overwhelming or limited if you only rely on the built-in options.
While modules offer many kits, you might be looking for a specific snare tone or a unique percussion sound not included.
Sound selection INFLUENCES the final mix.
The primary solution here is leveraging virtual instruments (VSTs).
By using MIDI drums recording, you can trigger almost any drum sample library or virtual drum machine available as a plugin for your DAW.
This opens up an almost infinite palette of sounds, from meticulously sampled classic drum kits to electronic sounds, world percussion, and completely synthesized textures.
Exploring VSTs EXPANDS sound possibilities.
Many VST drum plugins also offer extensive mixing capabilities within the plugin itself, allowing you to fine-tune the sound of each drum before it even hits your DAW tracks.
Key Features of an Electronic Drum Set for Recording
When considering the best electronic drum set for recording, certain features become more critical than others, directly impacting your ability to capture high-quality drum tracks and integrate the kit into your music production workflow.
Choosing a kit with the right set of features is paramount for a positive recording experience.
The quality of the drum module is arguably the most important feature for recording.
The module contains the sounds you’ll be using (either directly as audio or as inspiration for VSTs) and dictates the connectivity options available.
Look for a module with a wide variety of high-quality, realistic, and diverse drum sounds and kits suitable for the genres you record.
The ability to edit and customize sounds (adjusting tuning, muffling, effects) on the module can also be beneficial.
A good user interface makes it easier to navigate sounds and settings.
Module quality DETERMINES sound potential.
Connectivity options are non-negotiable for recording.
Ensure the kit offers the connections you need for your preferred recording workflow.
At a minimum, look for MIDI output (either 5-pin DIN or USB) to enable MIDI drums recording and trigger virtual instruments.
Audio outputs are also essential if you plan to record the module’s sounds directly; individual audio outputs on higher-end modules provide maximum mixing flexibility.
A USB port capable of transmitting both MIDI and multi-channel audio is a highly convenient feature.
Connectivity options ENABLE integration.
The pad responsiveness and feel directly impact your performance and the quality of the MIDI data captured.
Pads that feel good to play allow for more expressive and nuanced performances.
Mesh heads are generally preferred over rubber pads by many drummers as they offer a more realistic rebound and feel, similar to acoustic drumheads, and are quieter.
Look for pads that offer good sensitivity across the hitting surface and a wide dynamic range, allowing you to capture subtle ghost notes and powerful accents accurately.
Cymbal pads with choking capability add realism and control.
Pad responsiveness INFLUENCES performance capture.
While not strictly necessary for basic recording, expandability can be a valuable feature.
If you plan to grow your kit in the future by adding more pads, cymbals, or triggers, ensure the drum module has sufficient inputs to accommodate these additions.
Expandability ALLOWS future growth.
Finally, consider the overall build quality and durability of the drum set.
A sturdy rack and well-built pads and module will withstand regular playing and transporting, ensuring your investment lasts and functions reliably for your recording sessions.
Build quality ENSURES longevity.
Here is a table summarizing key features and their importance for recording:
| Feature | Importance for Recording | How it Helps |
|---|---|---|
| Drum Module Quality | High | Provides sound palette (built-in), affects trigger processing and features. |
| MIDI Output (USB/5-pin) | Essential for VSTs | Transmits performance data for editing and triggering virtual instruments. |
| Audio Outputs (Stereo/Individual) | High (if recording module sounds) | Allows capturing the module’s sounds directly into your DAW. |
| USB Audio Capability | High (for streamlined workflow) | Transmits both MIDI and audio over a single cable. |
| Pad Responsiveness (Mesh preferred) | High | Captures nuances of performance, feels more natural to play. |
| Pad Sensitivity/Dynamic Range | High | Ensures accurate translation of playing dynamics (soft to loud hits). |
| Expandability | Moderate (depends on future plans) | Allows adding more pads/cymbals as needed for more complex setups. |
| Build Quality | High | Ensures reliability and durability for consistent recording sessions. |
Recommended Electronic Drum Sets for Recording (Brief Overview)
While a detailed breakdown of specific models is beyond the scope of this guide focused on the process of using electronic drums for recording music, it’s helpful to briefly mention that various electronic drum set options exist that are well-suited for studio work, ranging from entry-level to professional.
The best electronic drum set for recording ultimately depends on your budget, desired features, and space.
Kits from manufacturers like Roland (especially their V-Drums line), Yamaha (DTX series), and Alesis often feature prominently in discussions about electronic drums for recording.
Models with advanced drum modules offering extensive sound libraries, robust connectivity options (including multi-channel USB audio), and high-quality, responsive mesh pads are generally preferred for serious recording applications.
For instance, kits known for their realistic pad feel and powerful modules with good VST integration capabilities are often highlighted for home studio recording.
When looking for a kit, cross-reference the features discussed in the previous section with the specifications of potential models to find the best fit for your music production needs.
Conclusion
Using electronic drums for recording music offers a powerful and flexible alternative to traditional acoustic drums, making high-quality drum tracks accessible to musicians and producers in virtually any environment.
The benefits are clear: from the essential noise reduction that facilitates home studio work to the immense versatility of sounds and the simplified recording setup.
Mastering the integration of electronic drums into your music production workflow involves understanding the different connectivity options, whether it’s MIDI drums recording to leverage the infinite possibilities of virtual instruments or audio recording electronic drums directly from the module’s output.
While challenges like latency and triggering issues can arise, they are easily overcome with proper setup and configuration.
Choosing the best electronic drum set for recording hinges on prioritizing key features such as the quality of the drum module, comprehensive connectivity options (especially MIDI and USB), and responsive, playable pads.
By carefully considering these aspects and familiarizing yourself with the recording process, you can effectively use electronic drums to create professional, dynamic, and versatile drum performances for all your musical projects.
Electronic drums EMPOWER modern production.
Here is a final list summarizing the core benefits:
- Enables quiet practice and recording (Noise Reduction).
- Provides access to a vast library of sounds (Versatility of Sounds).
- Delivers consistent performance and dynamics.
- Simplifies the recording setup compared to acoustic drums.
- Offers extensive editing flexibility, especially with MIDI drums recording.
- Is more portable and requires less space.